

What is RAW?
RAW is a very powerful tool in the world of photography and cinematography that allows the owner full control of every facet of the image in post. When used properly, RAW can aid you in crafting top-tier imagery. With that said, let’s dive in.
So, let’s start off with what RAW is. It is by definition an uncompressed and unprocessed file that comes straight from the camera’s sensor. Every bit of information that was captured by the camera is in the palm of your hand. That means if you overexposed an image in a certain area, you have a chance at bringing that portion back, or if you don’t like your color balance, you can change it with the flick of a wrist; you also have a large amount of color data to work with (12-16 bits), which provides you with maximum flexibility in post.
RAW: Exposure Balance (Bringing Back the Details)
As stated in the previous paragraph, one of the benefits of shooting in RAW is the massive dynamic range. For demonstration purposes, I took a still photo of my cat using on-camera flash and purposely overexposed it by about one and a half stops; the image looks really washed out. If I had shot it in JPEG, I’d be in a lot of trouble, but with RAW, I can lower the exposure by two stops and retrieve any lost details with no issues.

RAW Image.

RAW Image lowered by 2 stops.
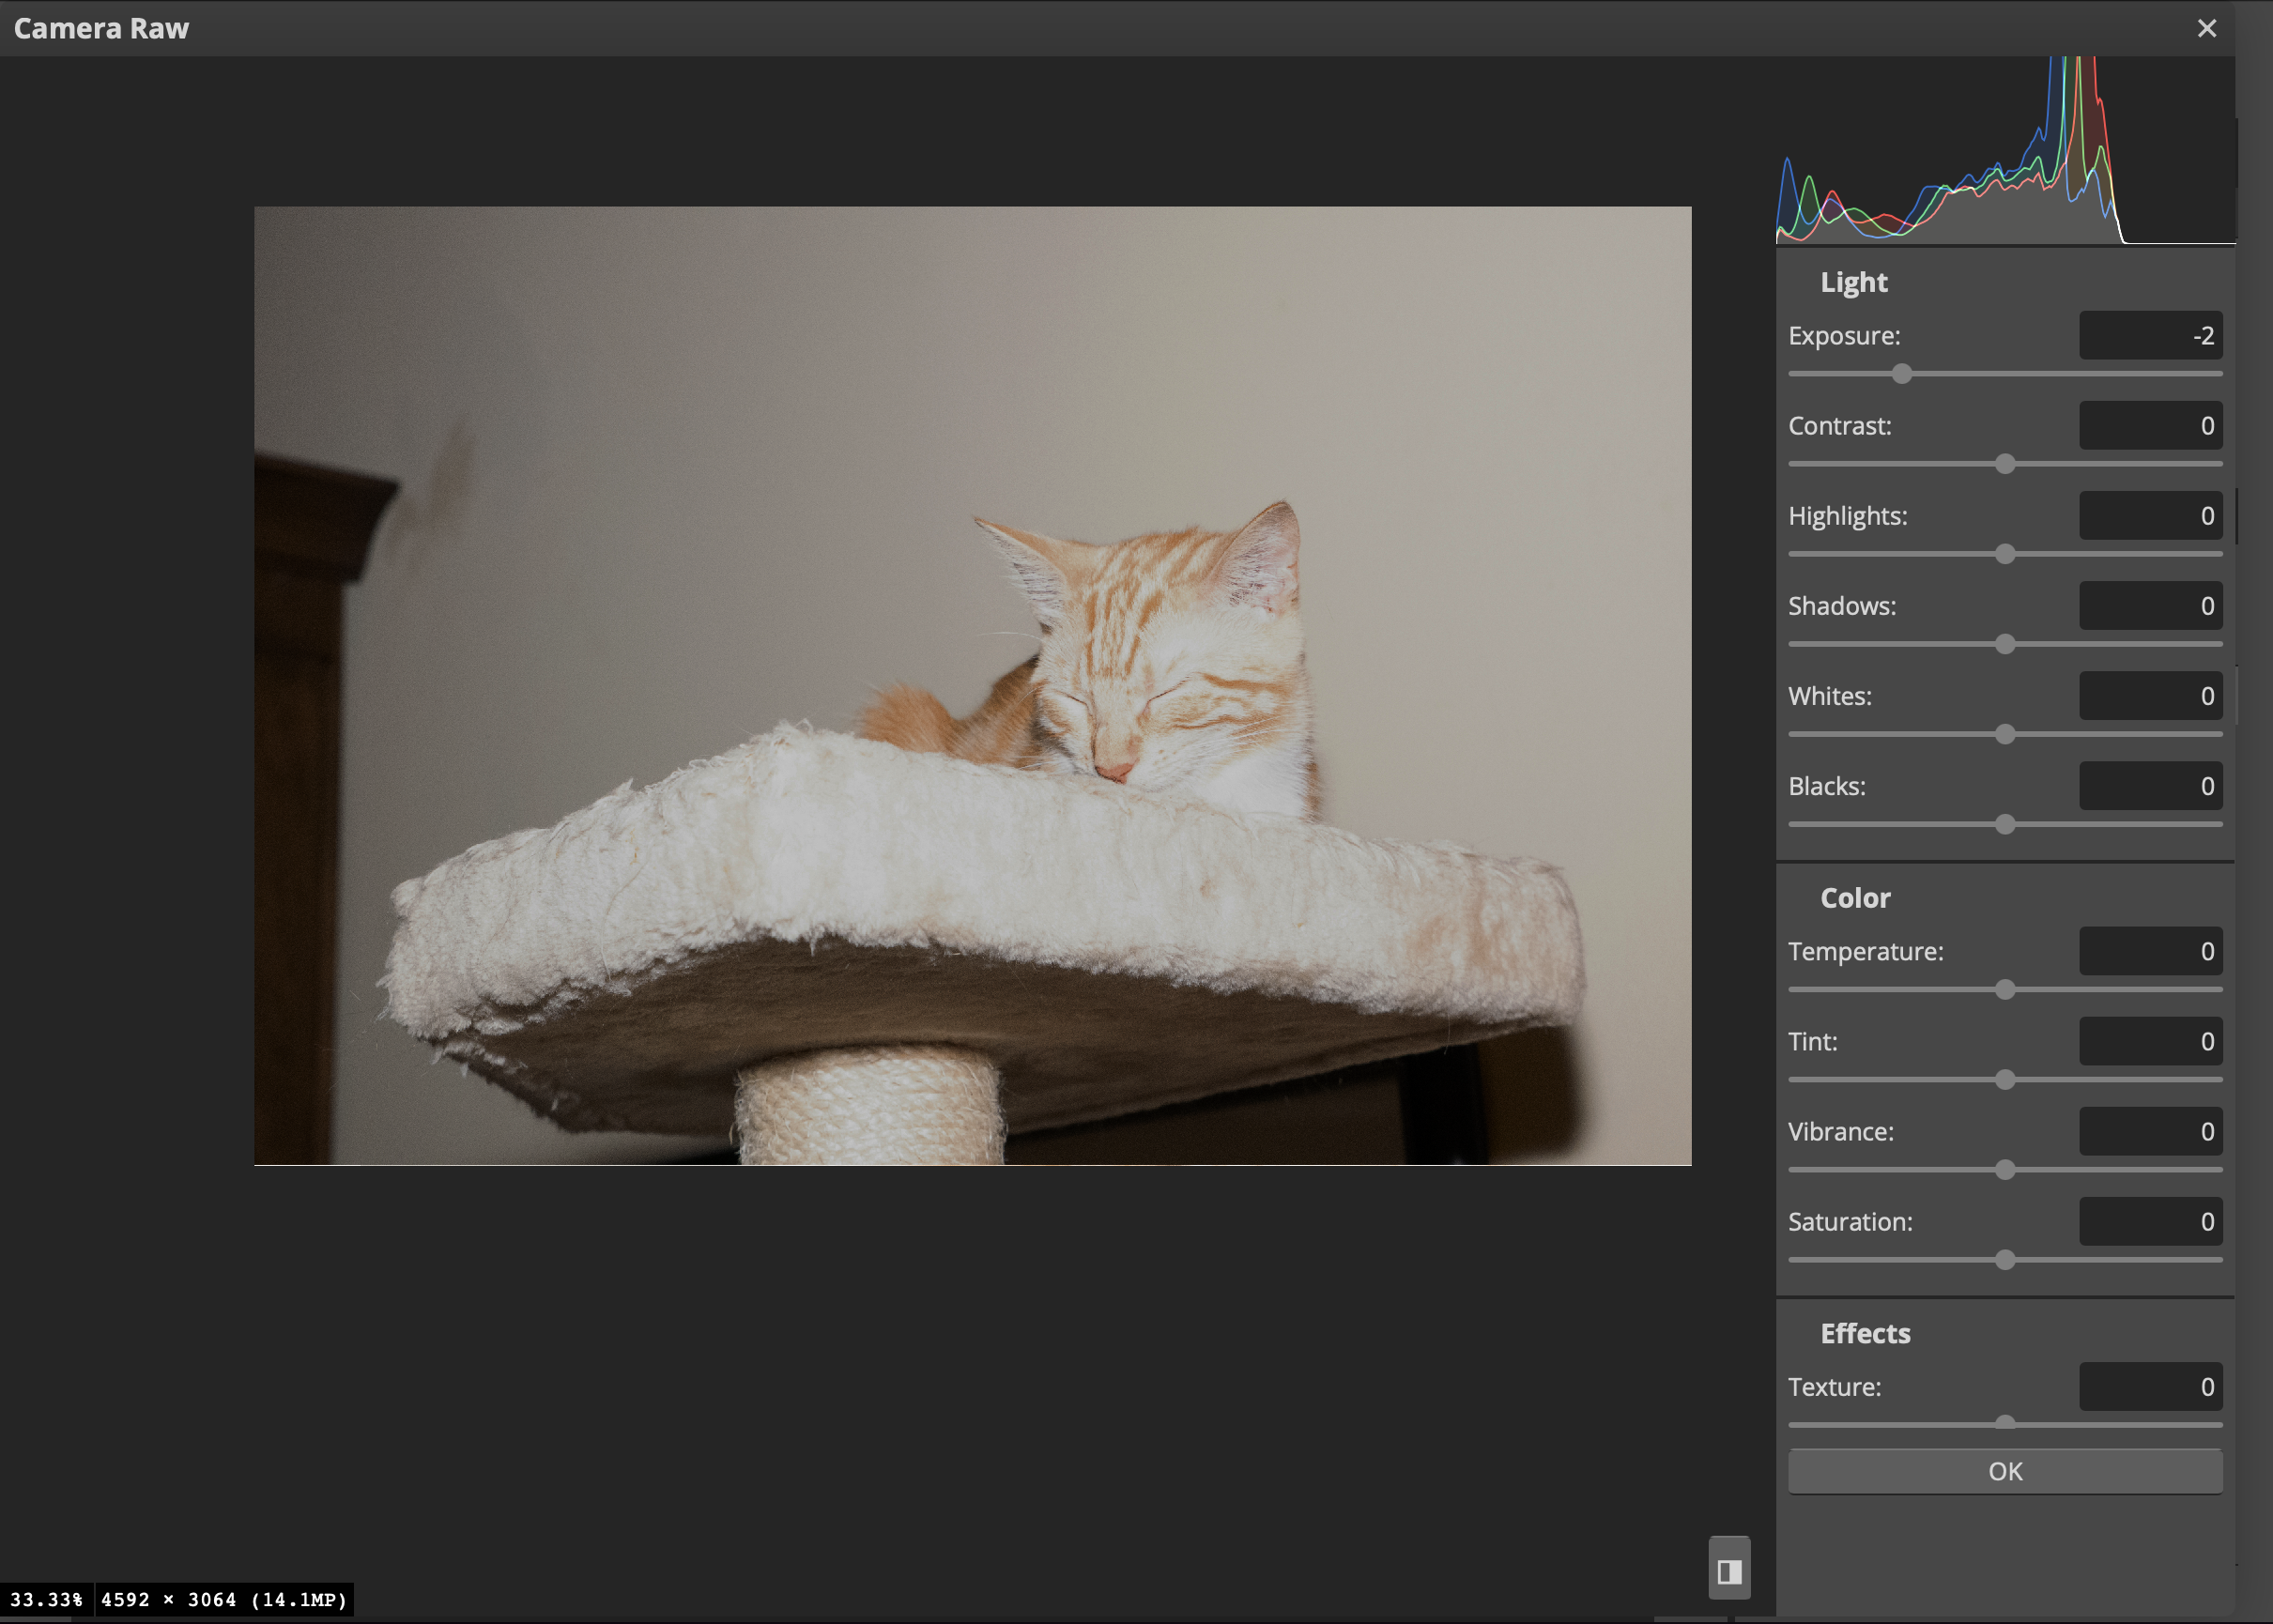
JPEG lowered by two stops.

As you can see, when I tried to bring back the detail in the 8-bit JPEG, I couldn’t because of the limited amount of color information. I have no way of recovering any extra highlight detail that would have remained in the image if I were to have shot with RAW.
RAW: Color Temperature

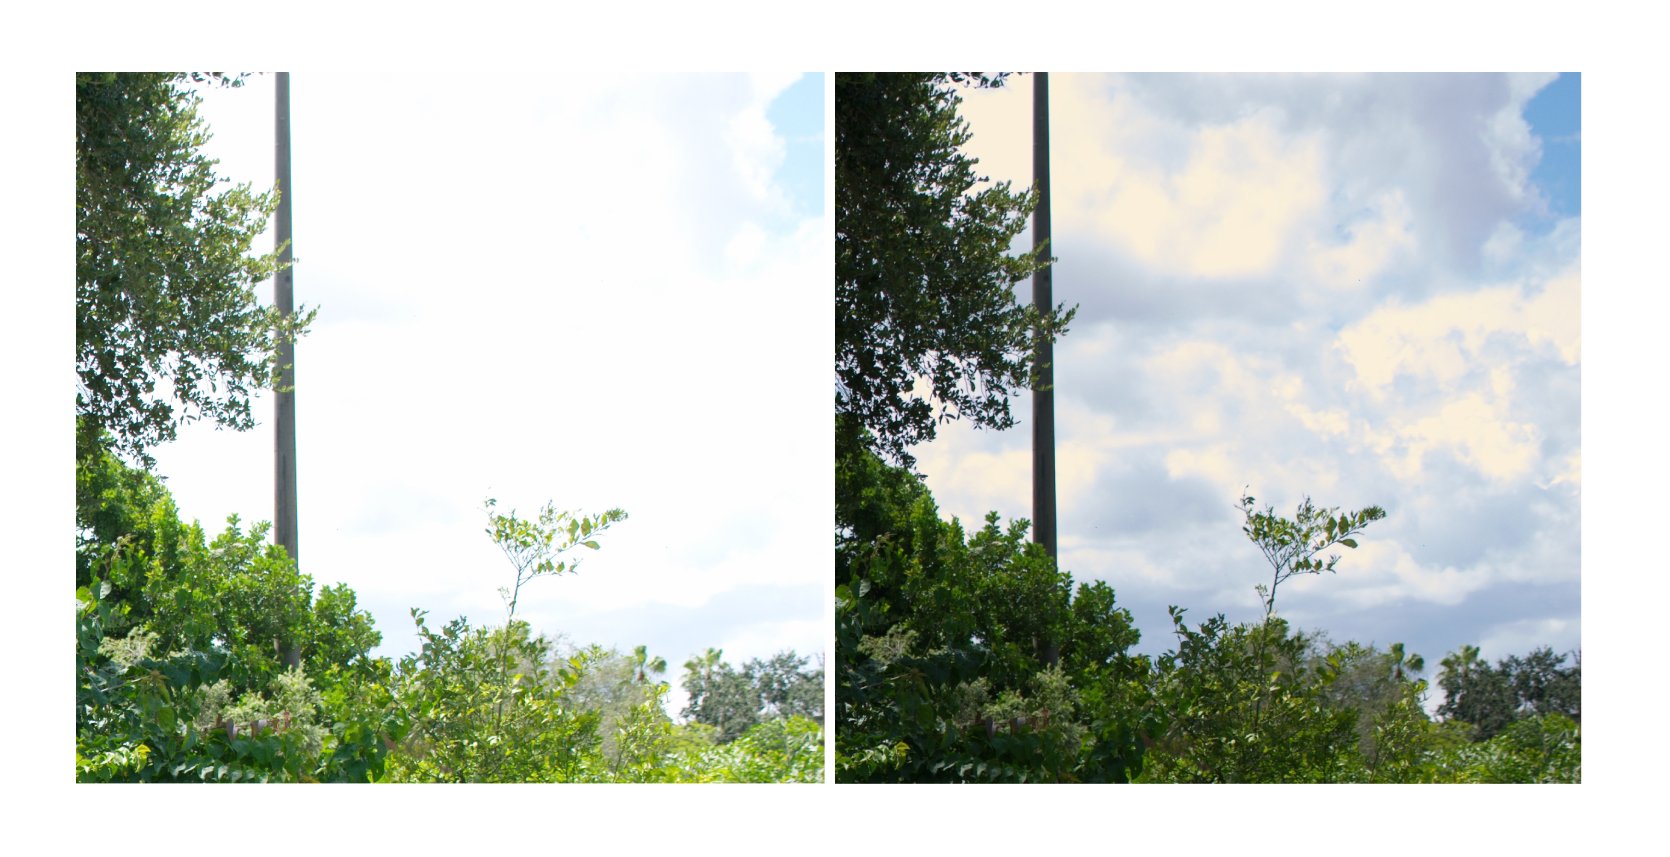
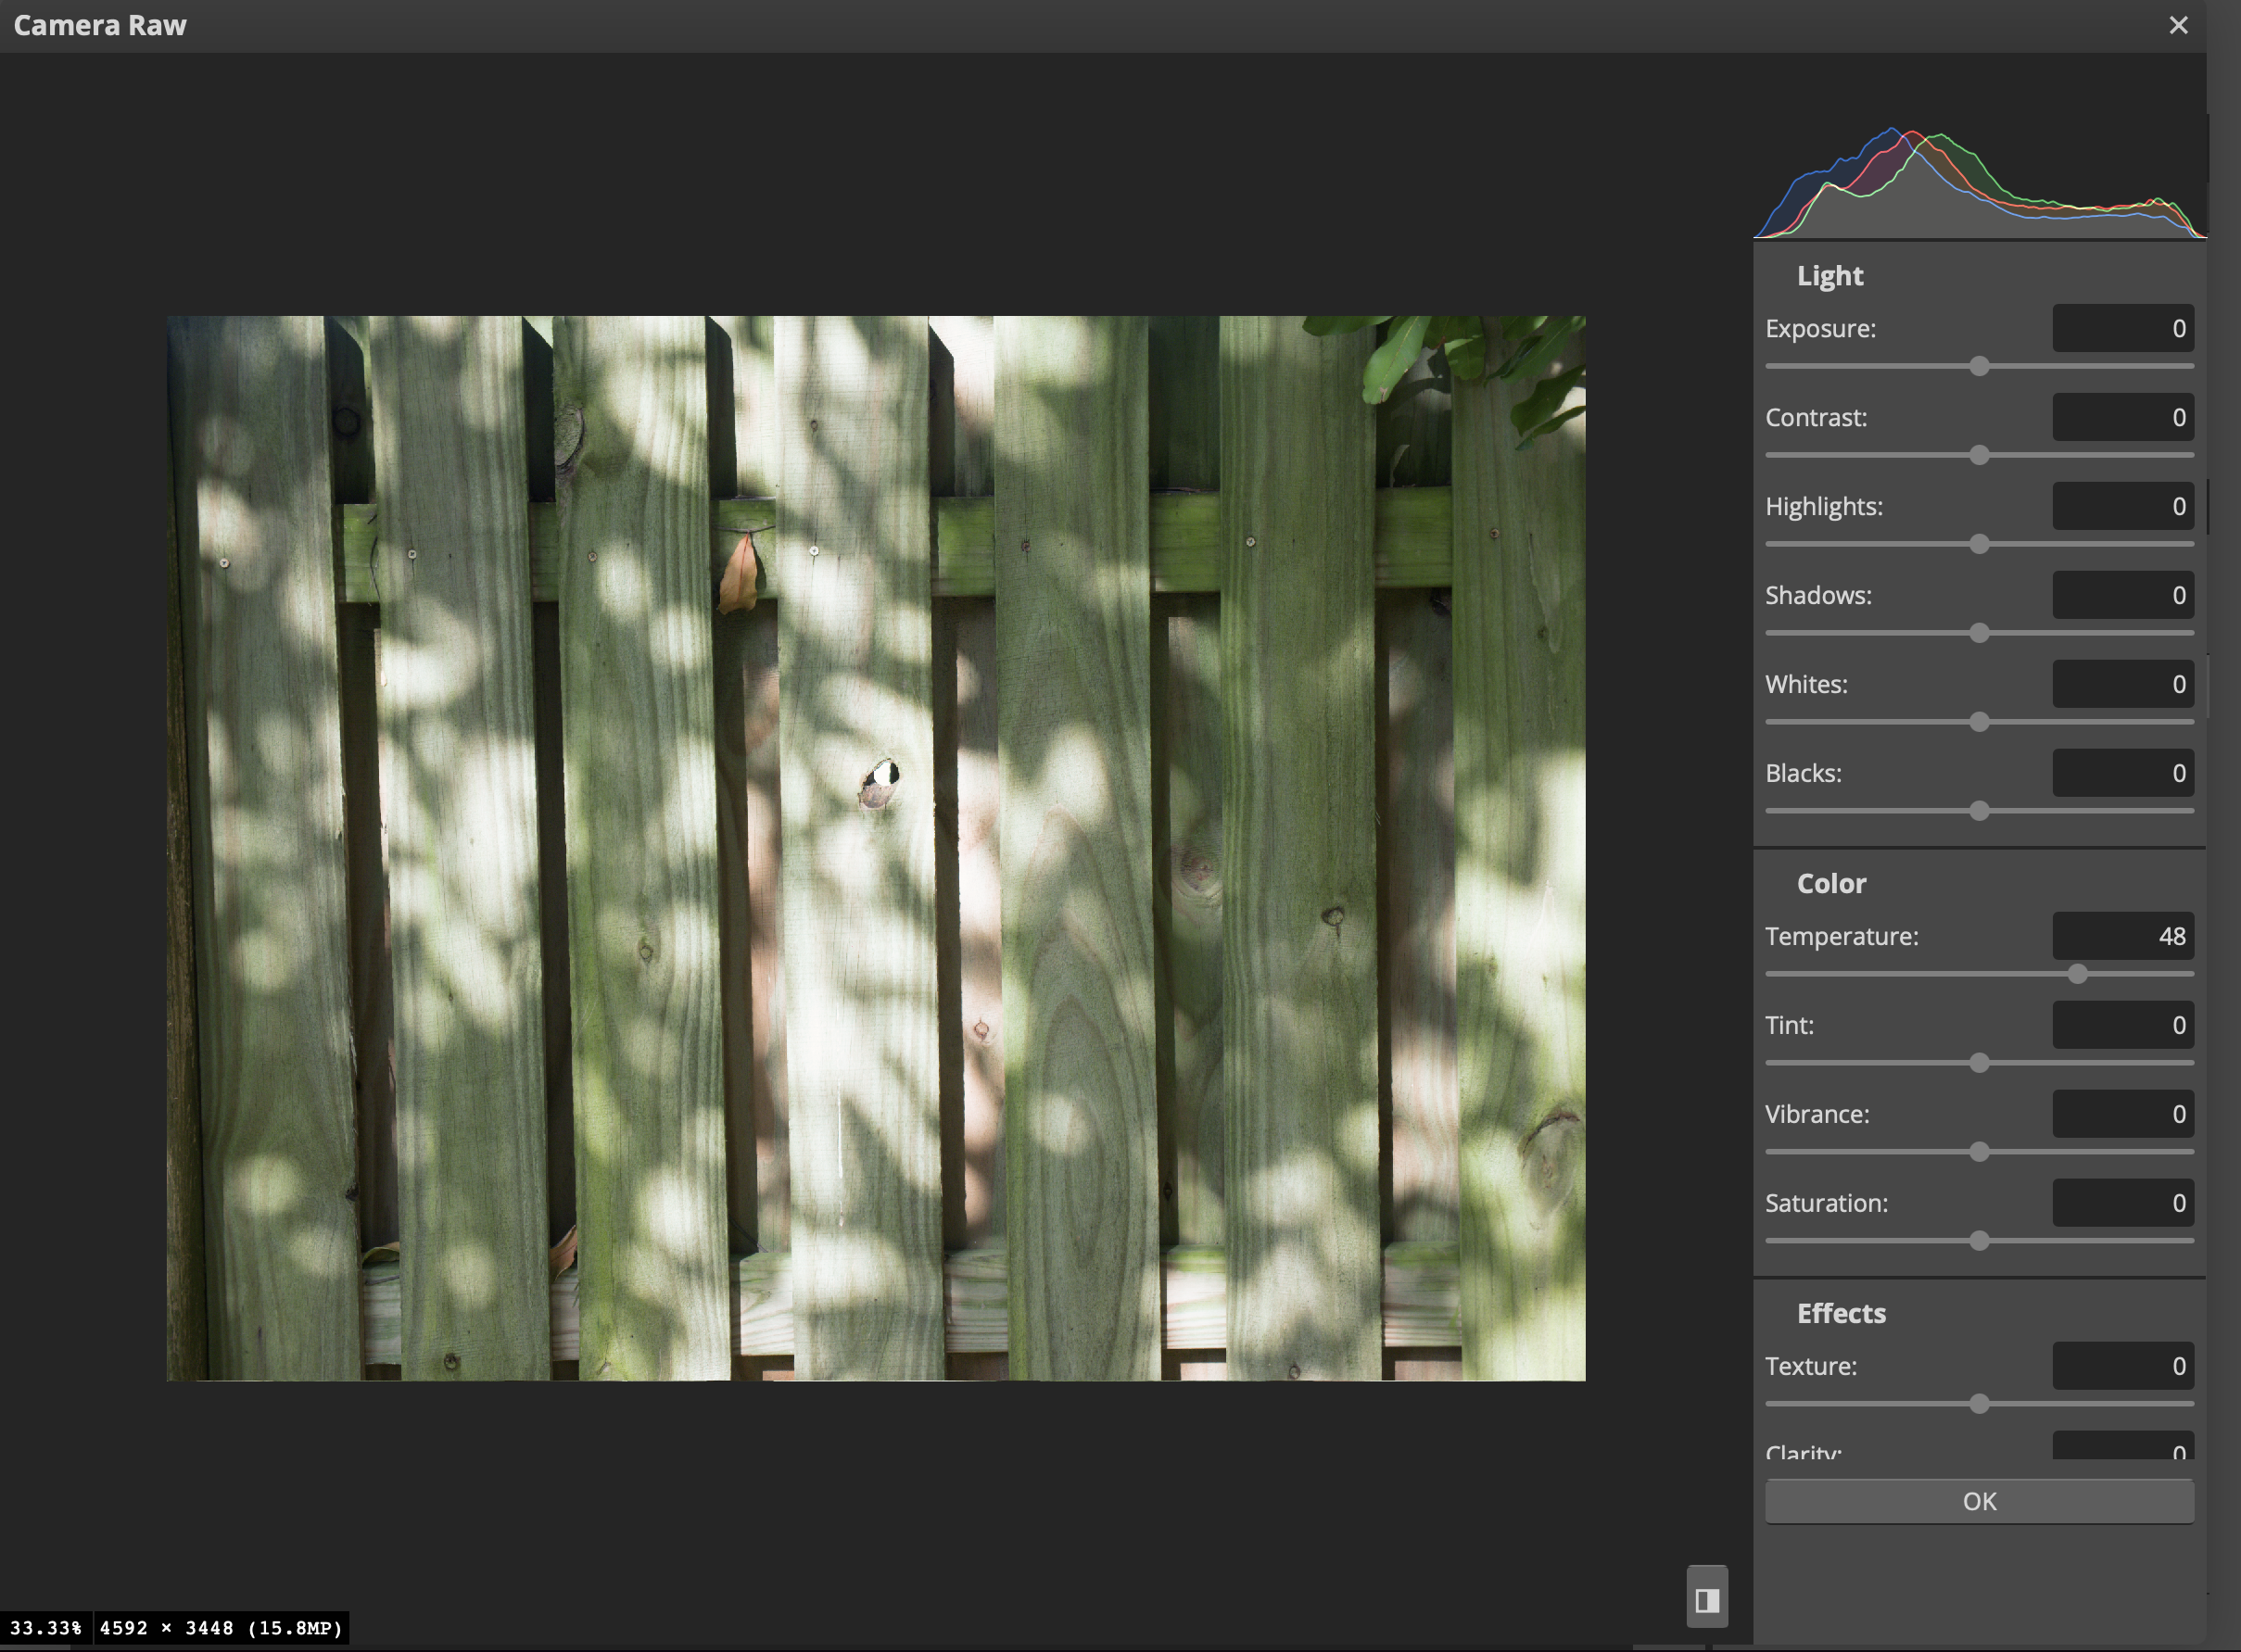
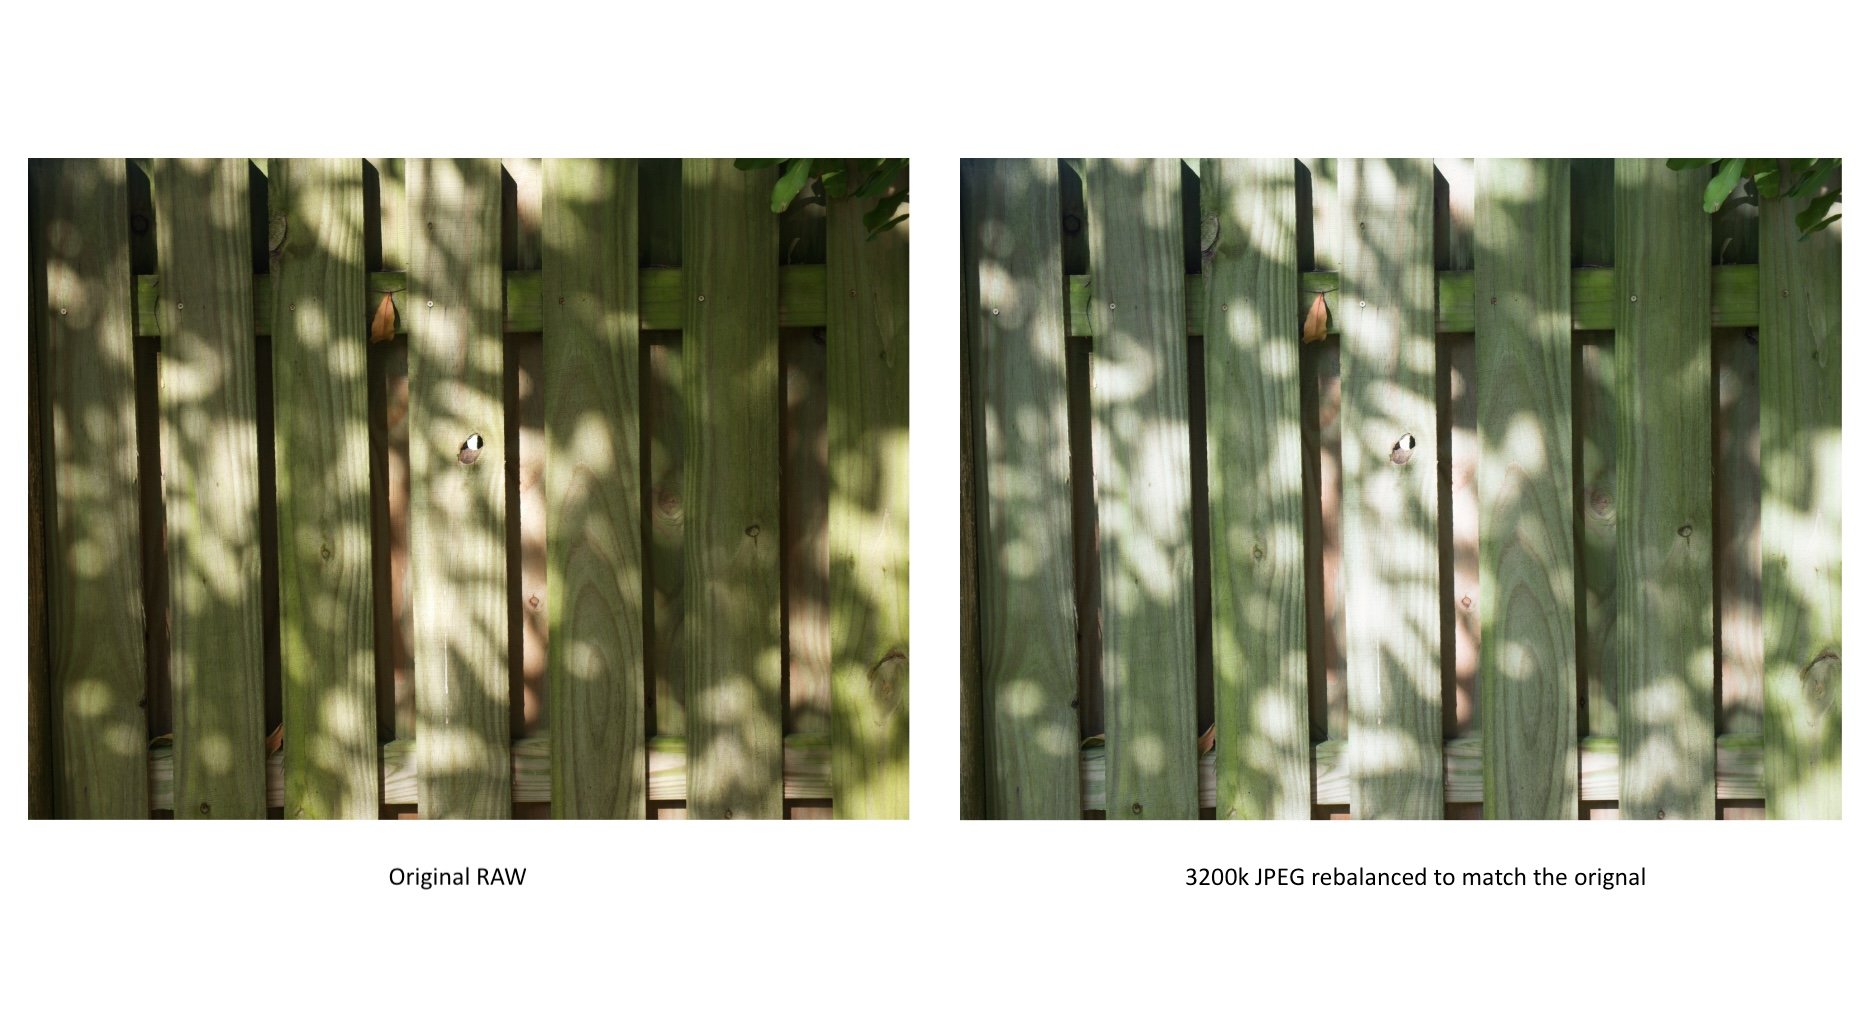
In this next example, we’re going to look at color temperature. I took an example that was shot with an outdoor color temperature of 4641k, and I rebalanced it to 3200k for teaching purposes. From there, I exported the wrongly balanced image as an 8bit sRGB JPEG and tried to rebalance it to match the original 4641k image. As expected, the results were not so good.
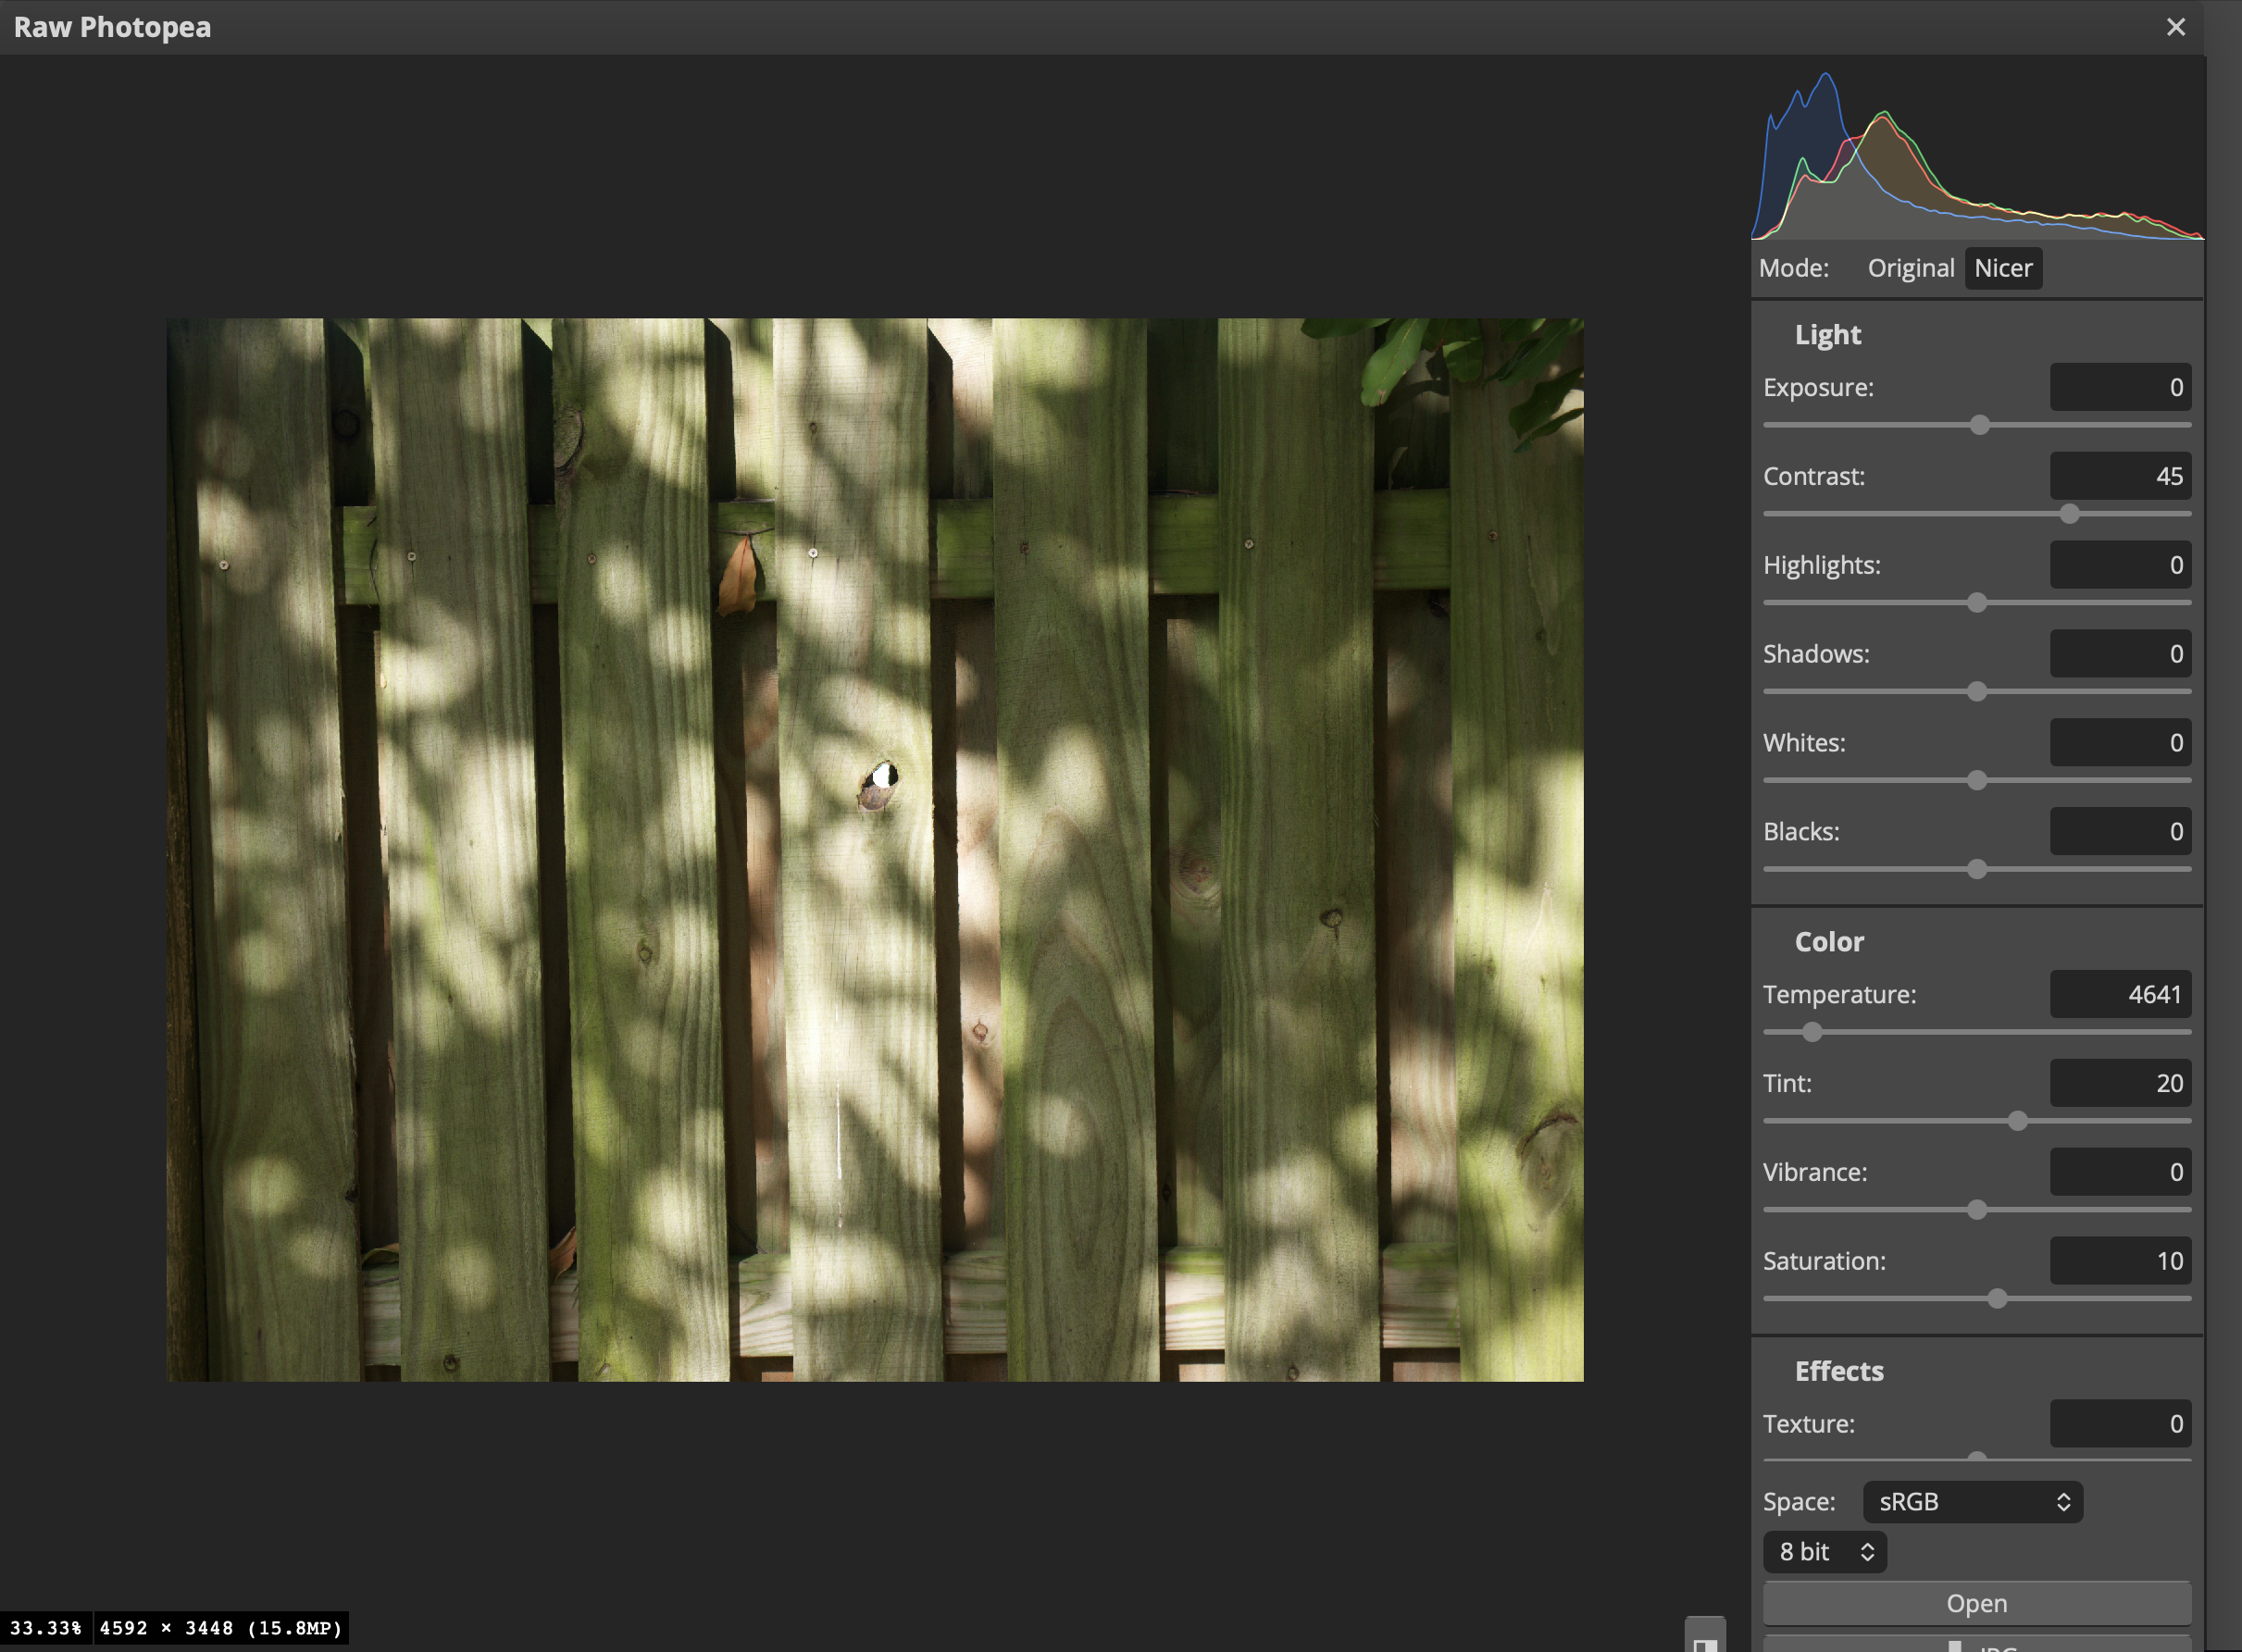
The correctly balanced RAW image at 4641k.
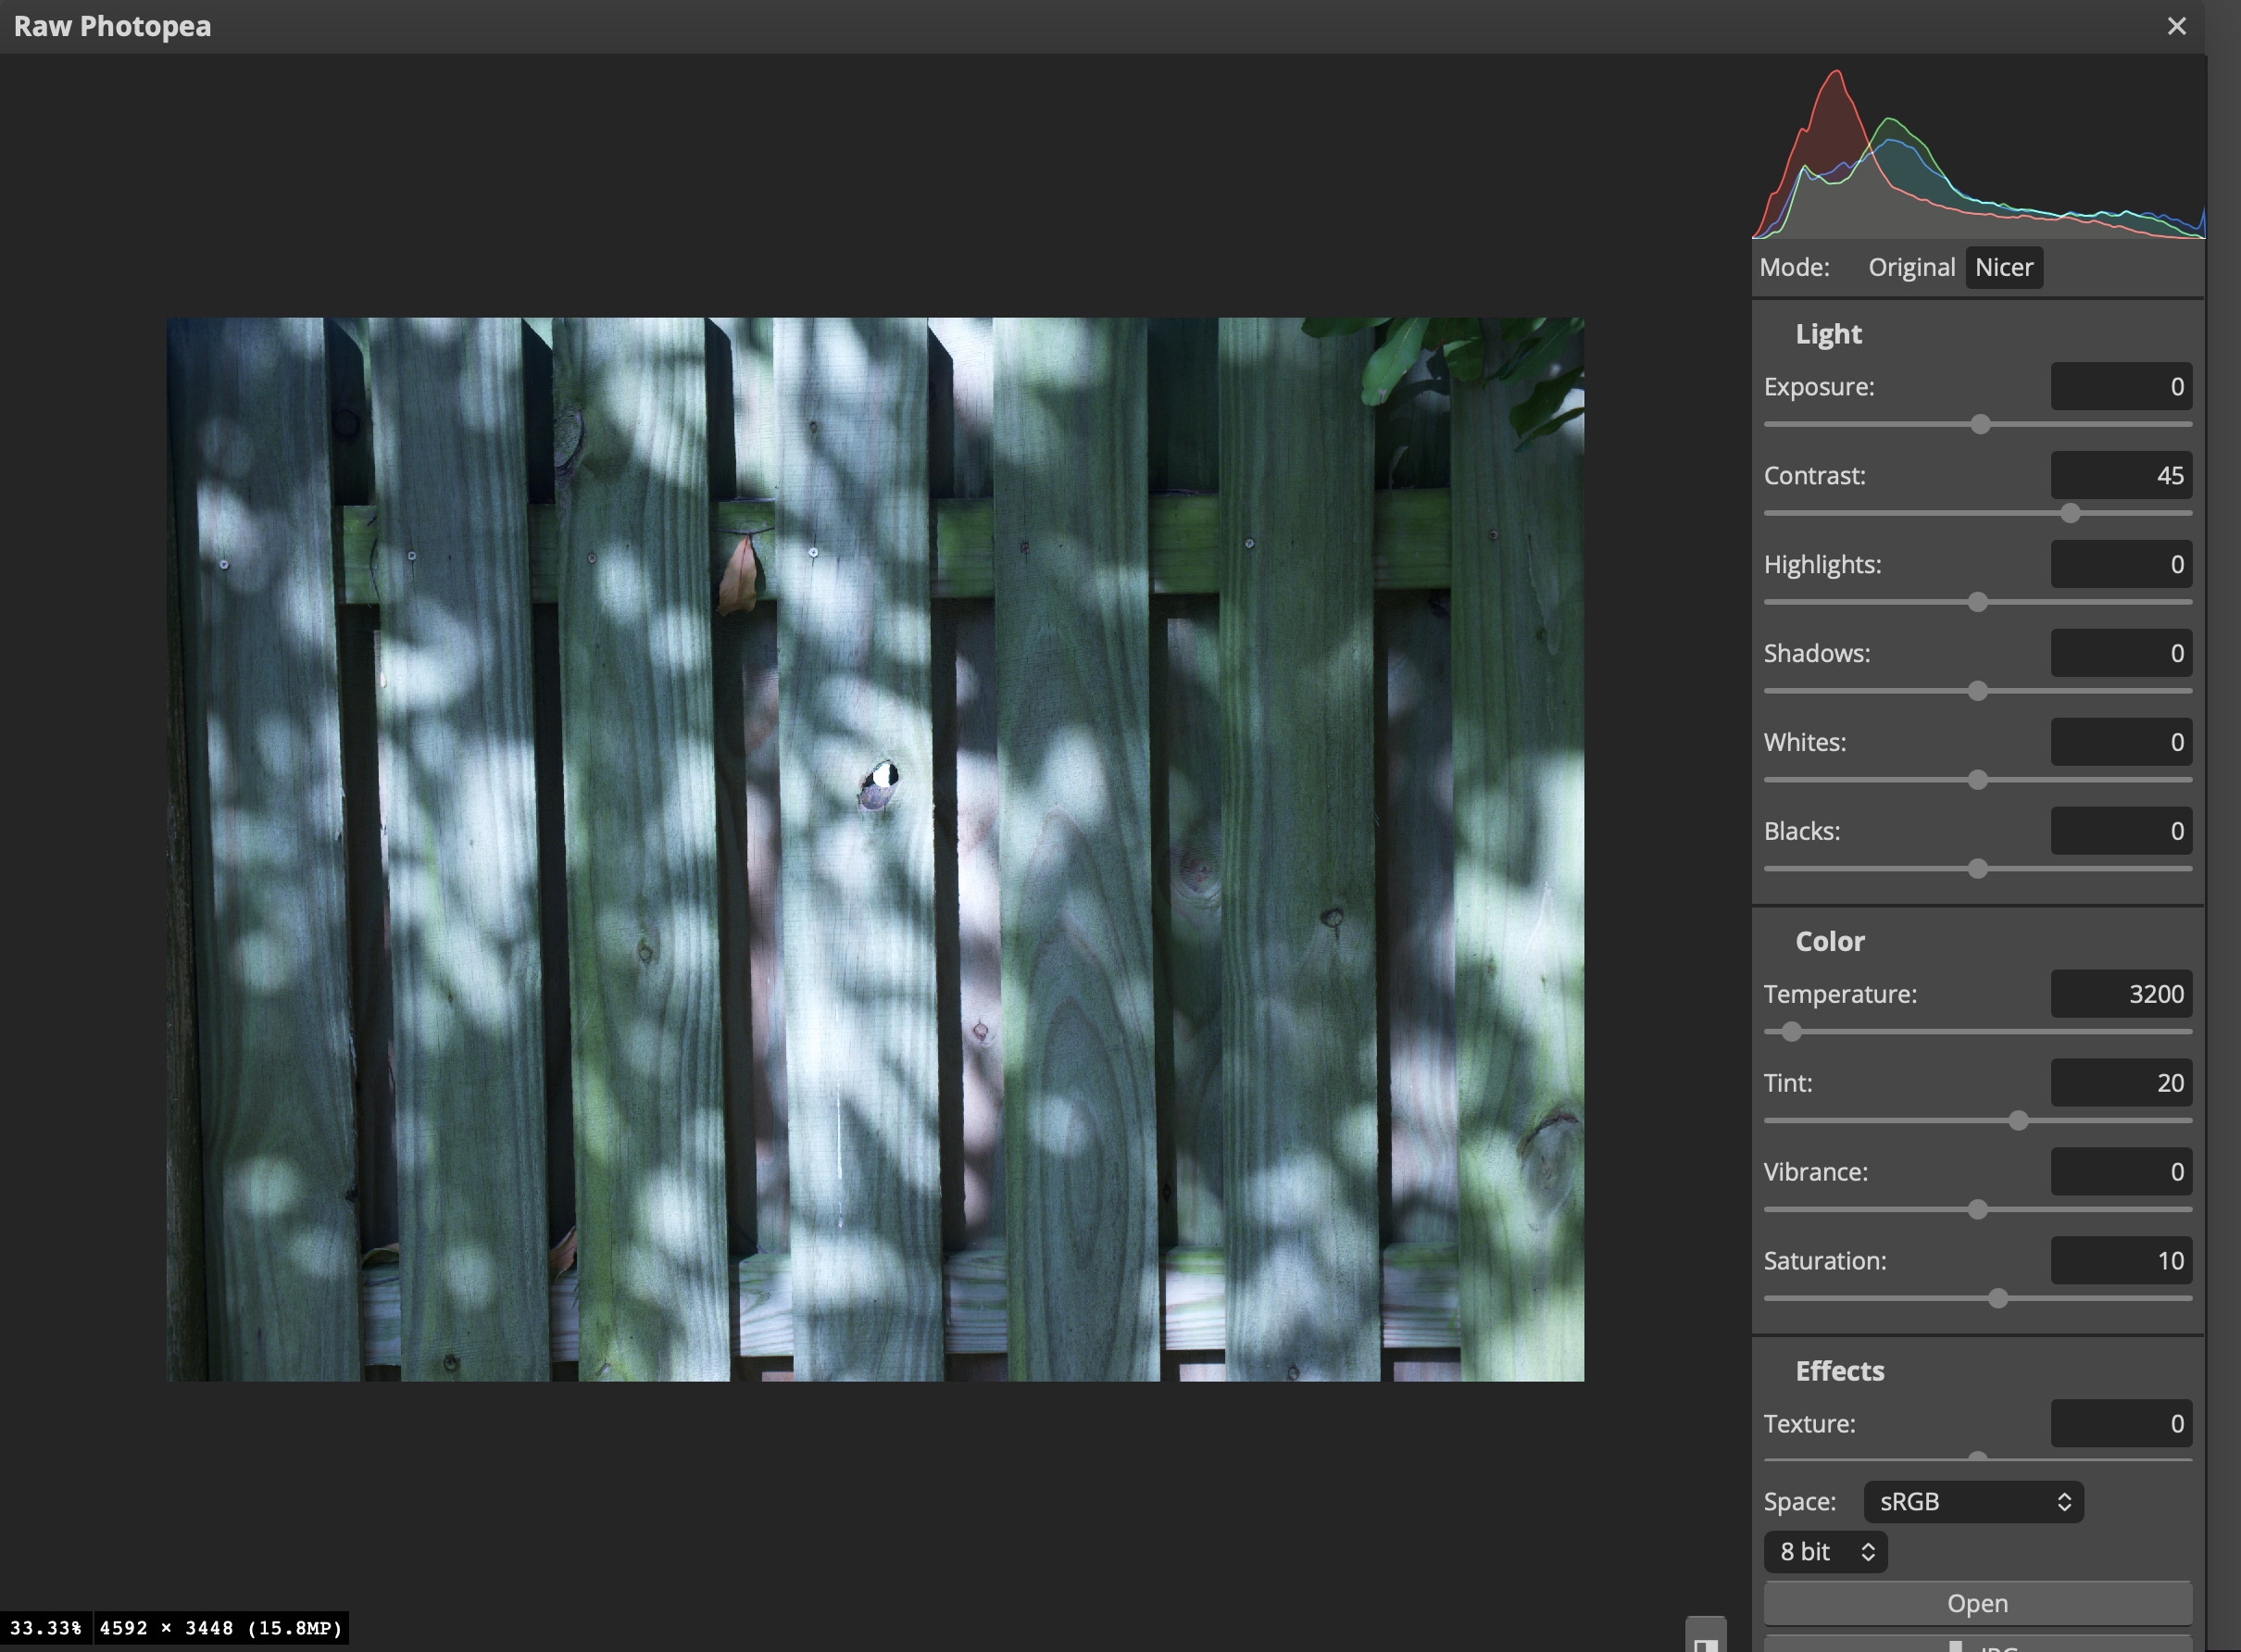
The RAW image balanced to 3200k.
The JPEG image being rebalanced back to 4641k. It’s lacking in color depth/contrast, and it’s not matching the original image.
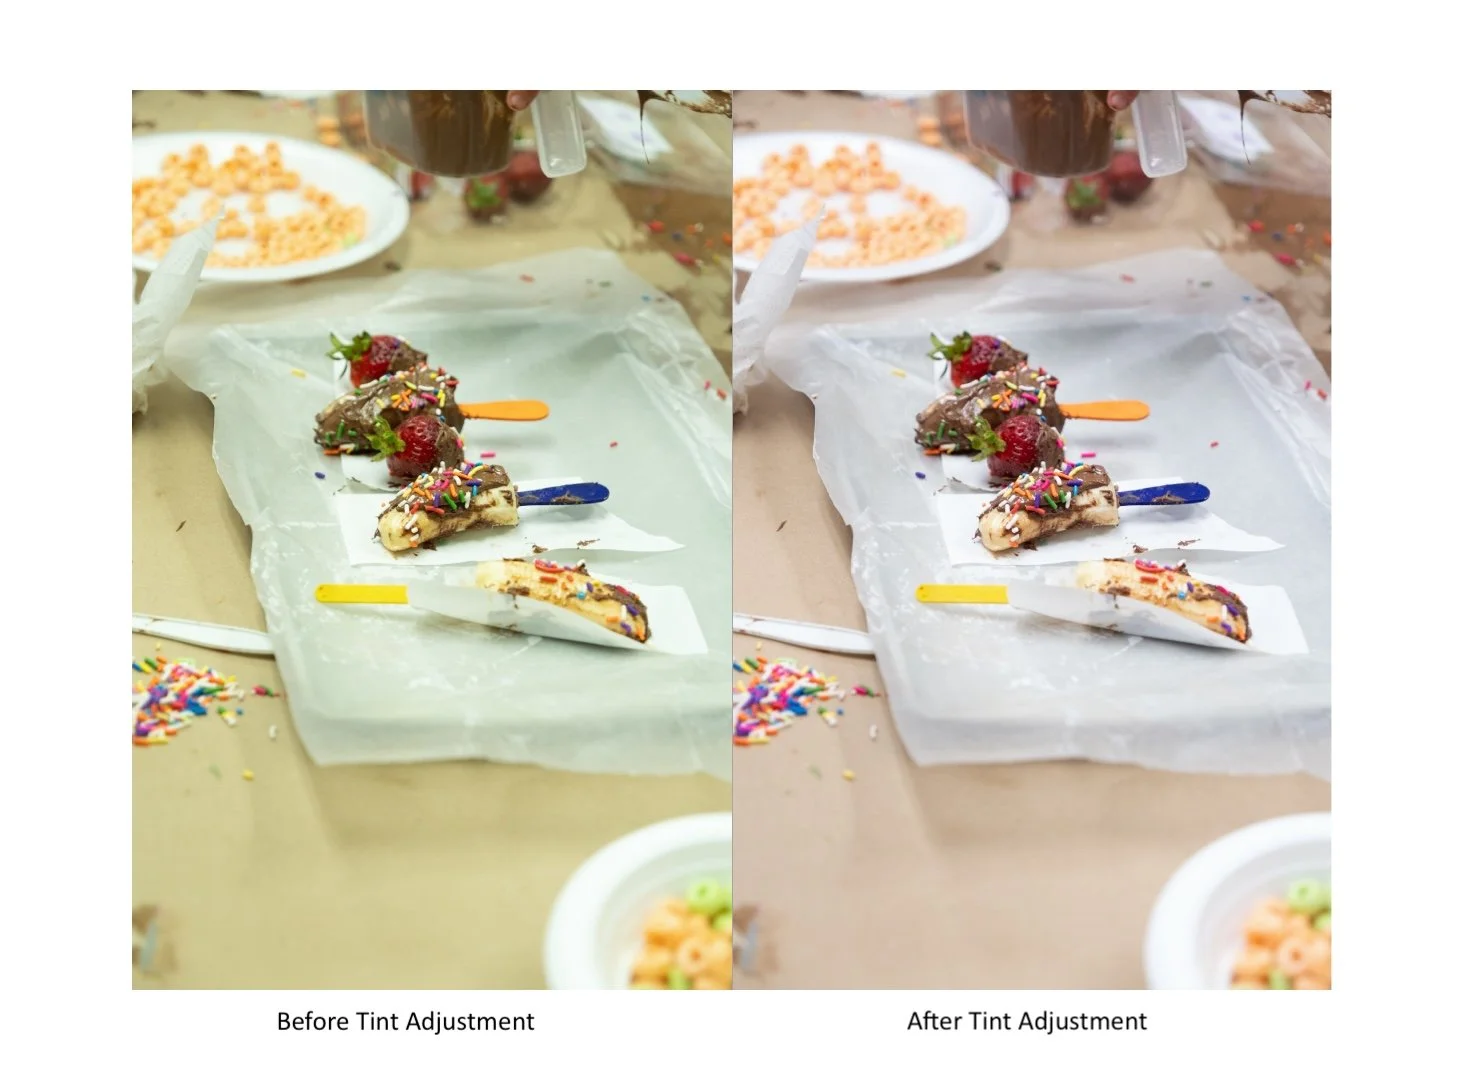
RAW: Tint Adjustment
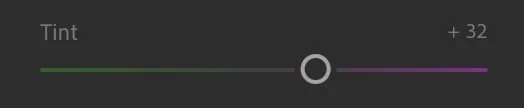
Besides providing control over Color Temperature, RAW affords one the ability to balance out green casts from an image. Let’s say, you were shooting under fluorescent lights. With RAW, that nasty green cast can be removed.

Log Gamma and RAW Video
Next, we’re going to jump into the video portion of this article. Before we start talking about RAW Video, we’re going to talk about Log because the two often get conflated, and I want to delineate between them.
LOG Gamma
Log is NOT RAW.
Log (short for logarithmic), is a non-linear gamma curve that records luminance logarithmically (similar to how the human eye sees light); the human eye is more responsive to small changes in dim light rather than large changes in bright light. Hence, the chart below stair stepping from black to gray to white.
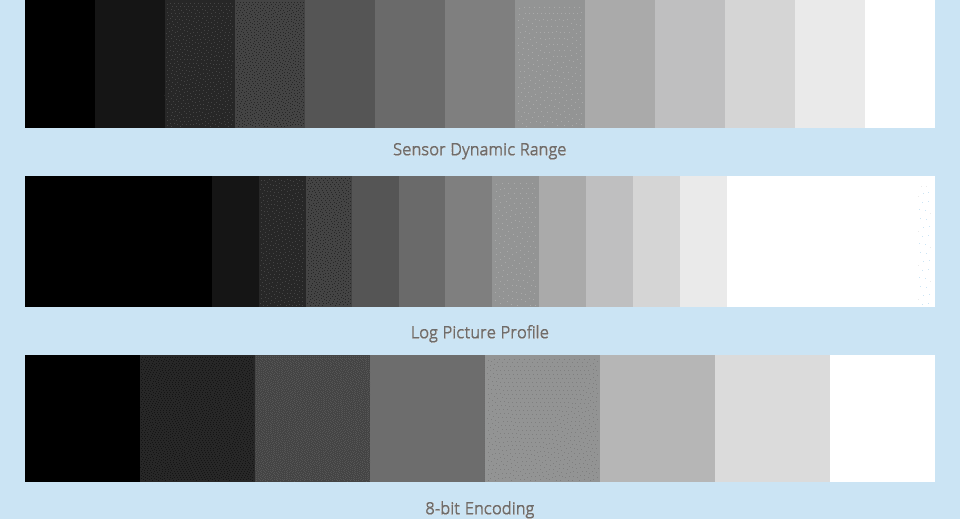
When an image is in 8-bit (bottom of image), the tonal steps are very limited, but when you start going into 10 and 12-bit, the amount of steps increase, and the subtlety of the tones in the image do as well.
The Sensor Dynamic Range bar is most likely representing a 12-bit image.
Source: B&H.com
Unlike an 8bit Rec.709 file, which follows a linear gamma curve like a JPEG (the highlights and shadows are cut off by the limited amount of tonal steps that can physically inhabit the file), Log takes all the highlights and shadows and squeezes them down into the middle of the curve to preserve those tones; this effectively mimics the tonal curve response of film.
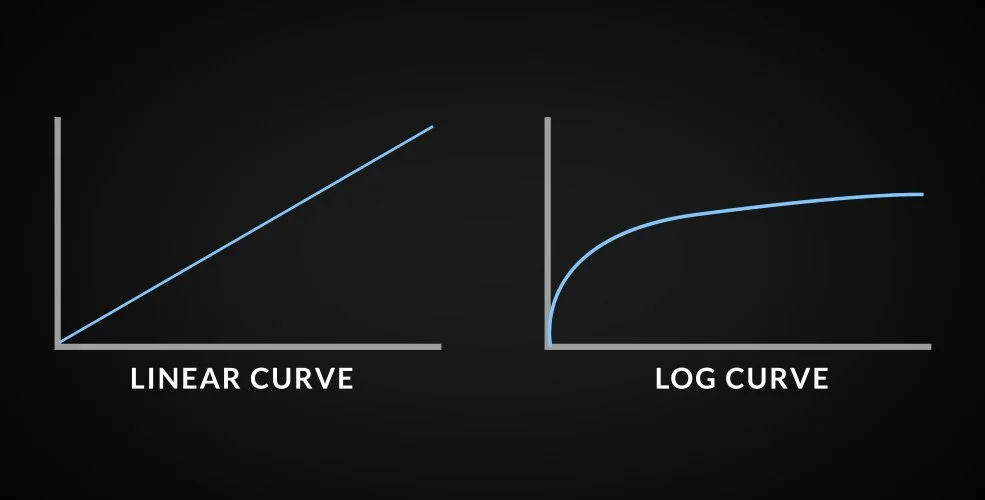
A Linear curve vs a Log curve. The Log curve preserves all of its tones into the middle of the curve.
Source: Pond5.com
The Log curve needs to work in tandem with a higher bit depth and a low amount of chroma subsampling to be most effective.
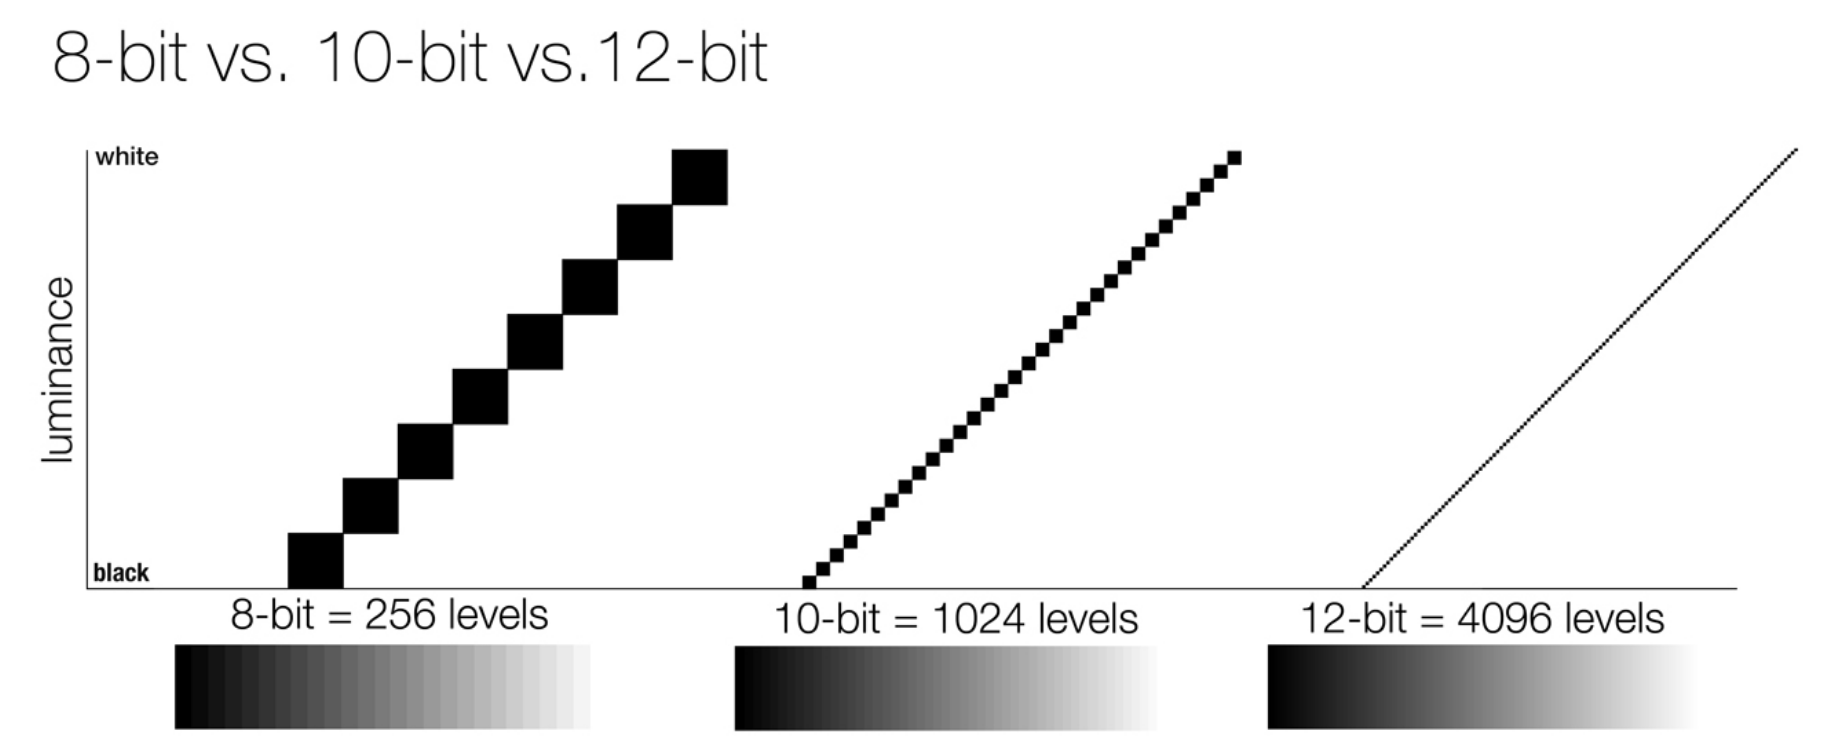
An example displaying the limited tonal steps an 8-bit image has to offer when compared to 10 or 12 bit.
Source: Pixelsham.com
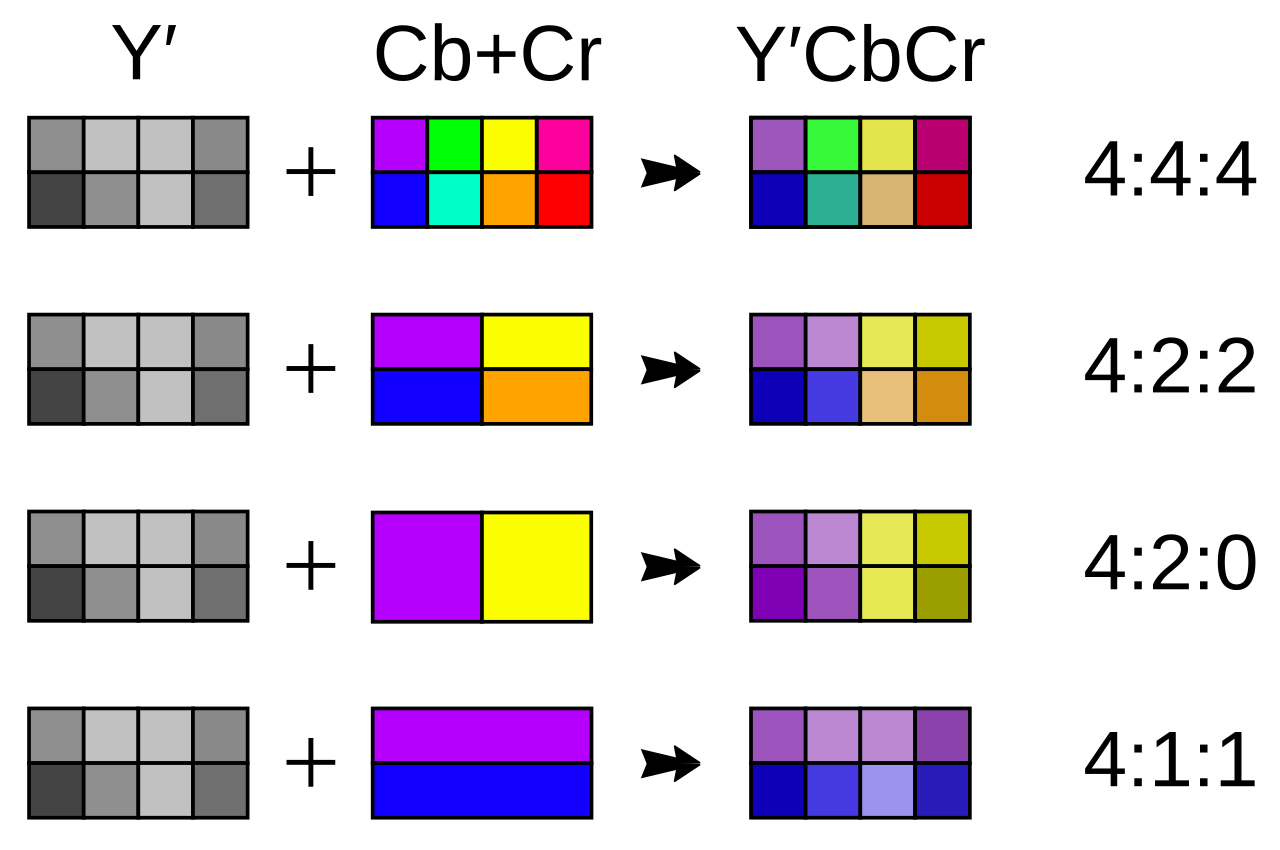
In a 4:4:4 chroma subsampling (low amount of subsampling), each pixel has its own color assigned to it, and they’re all being assigned different luma values. In a 4:2:0 chroma subsampling (high amount of subsampling), 4 pixels are being taken up by the same color, and they’re all being assigned different luma values.
Source: Wikipedia.org
As a quick note, a Log image can be recorded in 8-bit, 10-bit, 12 bit and above. Recording a Log image in 8-bit, though, can be very detrimental to your final product’s overall quality because of the limited number of color values present in each pixel during recording.
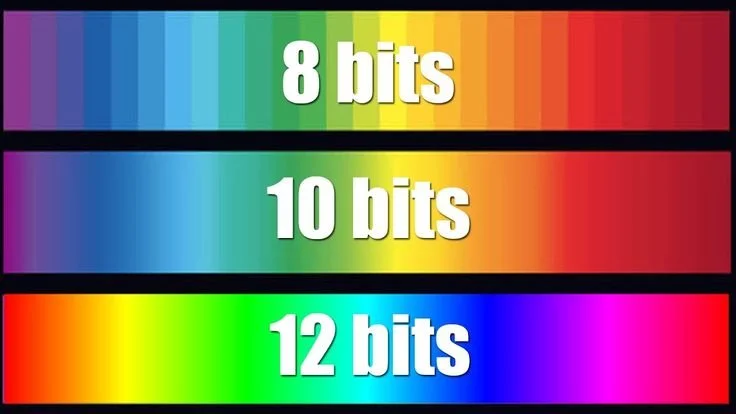
The 12-bit gradient is much smoother and more colorful because it has access to over 68 billion possible colors compared to the 8-bit’s 16.77 million possible colors.
Source: Pintrest
12-bit imagery vs 8-bit. You can see the banding in the sky.
Log was developed to maximize the dynamic range of non-RAW images; codecs such as ProRes, MXF and H.264 can all house non-linear log gammas. Each company has its own version of Log for their specific camera; for example: Log-C (ARRI), RedlogFilm (RED), S-Log (Sony), F-Log (Fujifilm), and the list goes on.
A popular Apple Codec that is industry standard.
Source: ARRI.com
If you shoot in a non-RAW codec, the Log Curve you apply to the clip will be baked into (permanently applied to) your image; the same goes for your color temperature and tint. Because of that, you need to be more intentional with your camera settings when shooting with a non-RAW codec. When capturing 12-16 bit files, the clips include very large amounts of color data, unlike 8-bit Rec.709 files; therefore, you can rebalance an incorrectly color-balanced image with ease.
Below are stills from two ARRI Alexa clips I shot in 2022; the footage was recorded into a ProRes 4444, 12 bit, 2048×1152 container with a Log-C gamma curve and an ARRI Wide Gamut 3 color space. The color temperature was incorrectly set in-camera to 3200k for demonstration purposes, and was shot alongside a control clip that was balanced, on the day, for 5600k.
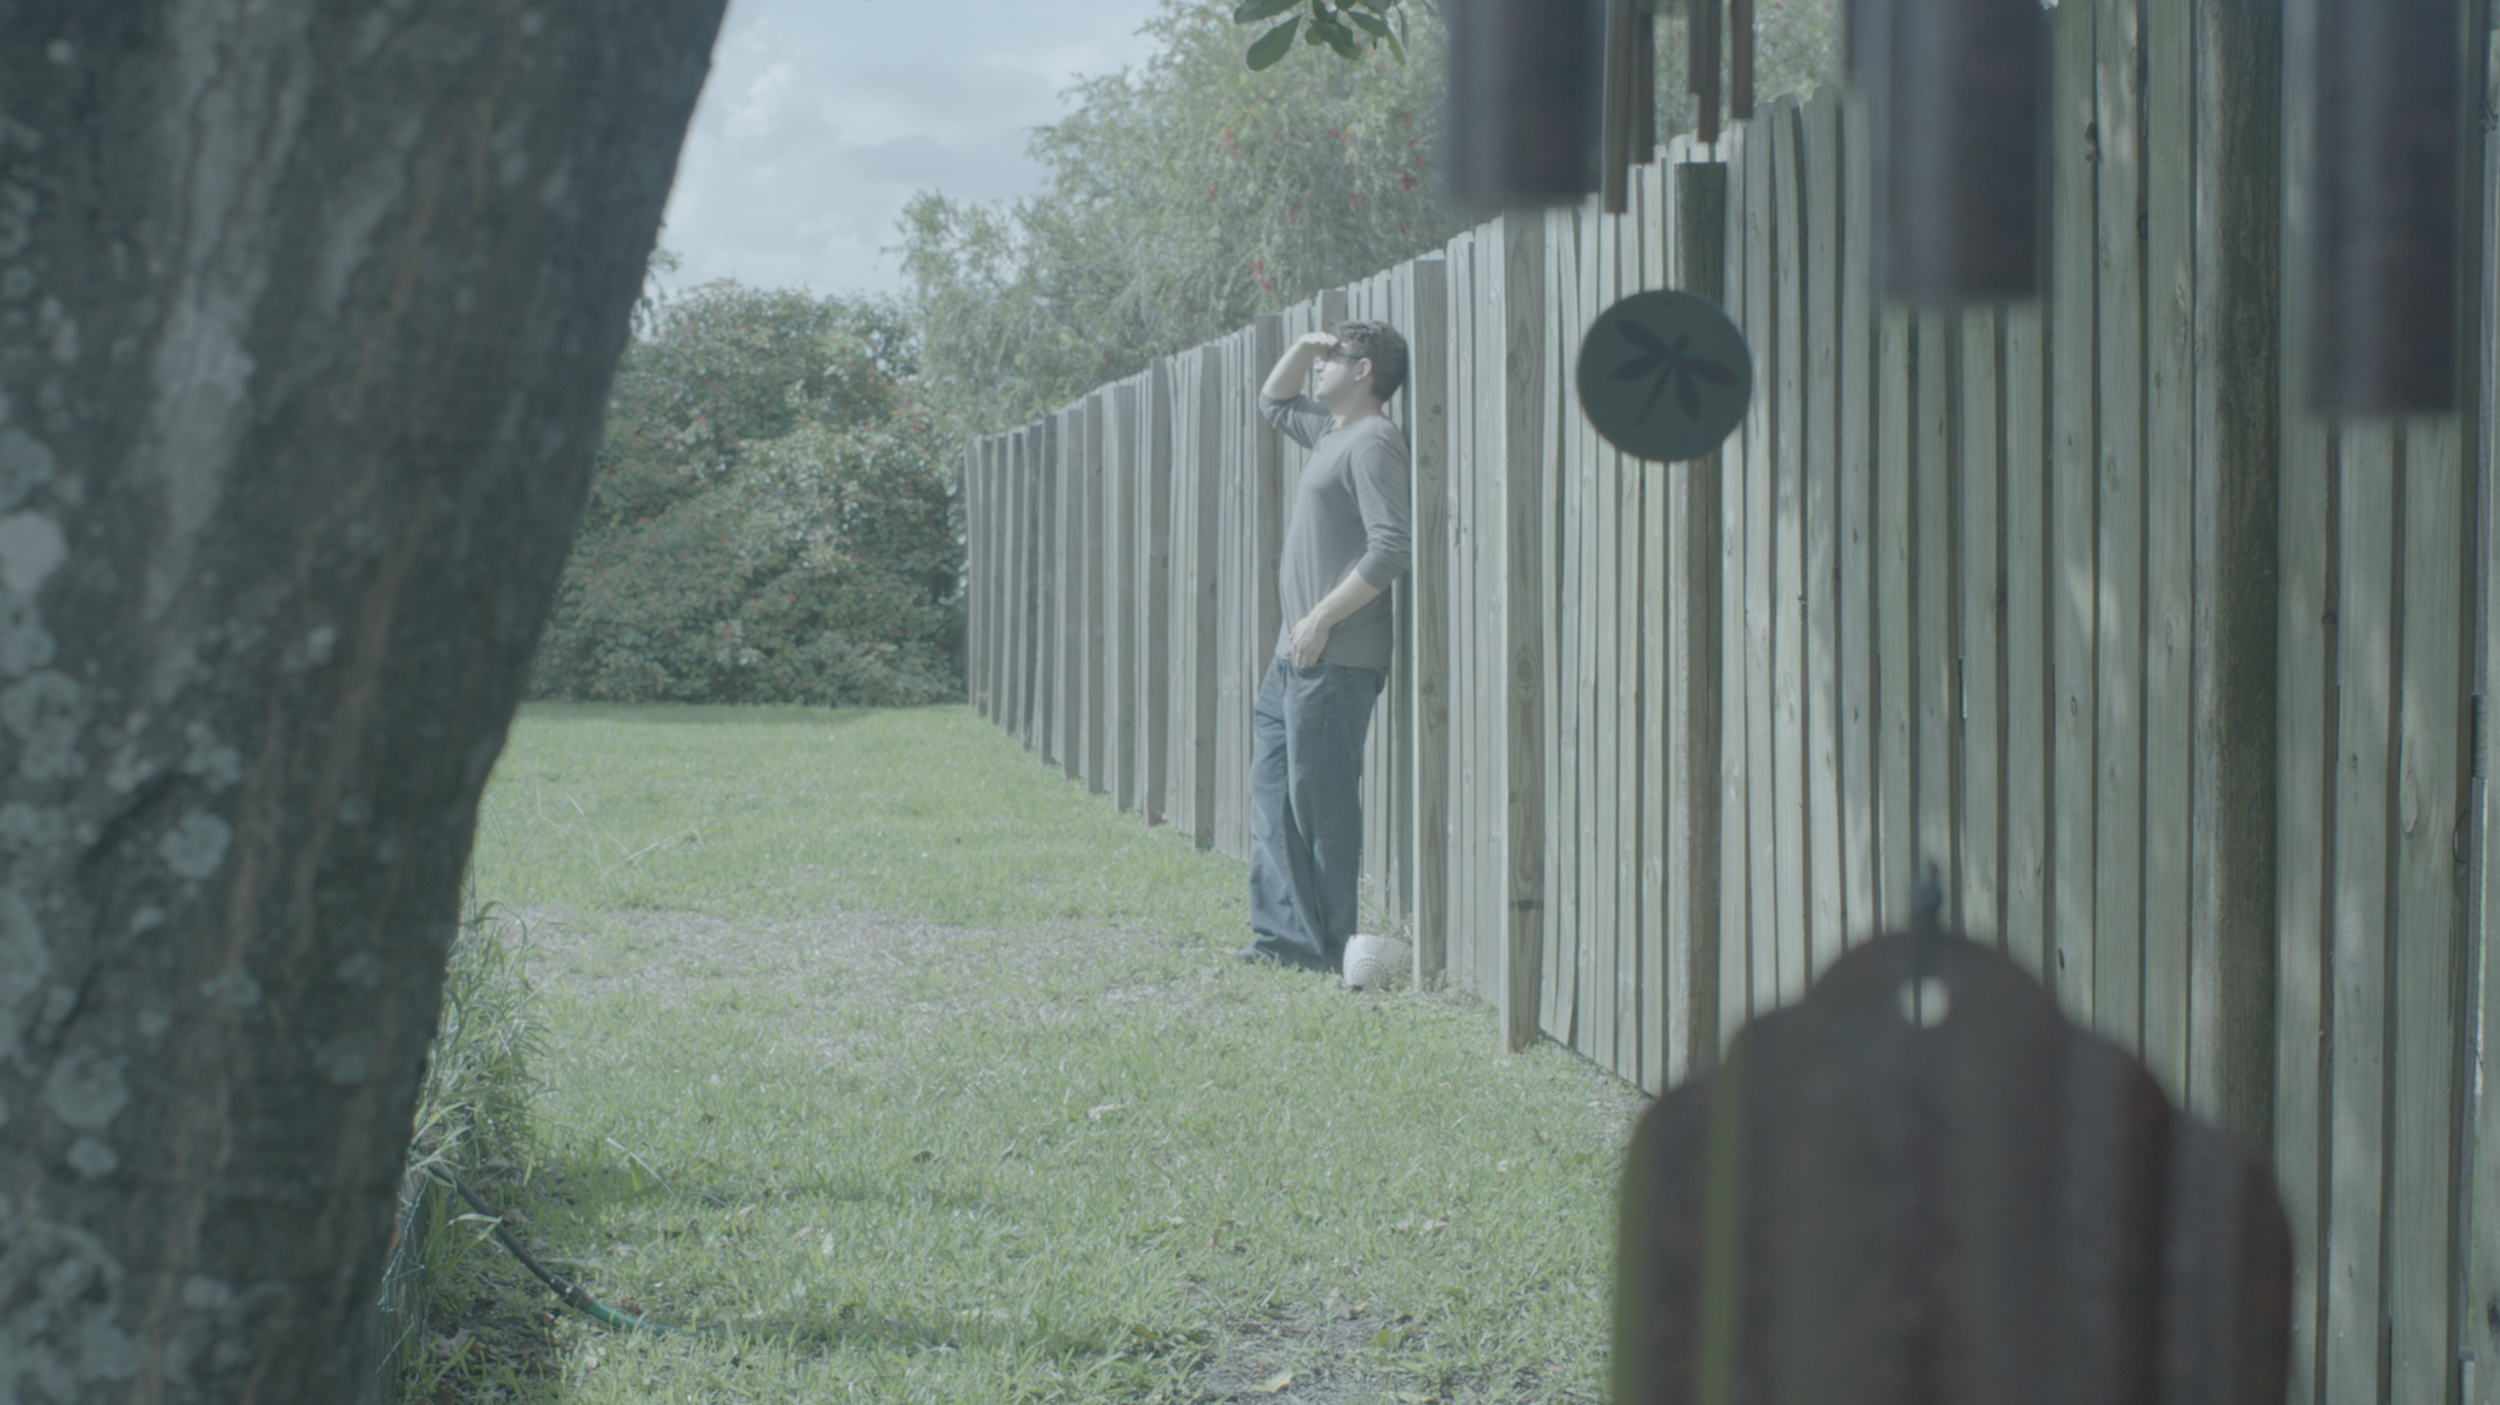
The 3200k Log-C image with no correction applied.
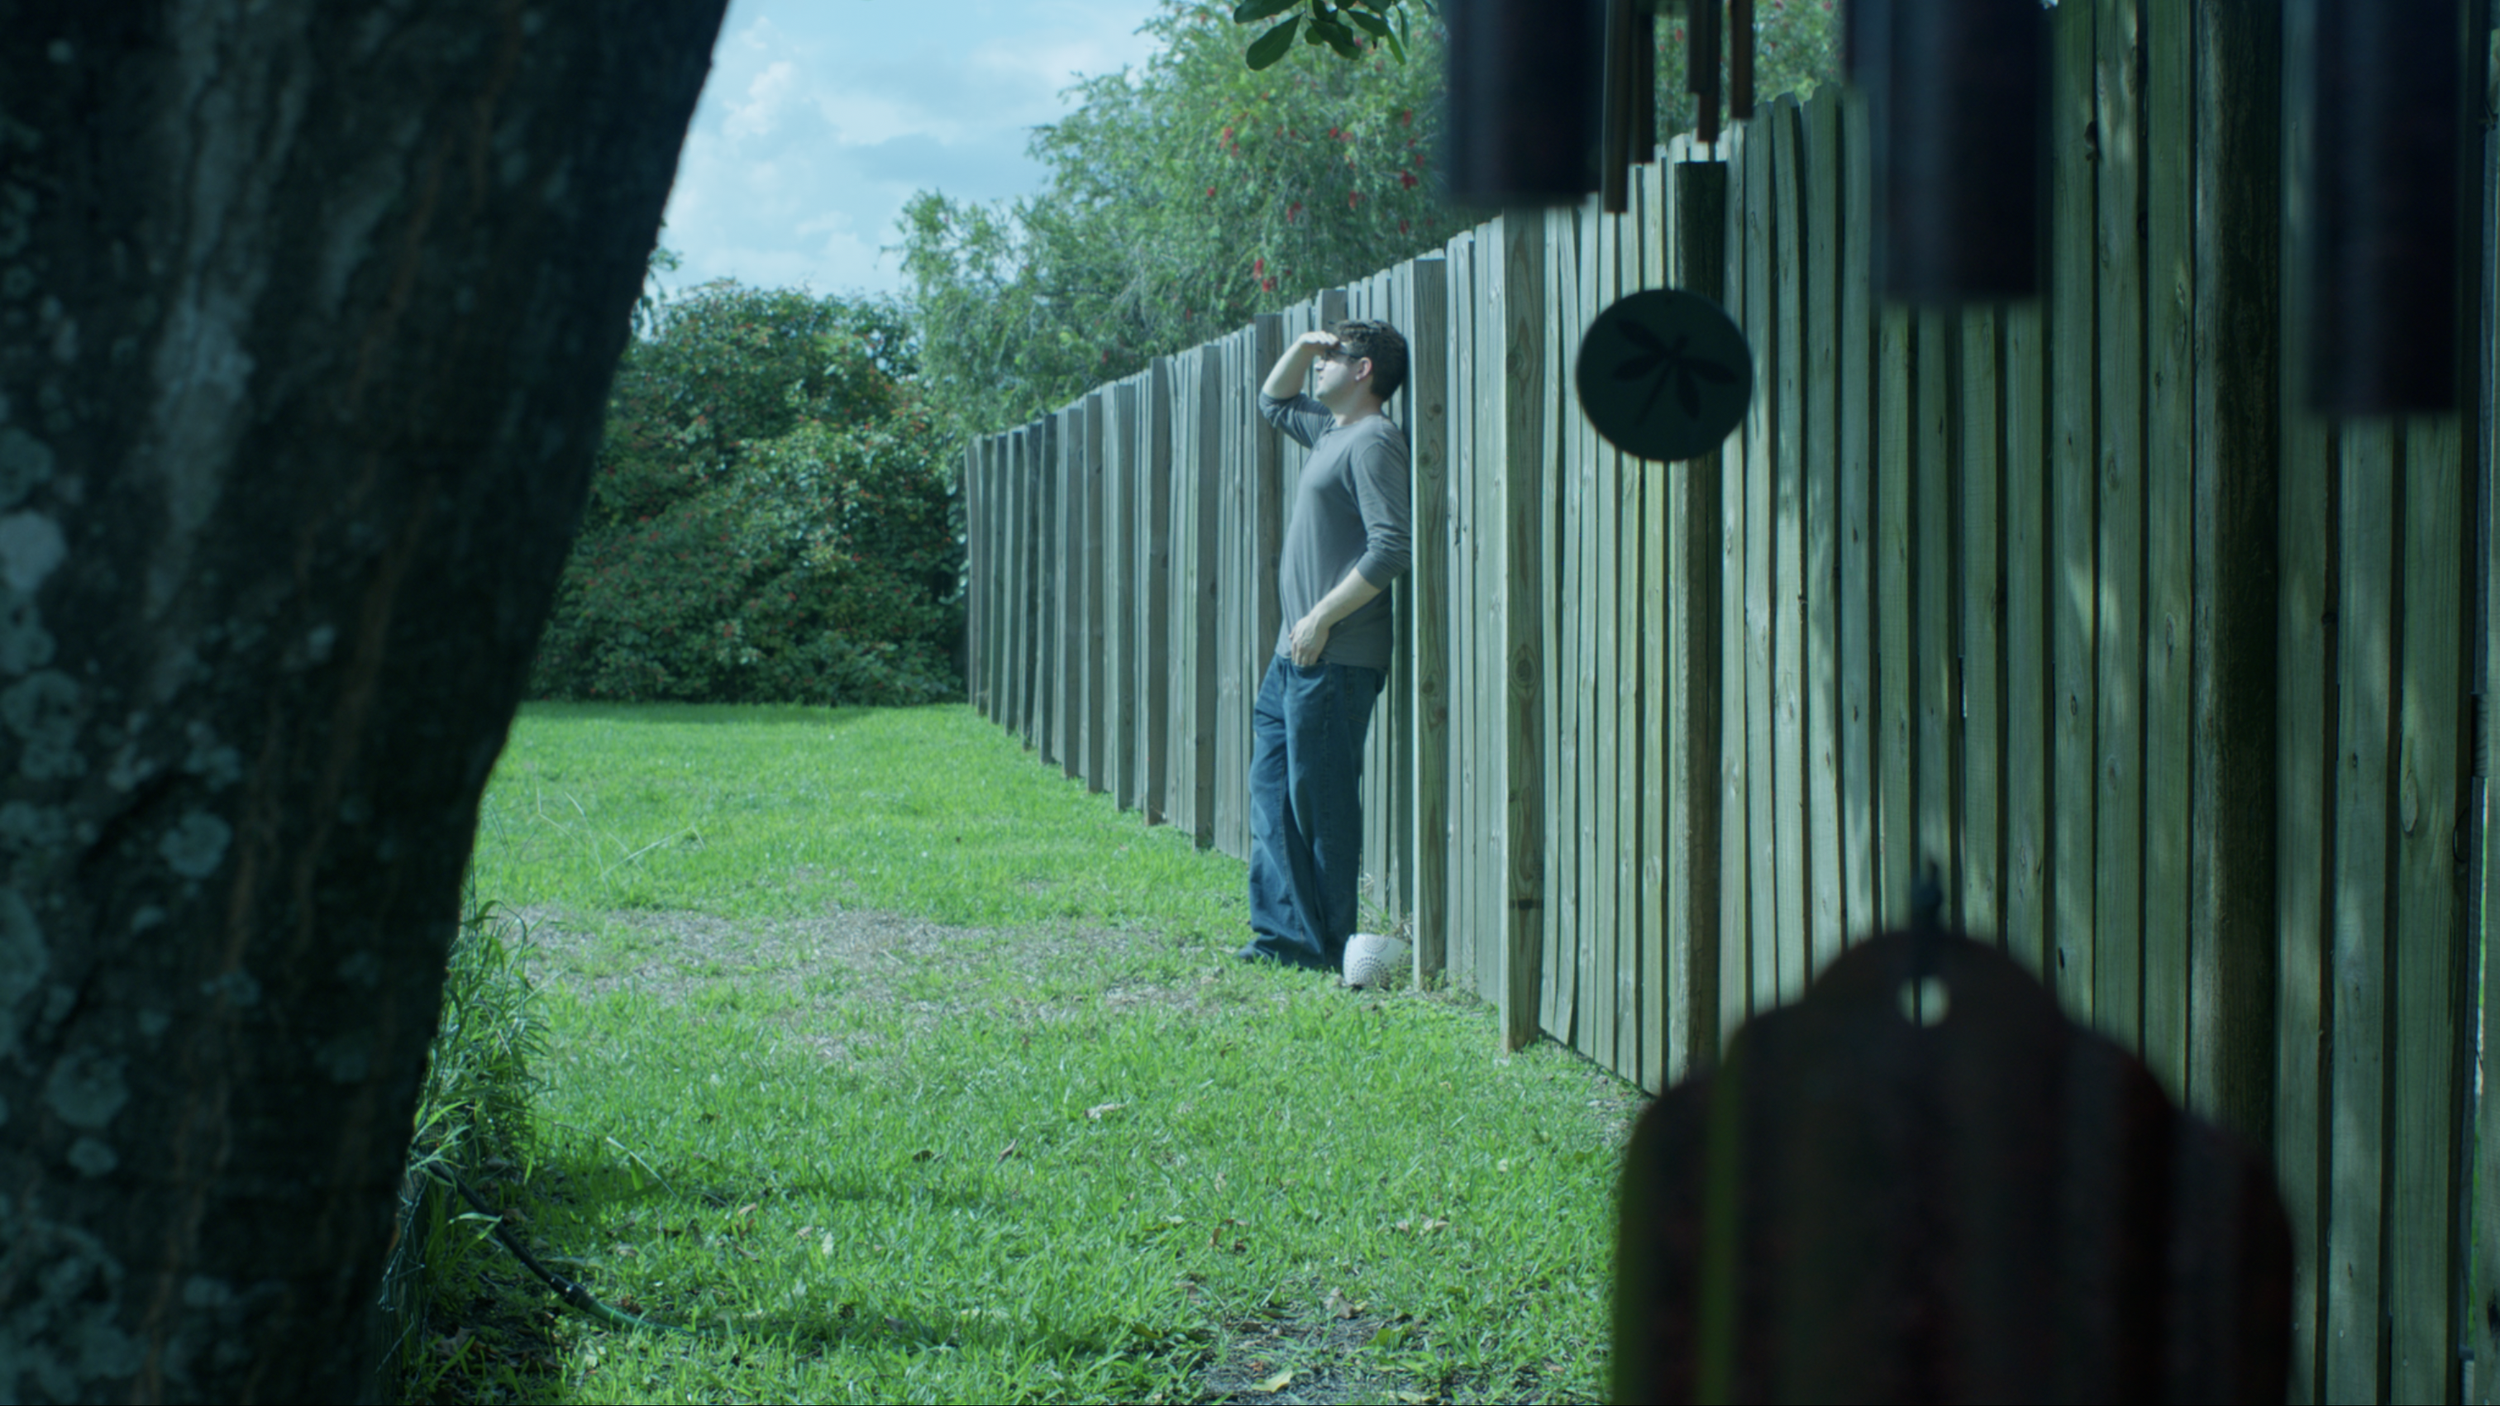
The 3200k Log-C image with Input and Output Color Space Transforms applied.
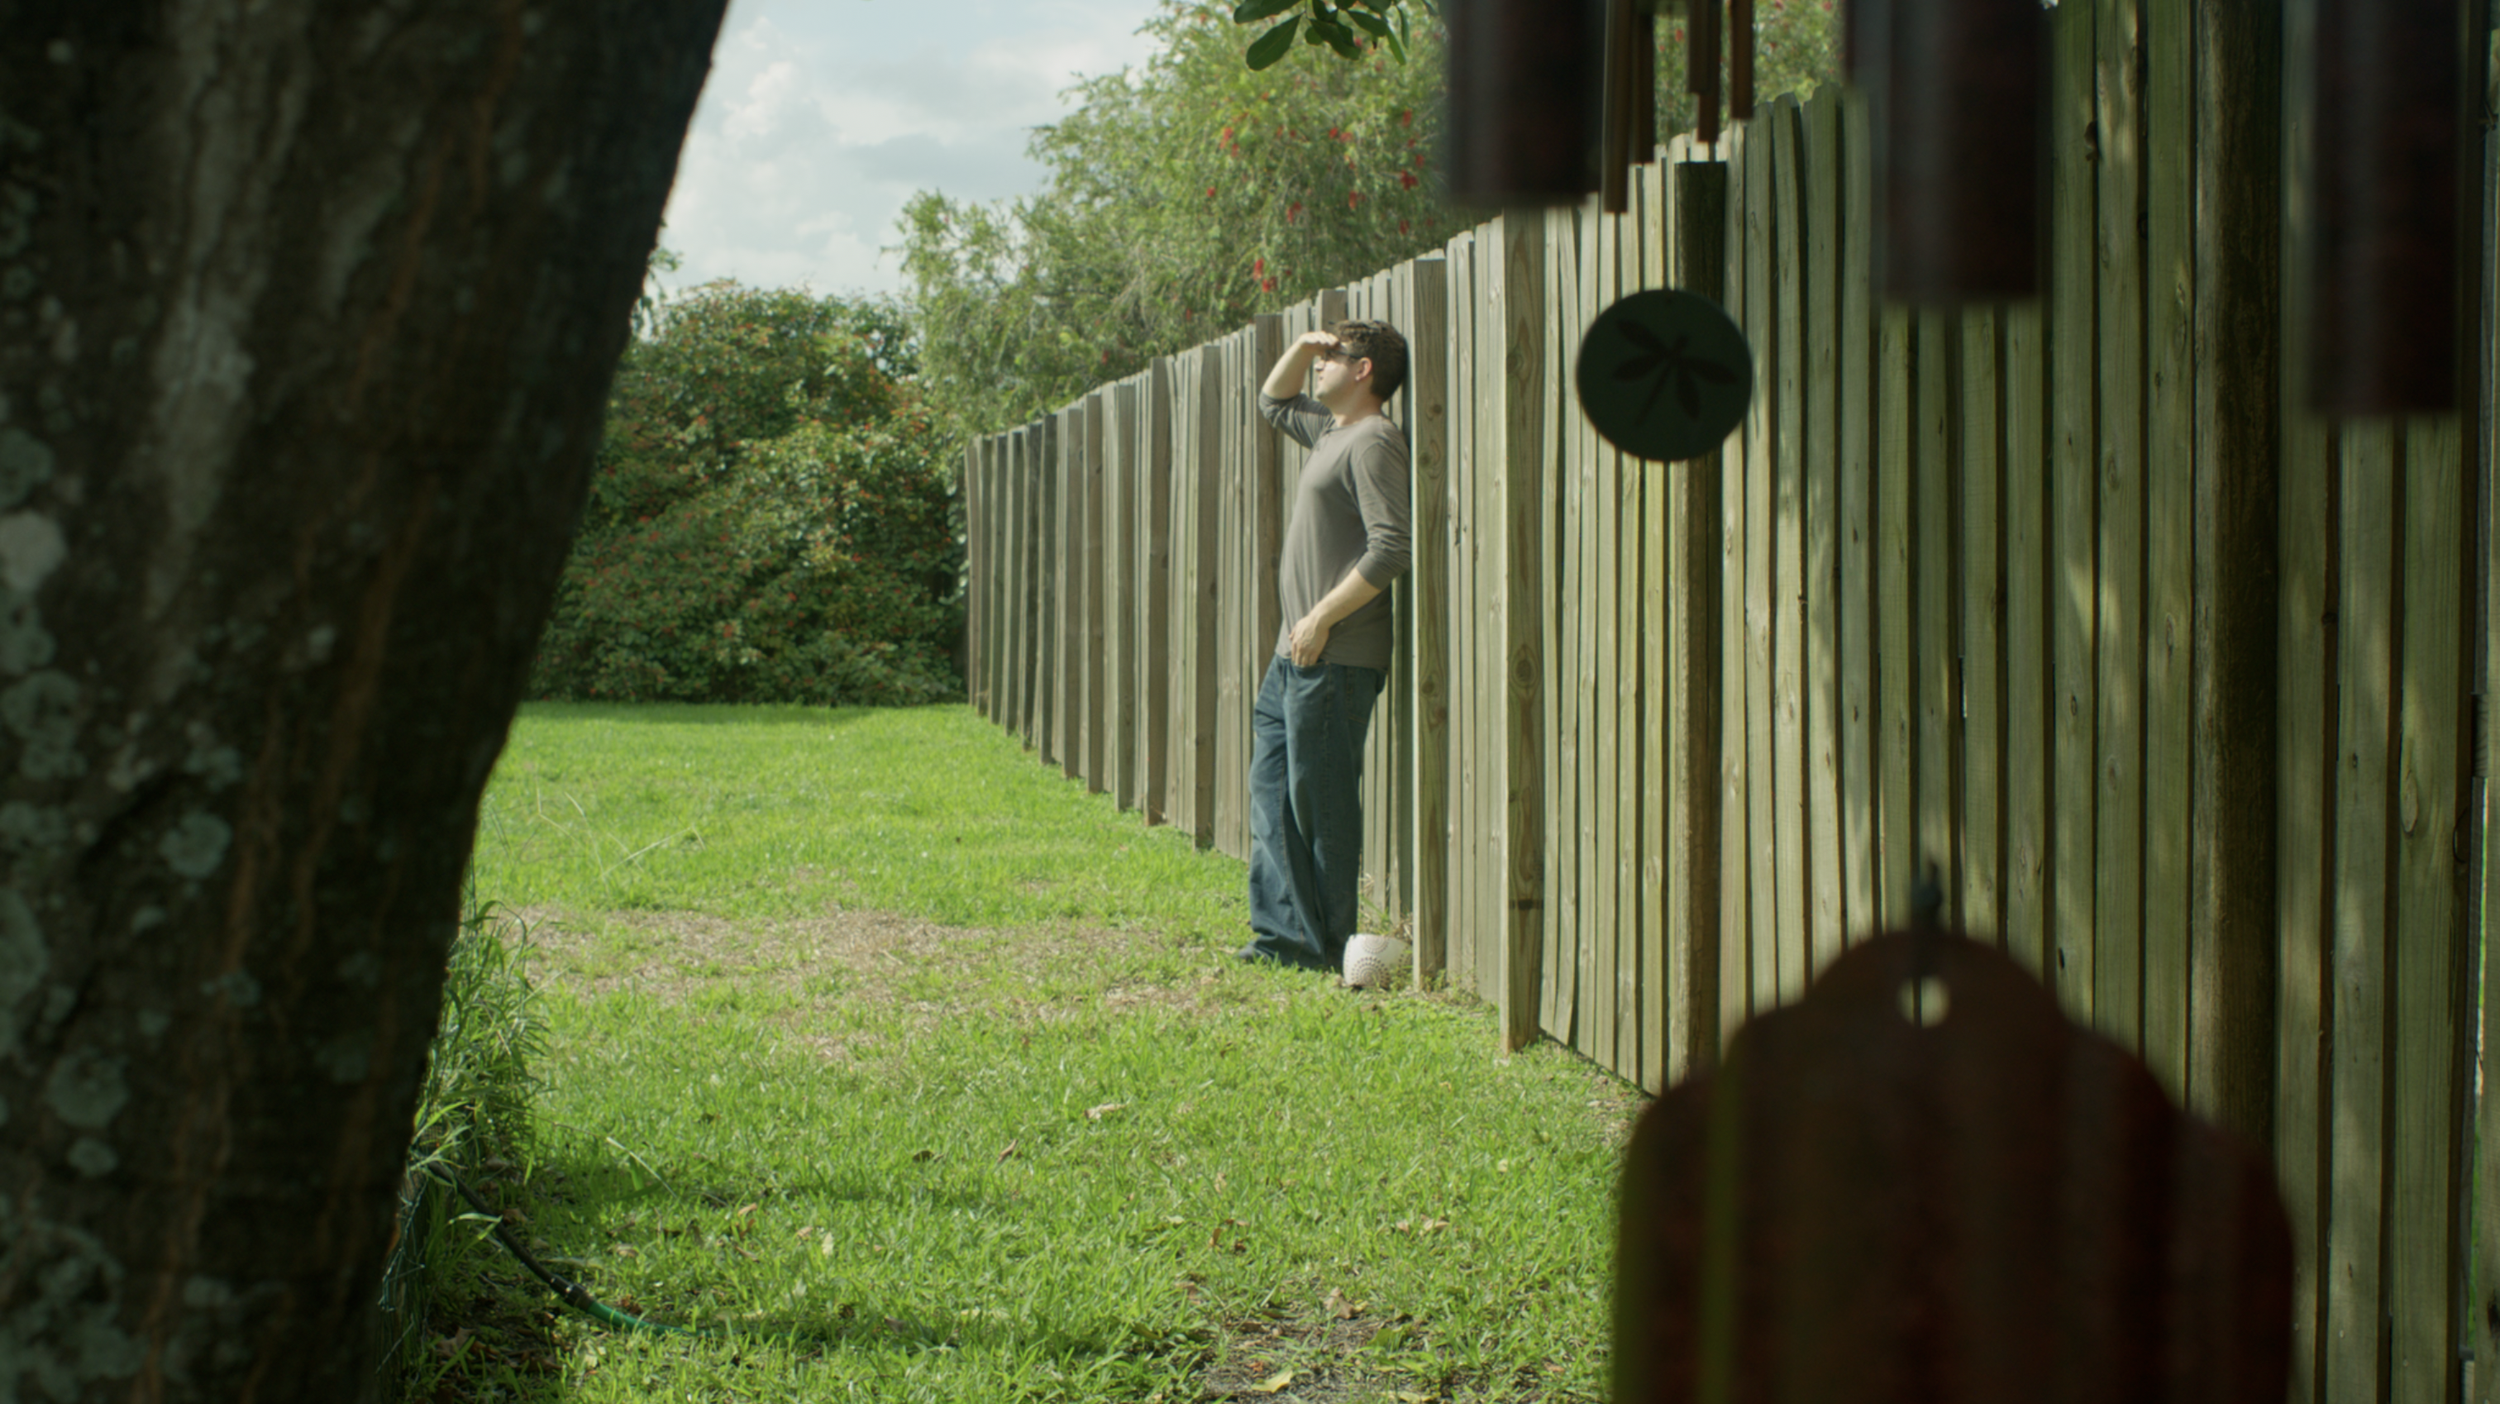
The 3200k Log-C image balanced back to 5600k. It’s very close to being correct. There are minor differences when compared to the control 5600k.

The 3200k Log image vs the control 5600k Log image. Both were balanced in camera.
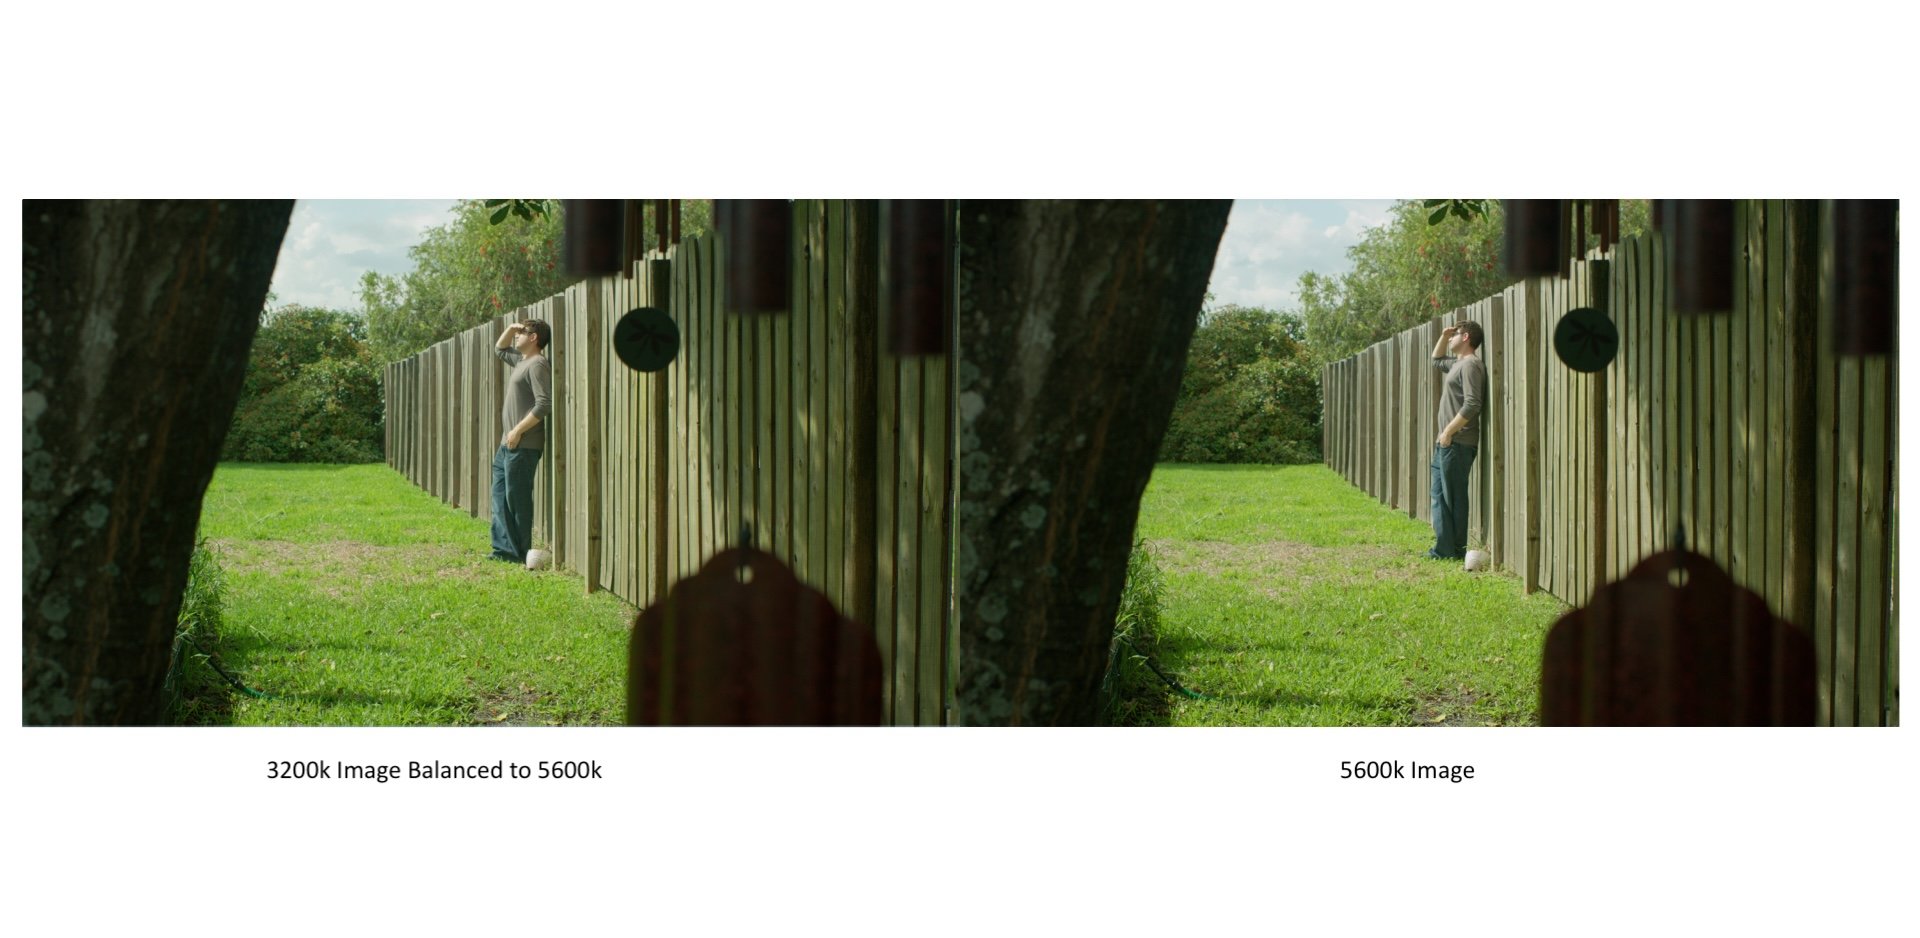
Very similar.
RAW Video
Shutterstock.com
RAW is NOT Log.
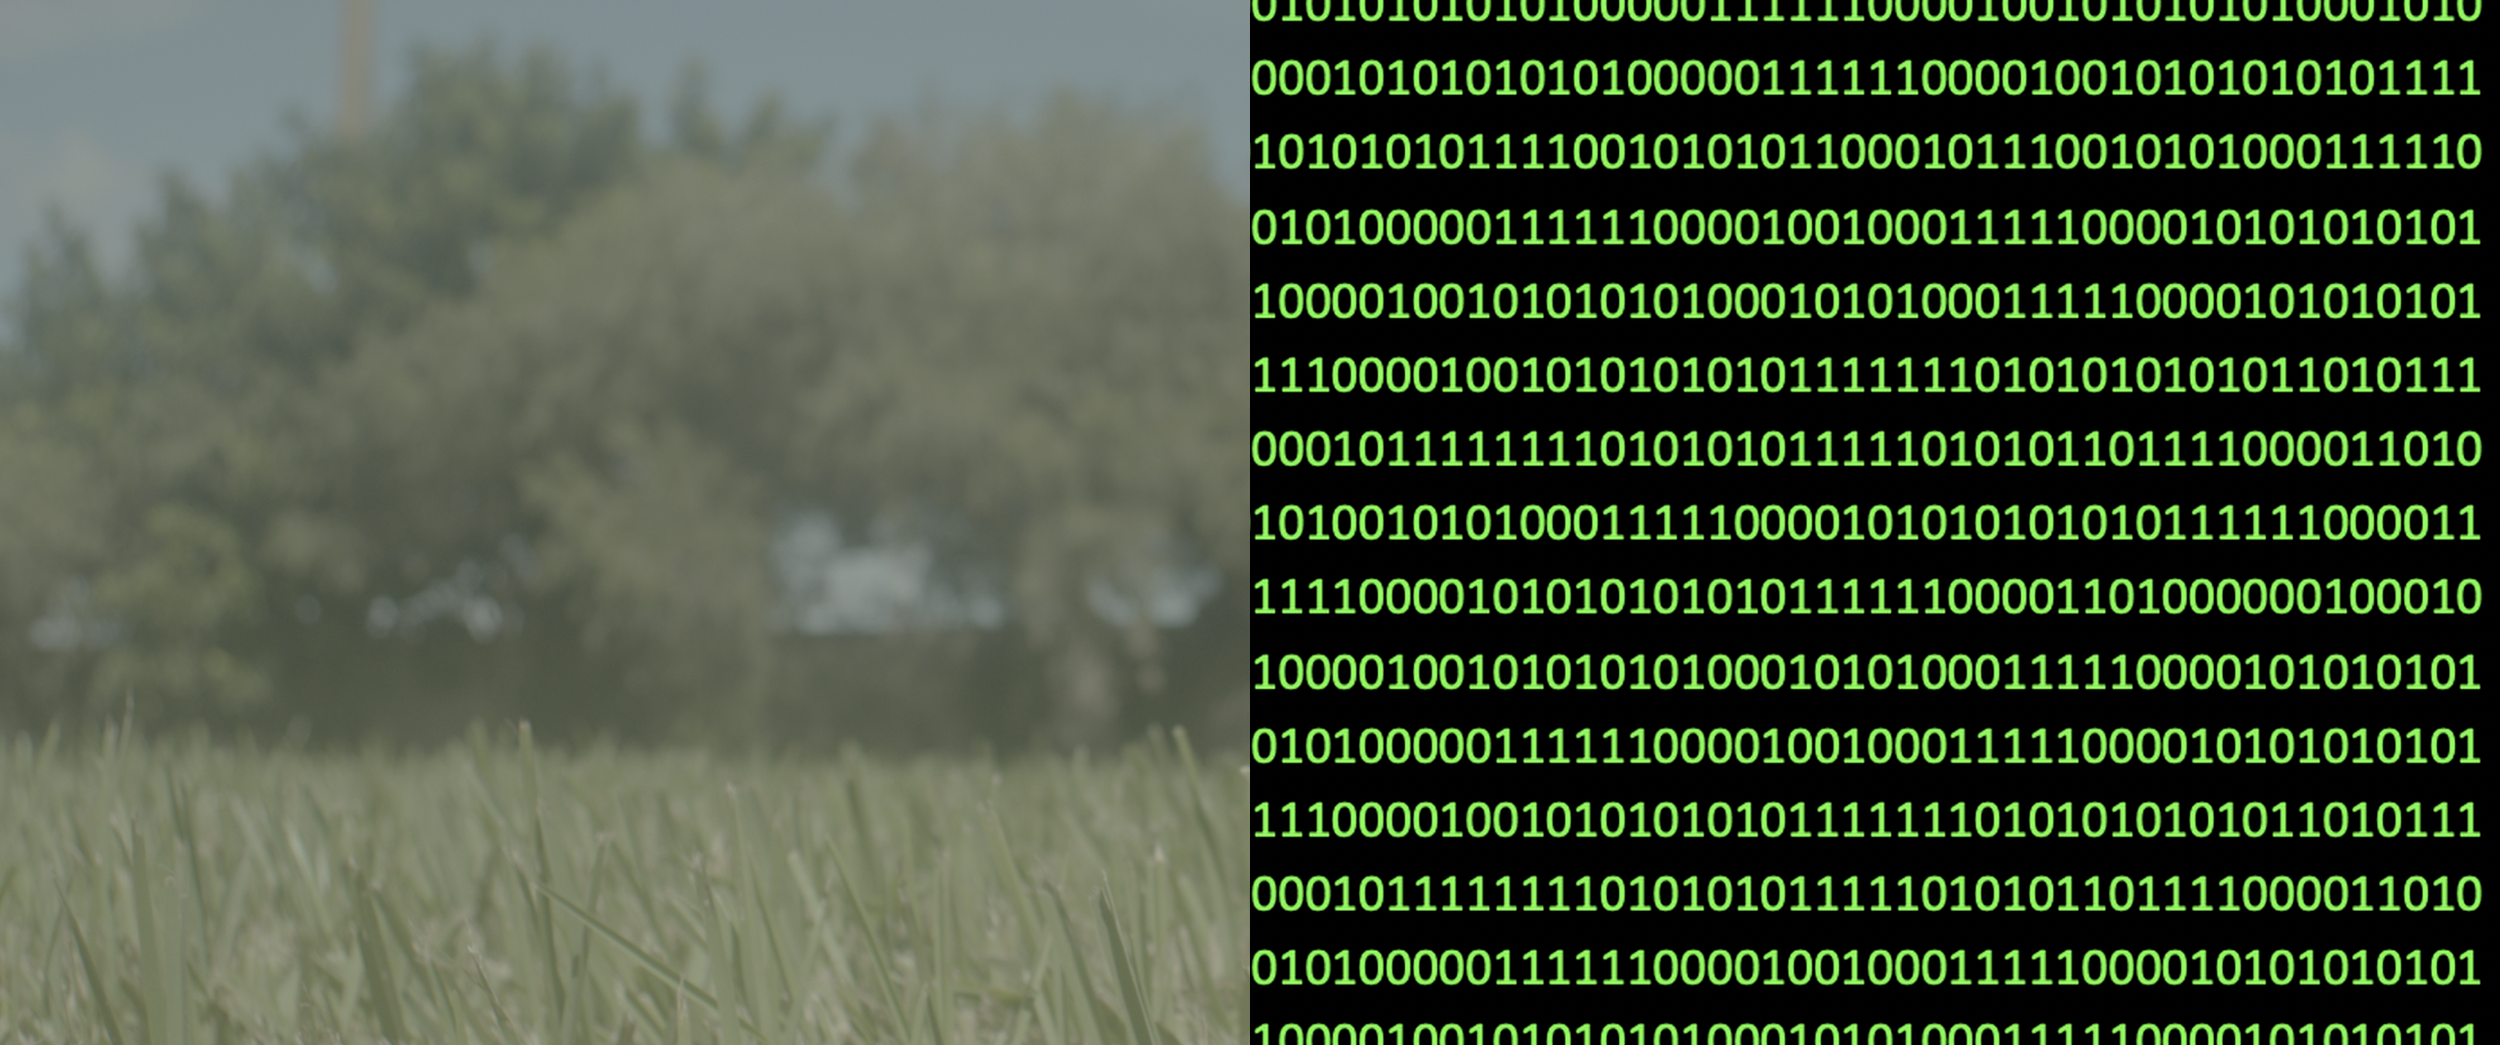
Like RAW photography, RAW Video is all the information captured directly from the sensor and recorded to an HDD or SSD as unplayable 1s and 0s. Though, not all cameras that shoot in RAW shoot true RAW.
If you’re shooting with RED or Blackmagic, you can shoot in a lossy (compressed) format to reduce data sizes while retaining the benefits of RAW. For example, if you were to shoot on a RED camera with a 7:1 compression ratio, the image would be 7 generations removed from the original image quality as opposed to a 2:1 ratio, which would be 2 generations away. The quality for either ratio is very nice.
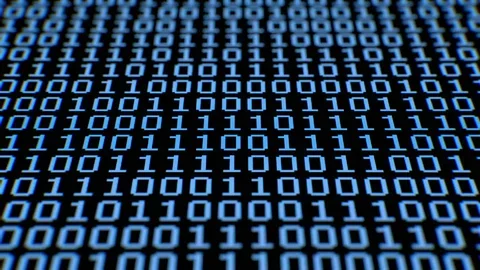
A chart explaining how shooting in a lossy REDCODE format on RED can reduce data rates and increase recording times when compared to ARRI’s, non-RAW/debayered ProRes files and RAW/lossless ARRI RAW.
Source: YMCinema.com
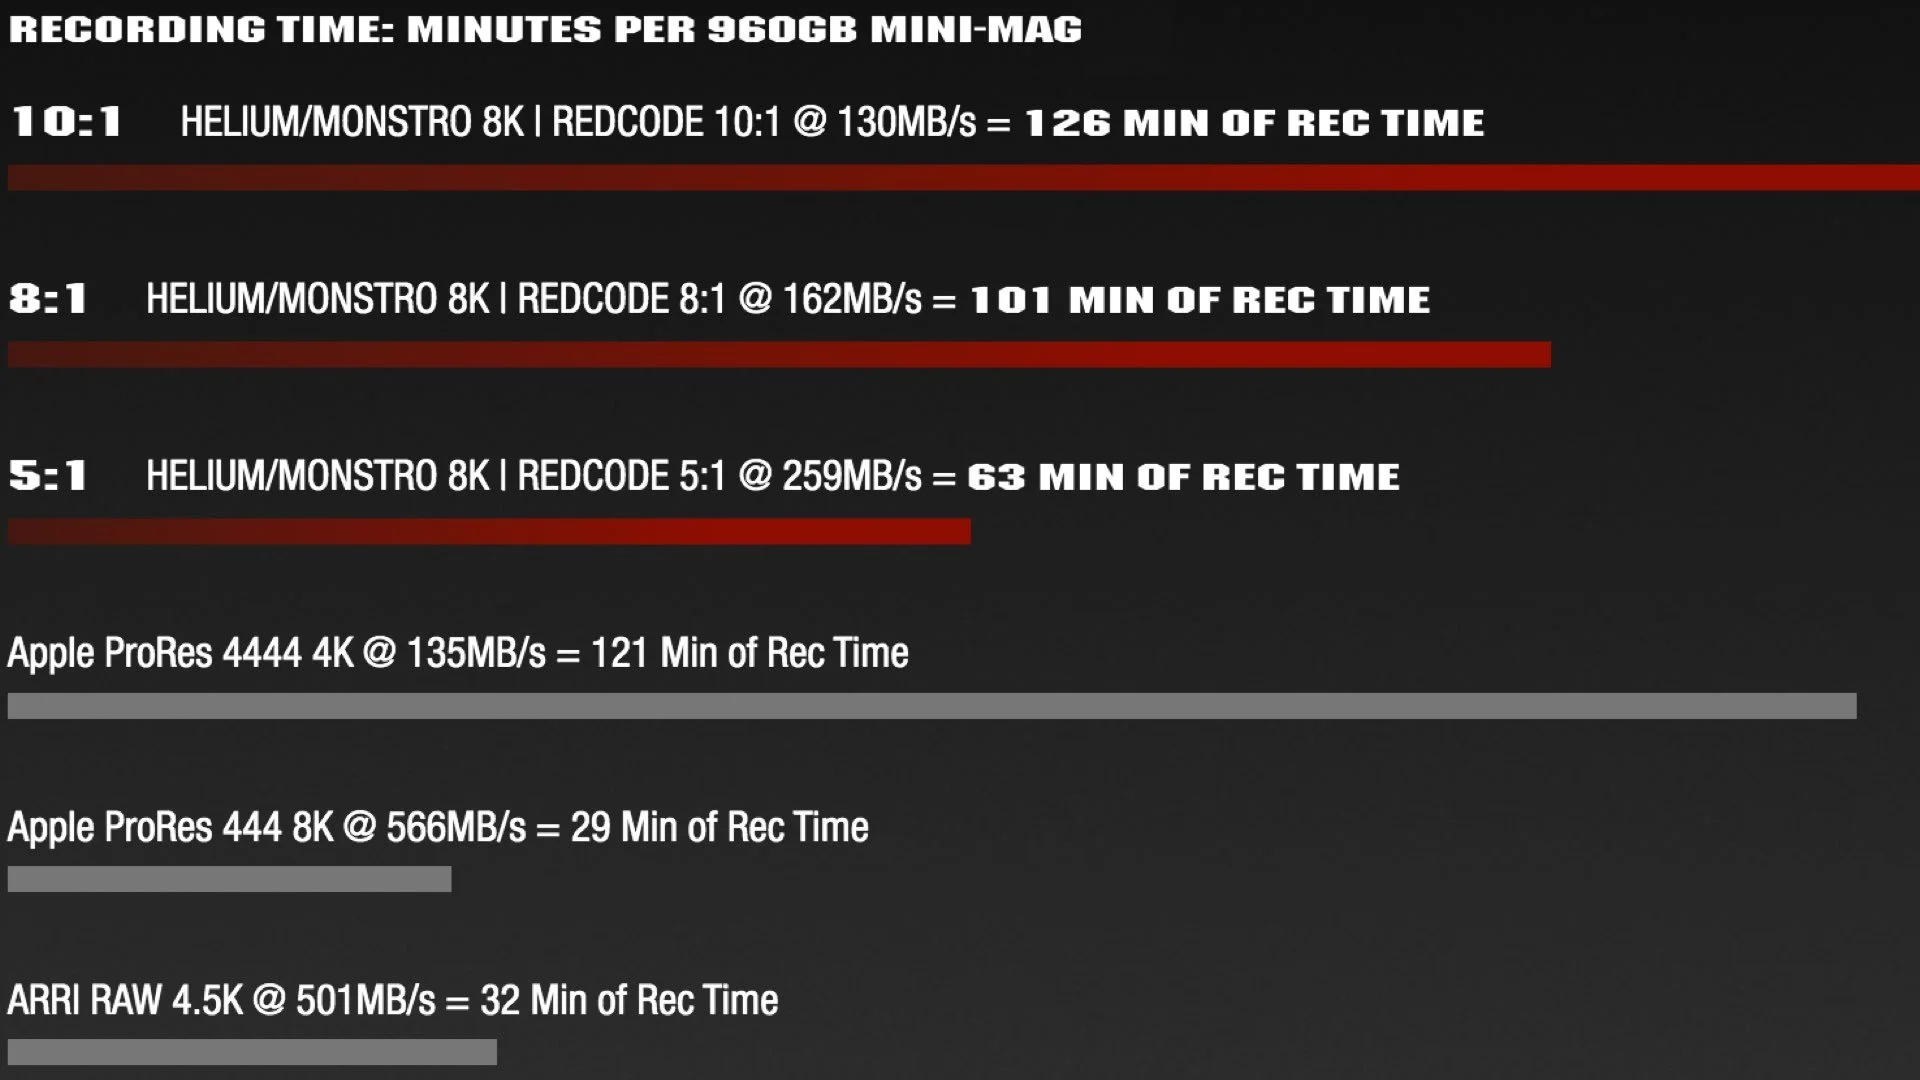
ARRI cameras on the other hand, due to their uncompromising and unrelenting pursuit for quality, shoot RAW as losses (uncompressed); true RAW. The file sizes are massive, but are the best in the business. Because they come into the computer as pure RAW data, the ARRI files need to be encoded (converted into a coded form) in order to be read as video.
ARRI’s ARRIRAW Converter software.
Source: ARRI.com
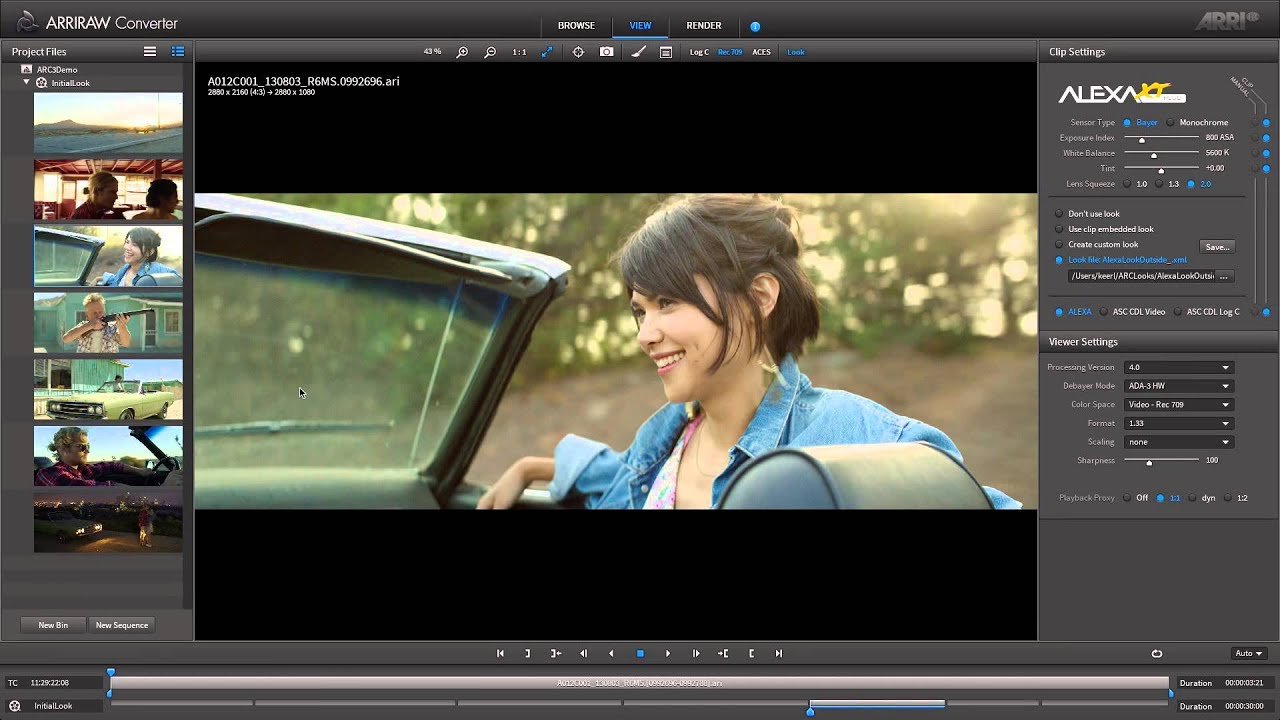
Like RAW photo, RAW video is not married to a non-linear Log gamma curve, like codecs are, and has the ability to accept any gamma curve you throw at it. With RED footage, you can implement different types of Log curves and multiple types of Gamma curves in the Camera RAW tab.
The Log and Gamma Curves available to RED cameras in DaVinci Resolve’s Camera Raw tab.
These Log and Gamma Curve options can be used by other cameras as well.
To further help you understand how tweak-able RAW video settings are in post, we’re going to look at some footage shot in 2021 on a RED Helium S35 8K camera. You can download this footage from RED.com.
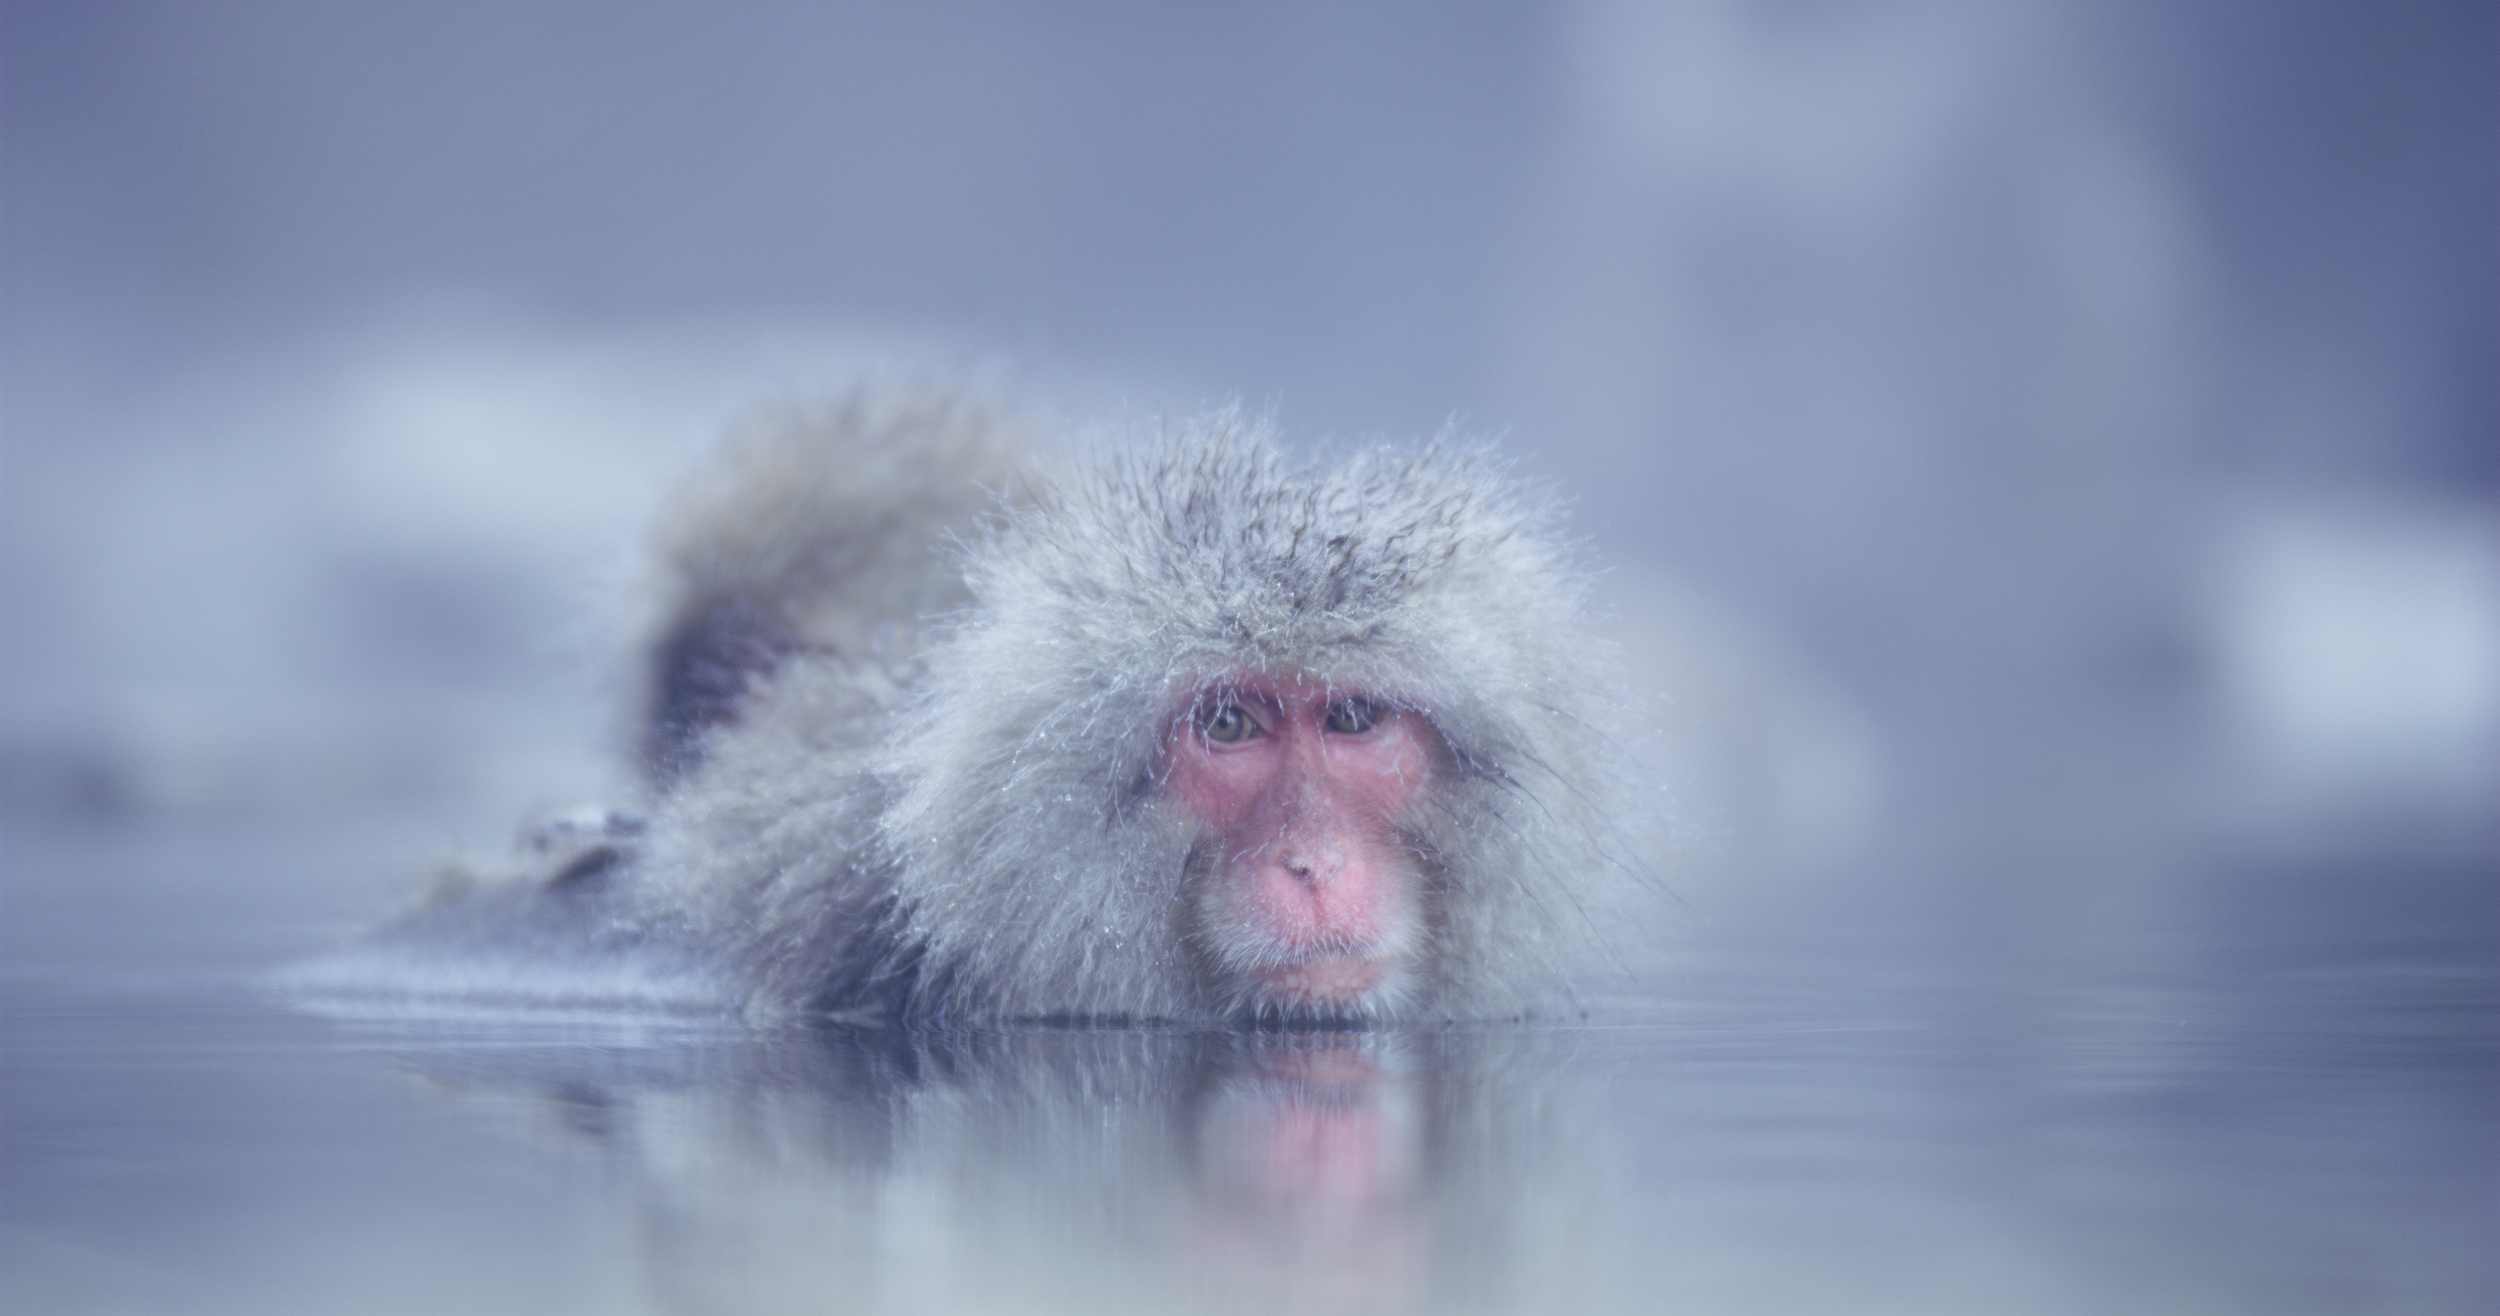
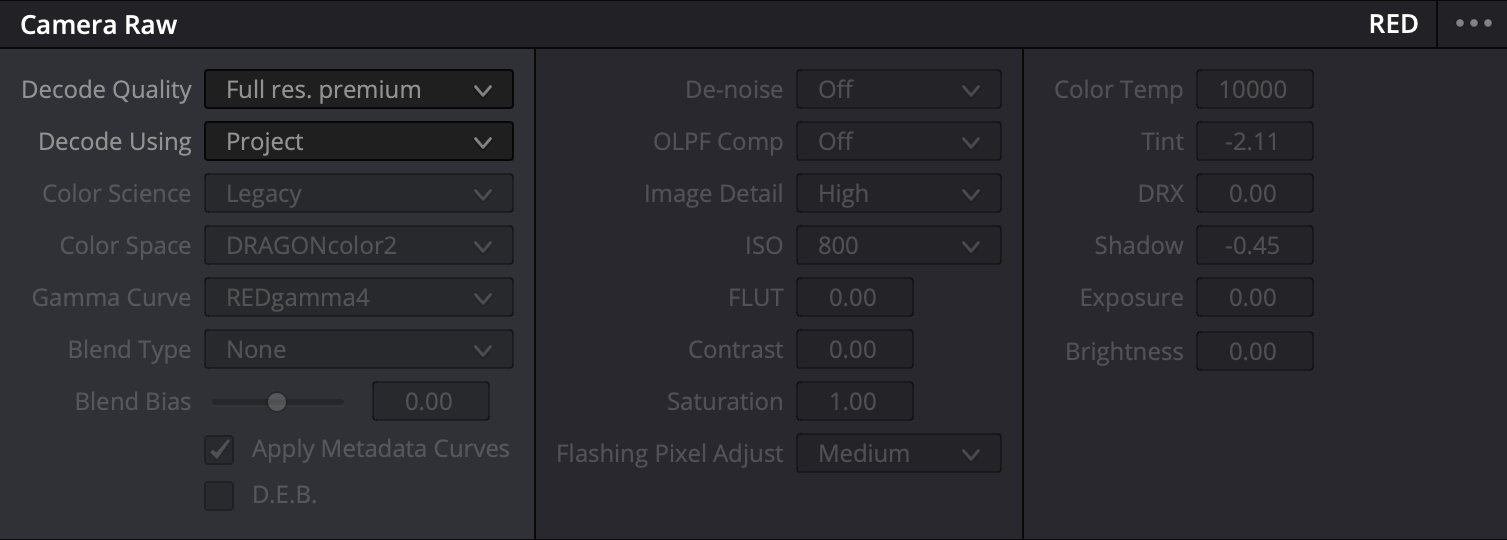
The footage, when it was decoded, had the Project setting enabled in DaVinci’s Camera Raw tab. The image may need a few adjustments before it looks picture perfect.
Source: RED.com
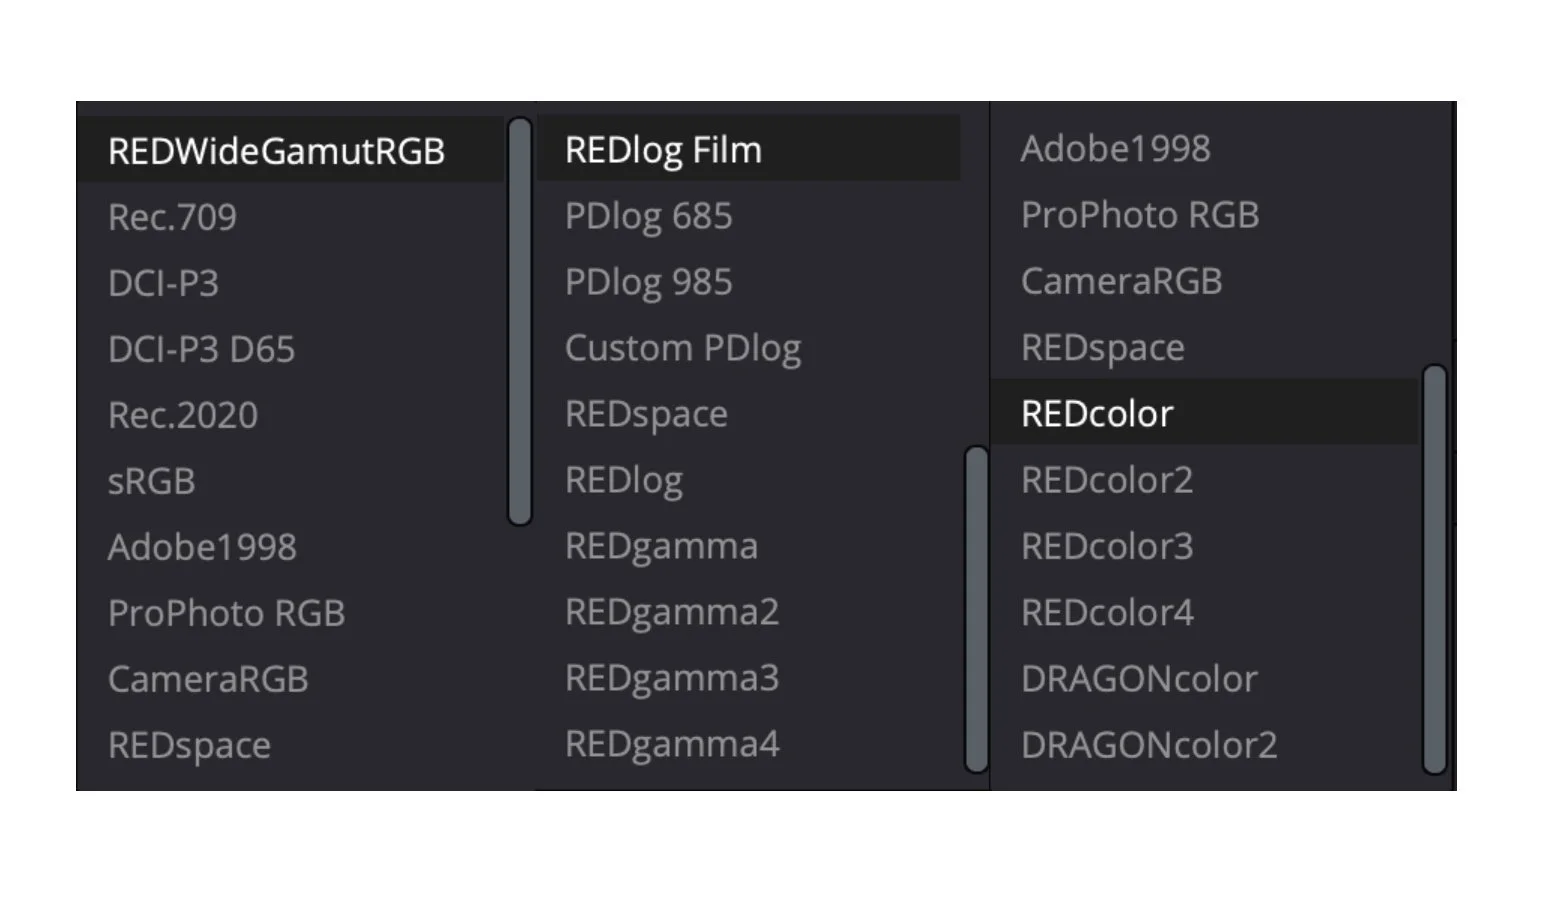
The Project setting locked the footage into a Legacy Color Science with a Dragoncolor2 Color Space and a REDgamma4 Gamma Curve.
The camera was set at ISO 800, and the Color Temperature was 10,000k.
No Log curve was used in making of the image as the intent was to start the image off as close to finished as possible for quick turnaround times.
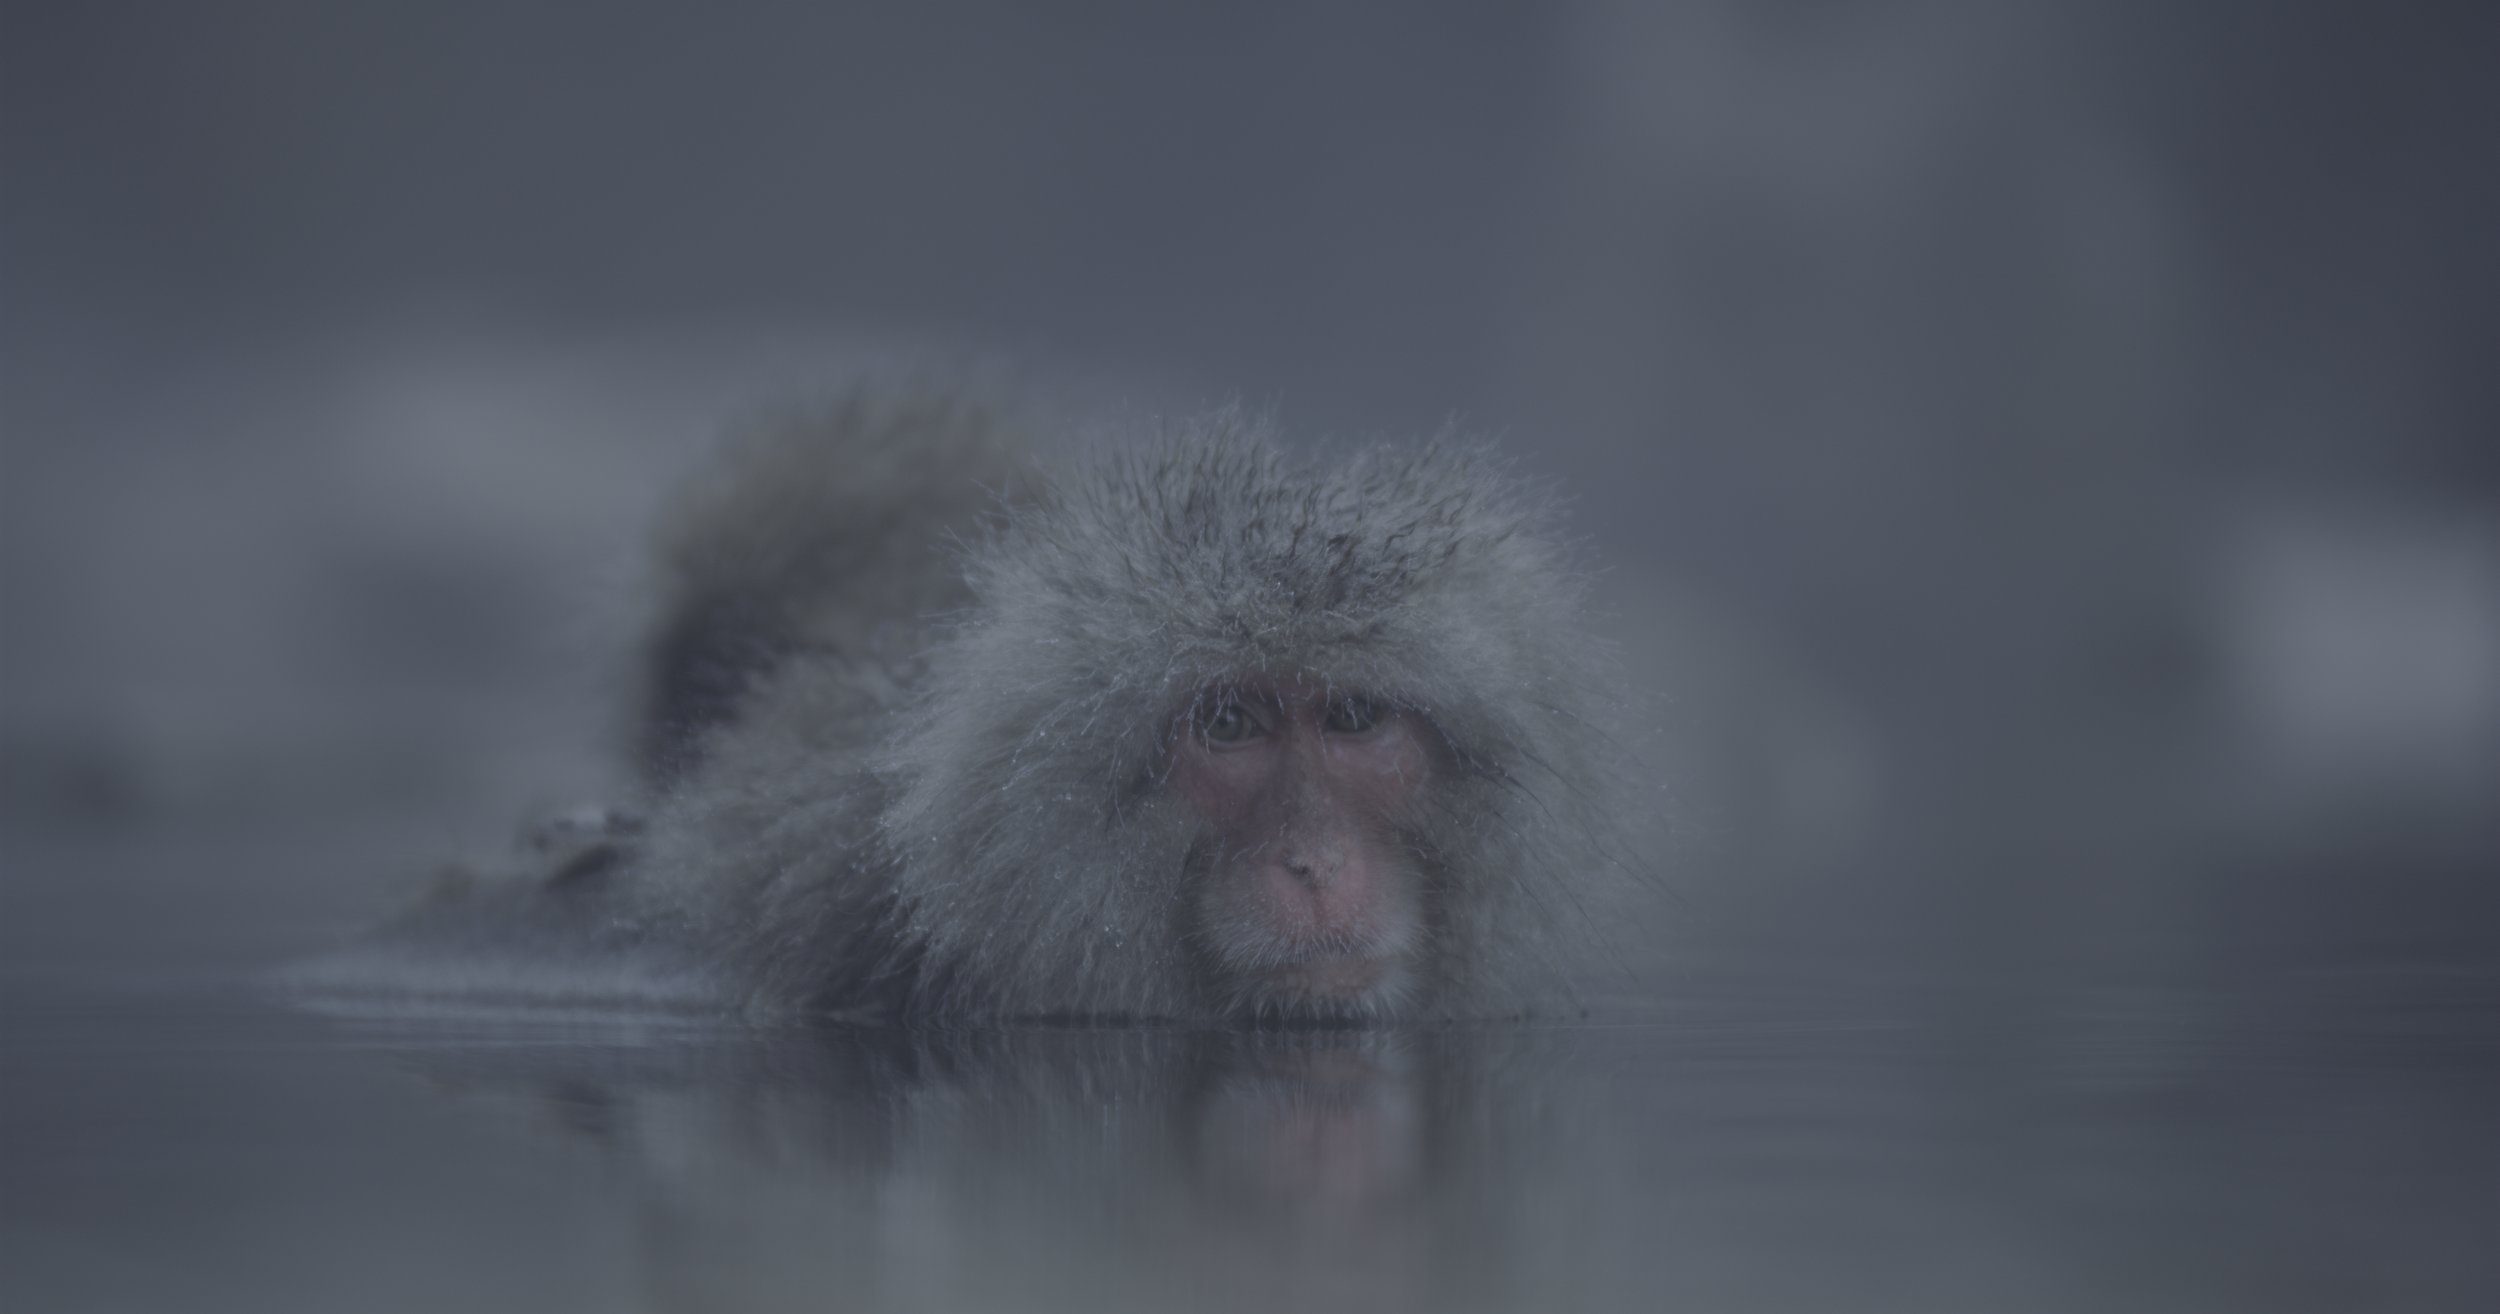
The image in REDlog Film before being colored the way I wanted it to look.
I achieved this by changing the Decode from Project to Clip, which allowed me to use the REDlog Film non-linear log gamma.
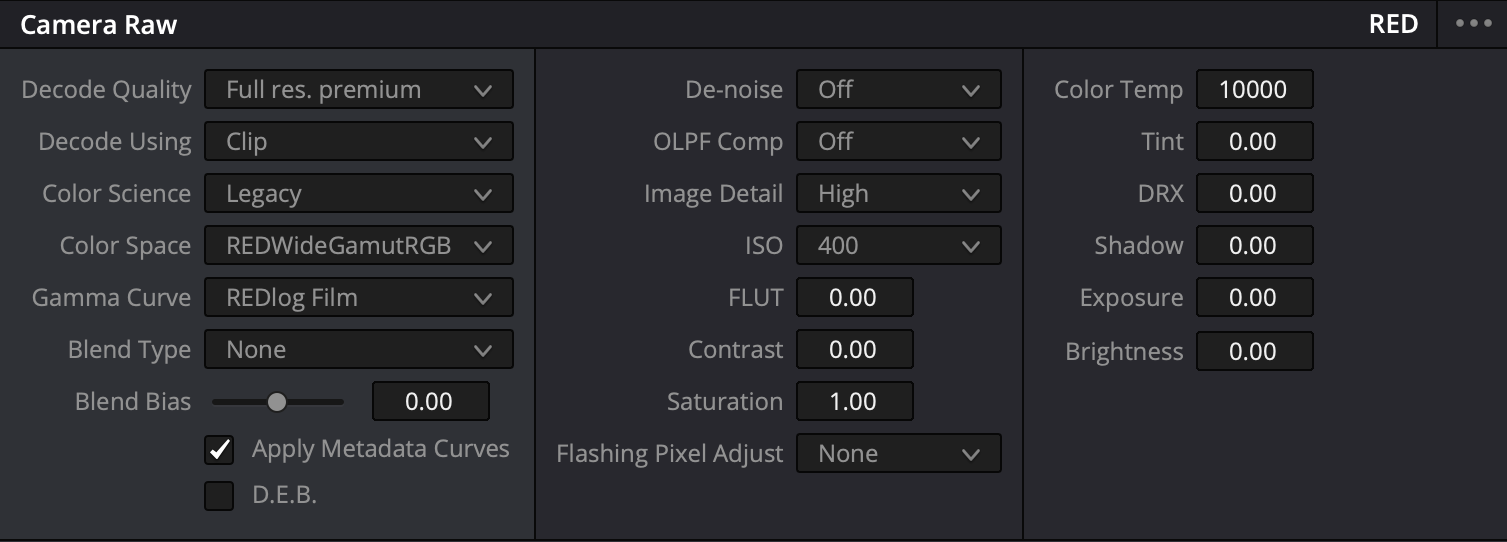
The image is now decoded using the Clip setting, and I have access to an array of settings including, Color Temperature, ISO, Tint and more.
My Color Science is now Legacy with a REDWideGamutRGB Color Space and a REDlof Film Gamma Curve. The ISO is set to 400.
The final image.
RAW: Internal Vs. External Capture
Not all cameras are created equal. Some record RAW internally, while others do not. This is a really important consideration to take into account before making your next camera purchase.
One of the benefits of recording internally is that you don’t have to power or depend on an external device to record your footage. It allows for a faster and simpler workflow. You record to your card, and it’s off to the DIT cart or edit bay.
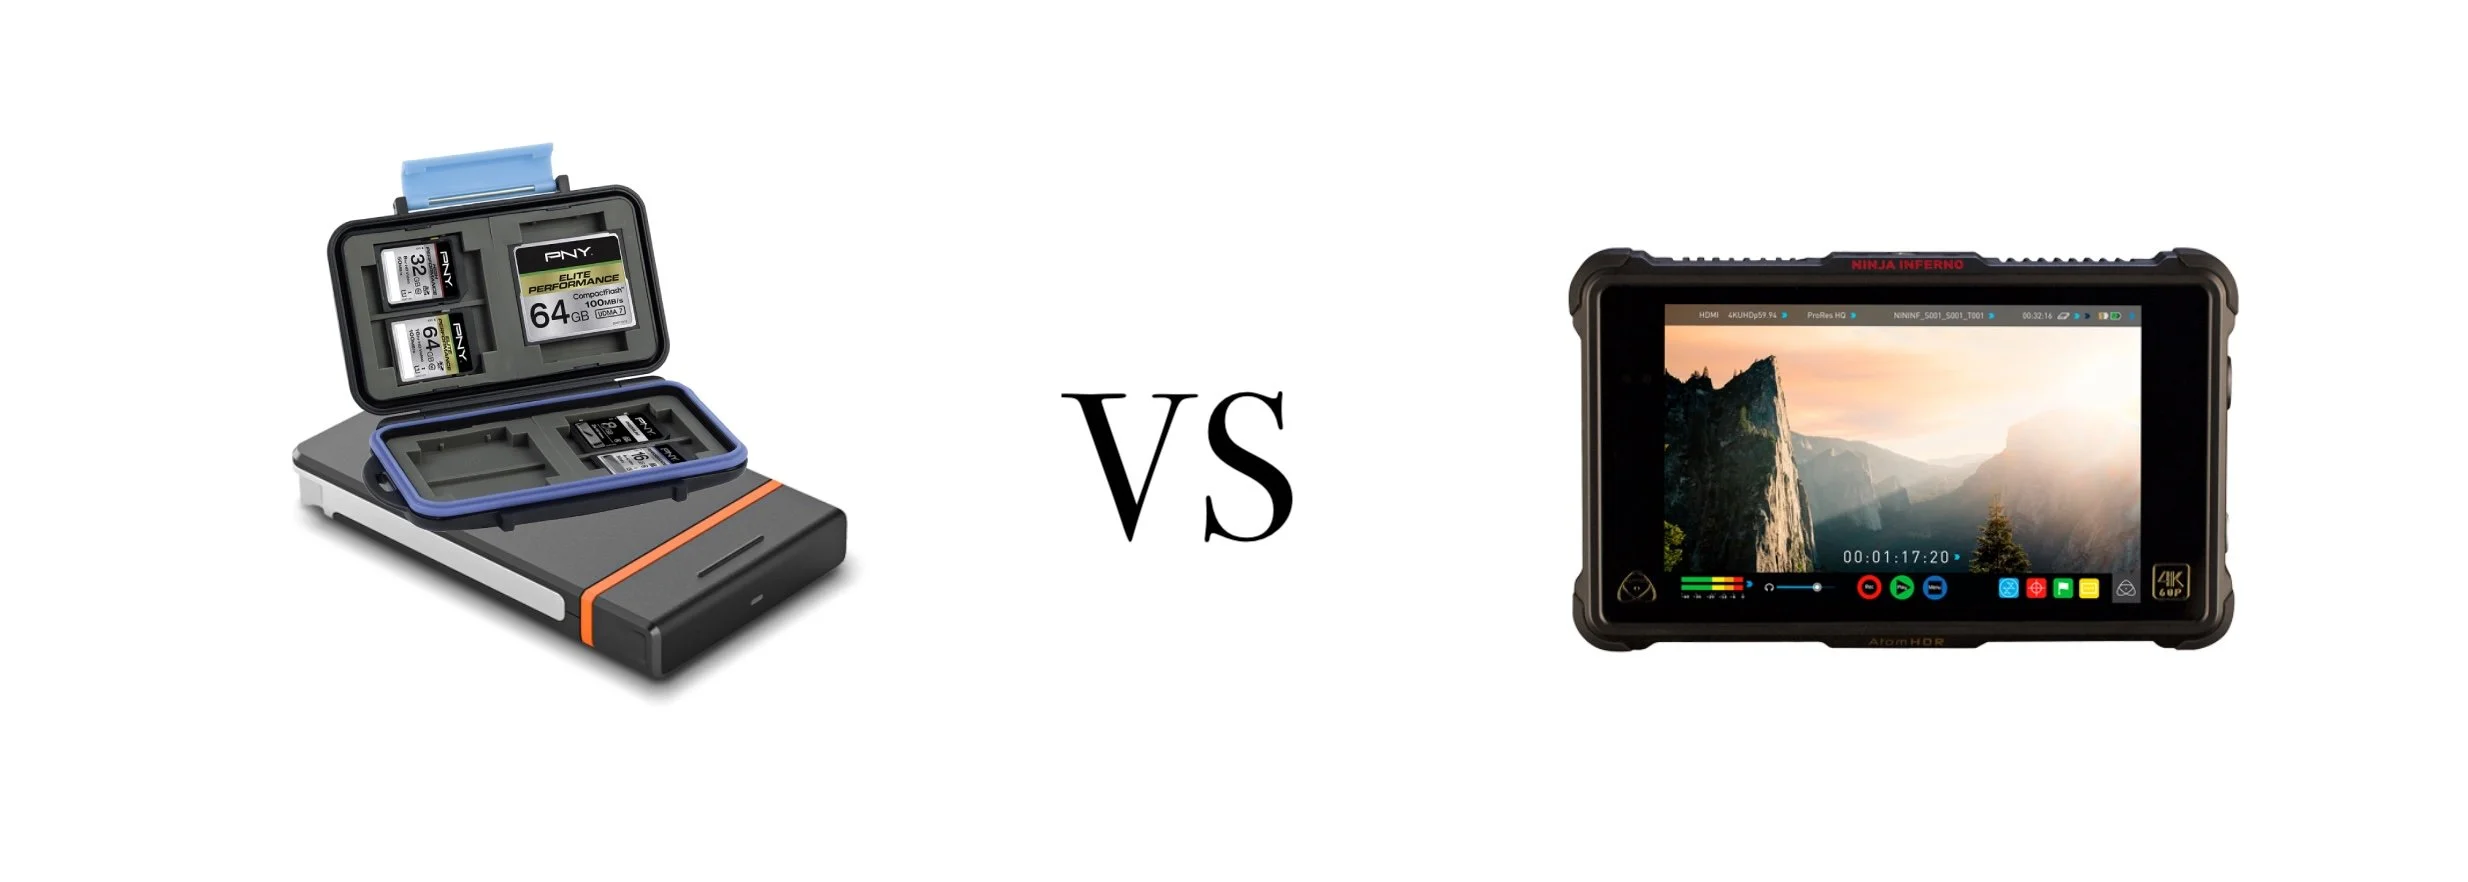
With an external RAW recorder, not only do you have to power the external device with separate set of batteries, but you have to acquire memory that’s proprietary to that hardware type. Plus the fact that you need a mount that can support the recorder. That’s a lot of extra money.
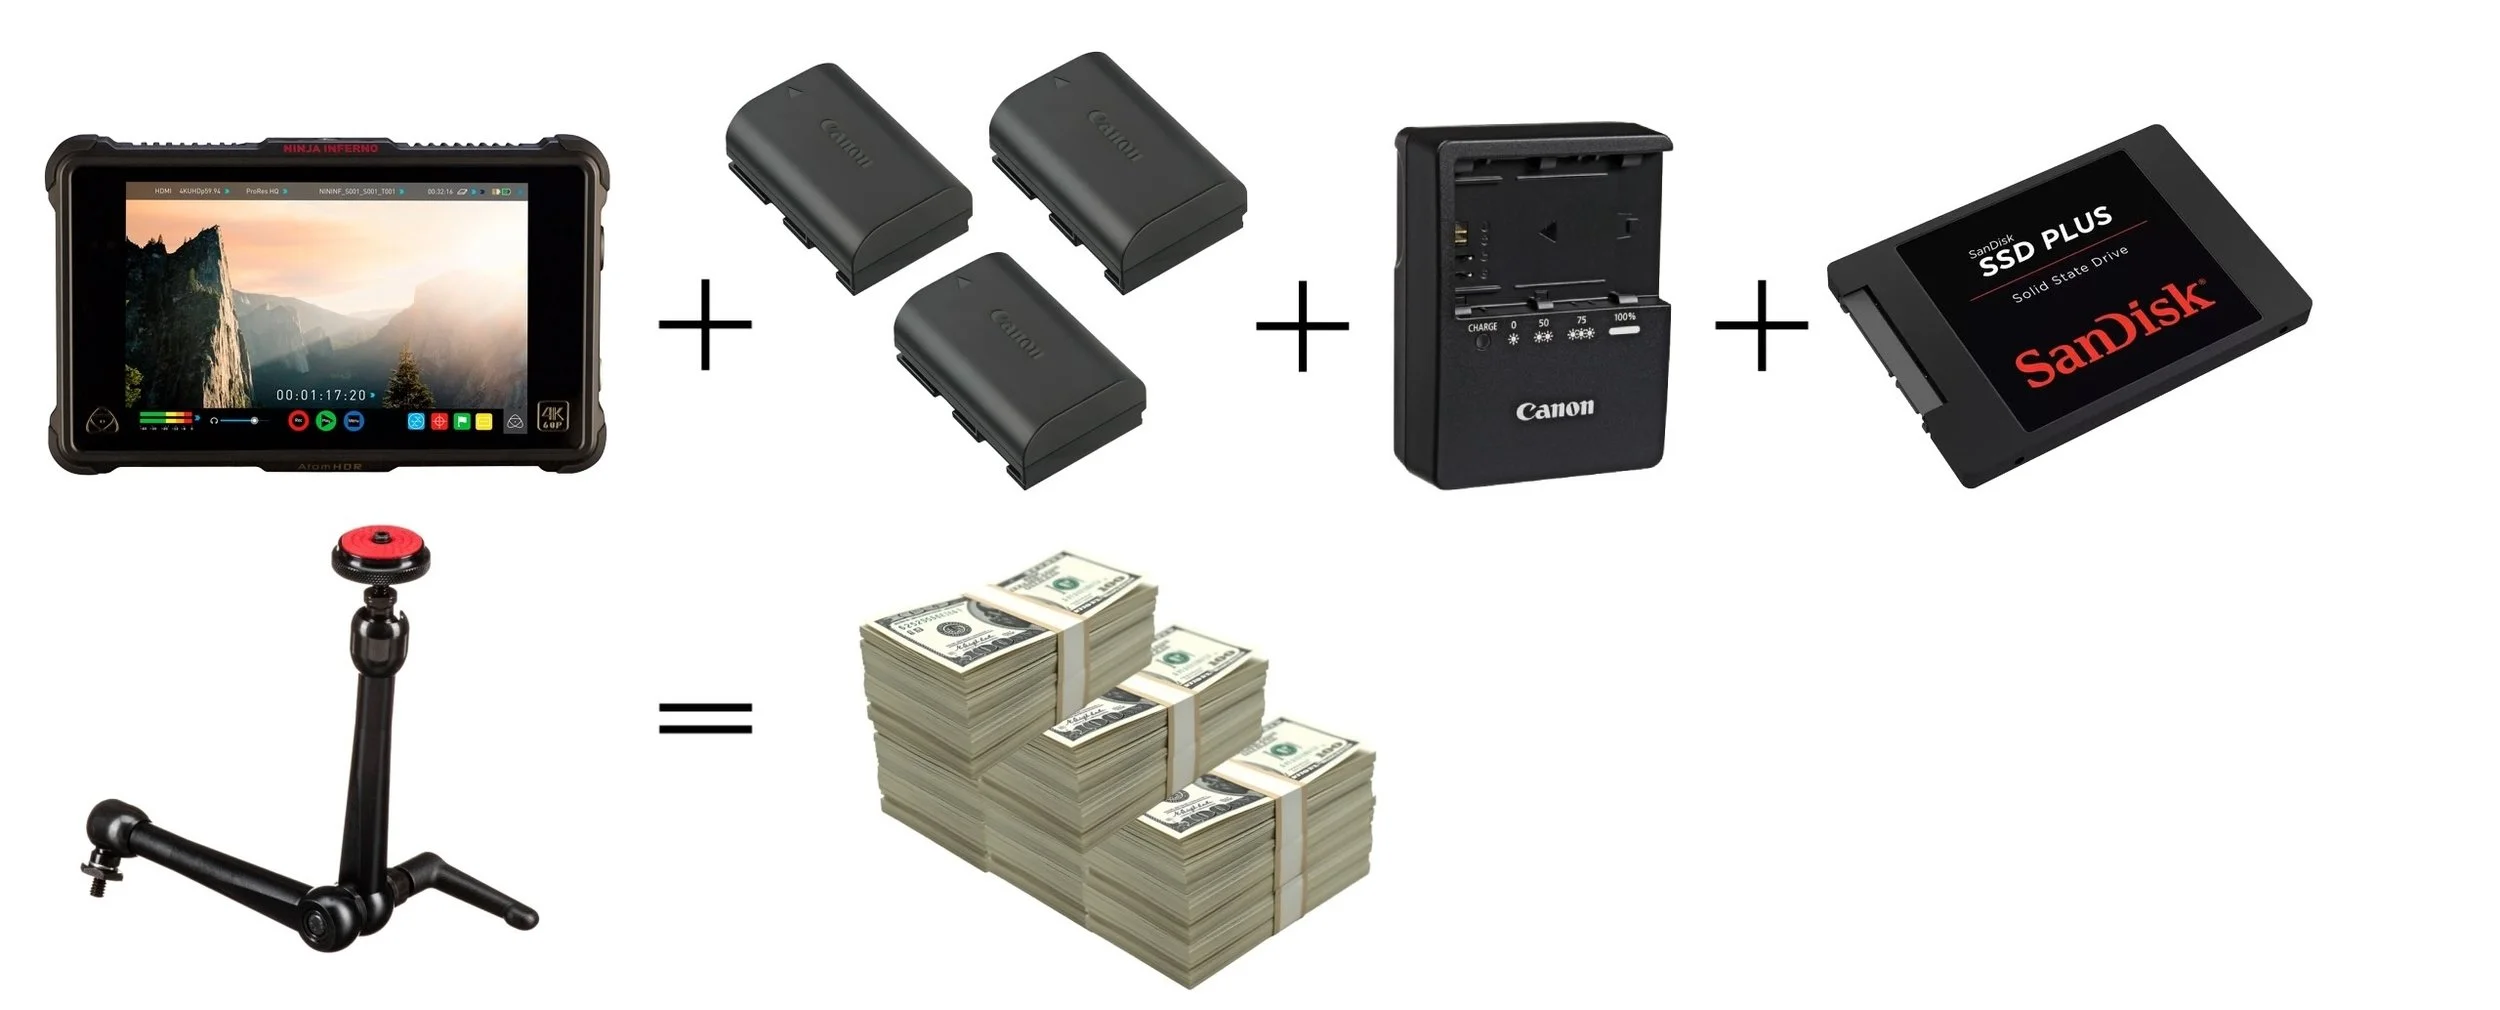
The requirements for an external RAW recorder. It all adds up.
Who is RAW For?

RAW is for filmmakers who require maximum flexibility in post and/or are working with a team of VFX editors. It’s also for photographers who need the extra flexibility while shooting in uncontrolled environments and artists who are working on high-end creative and commercial projects that are going to be displayed in a variety of viewing spaces such as buildings, billboards and museums.
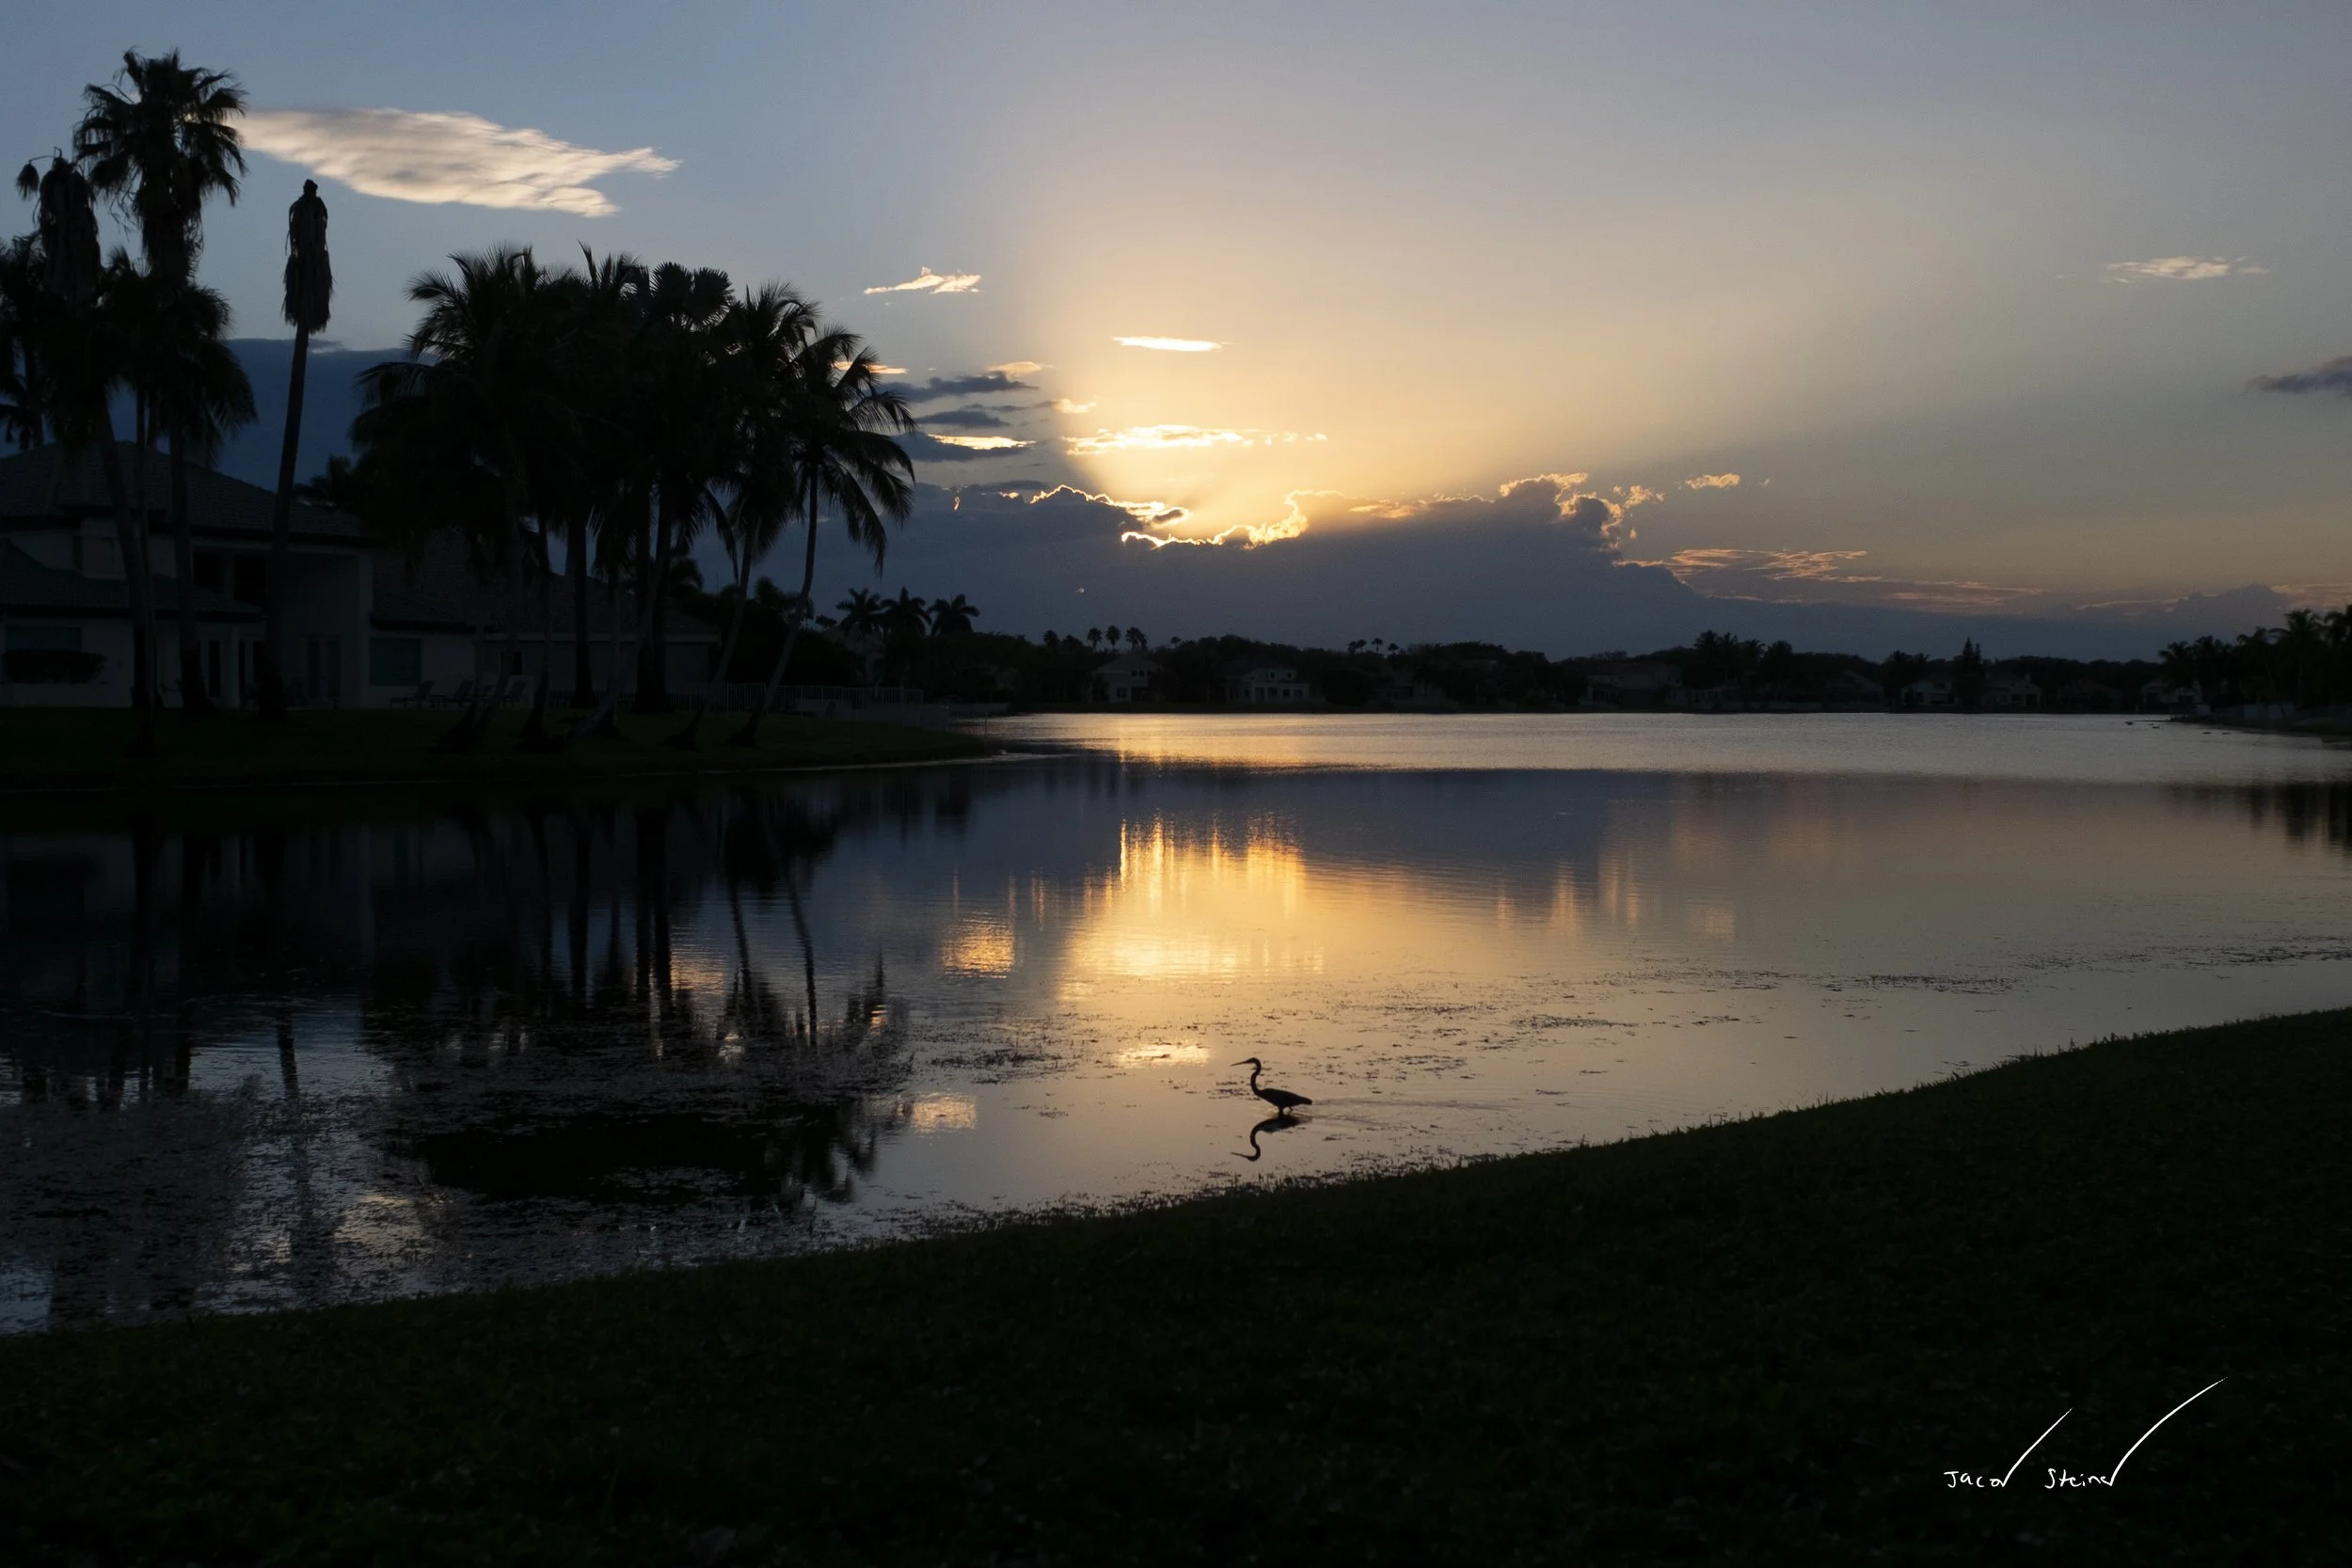
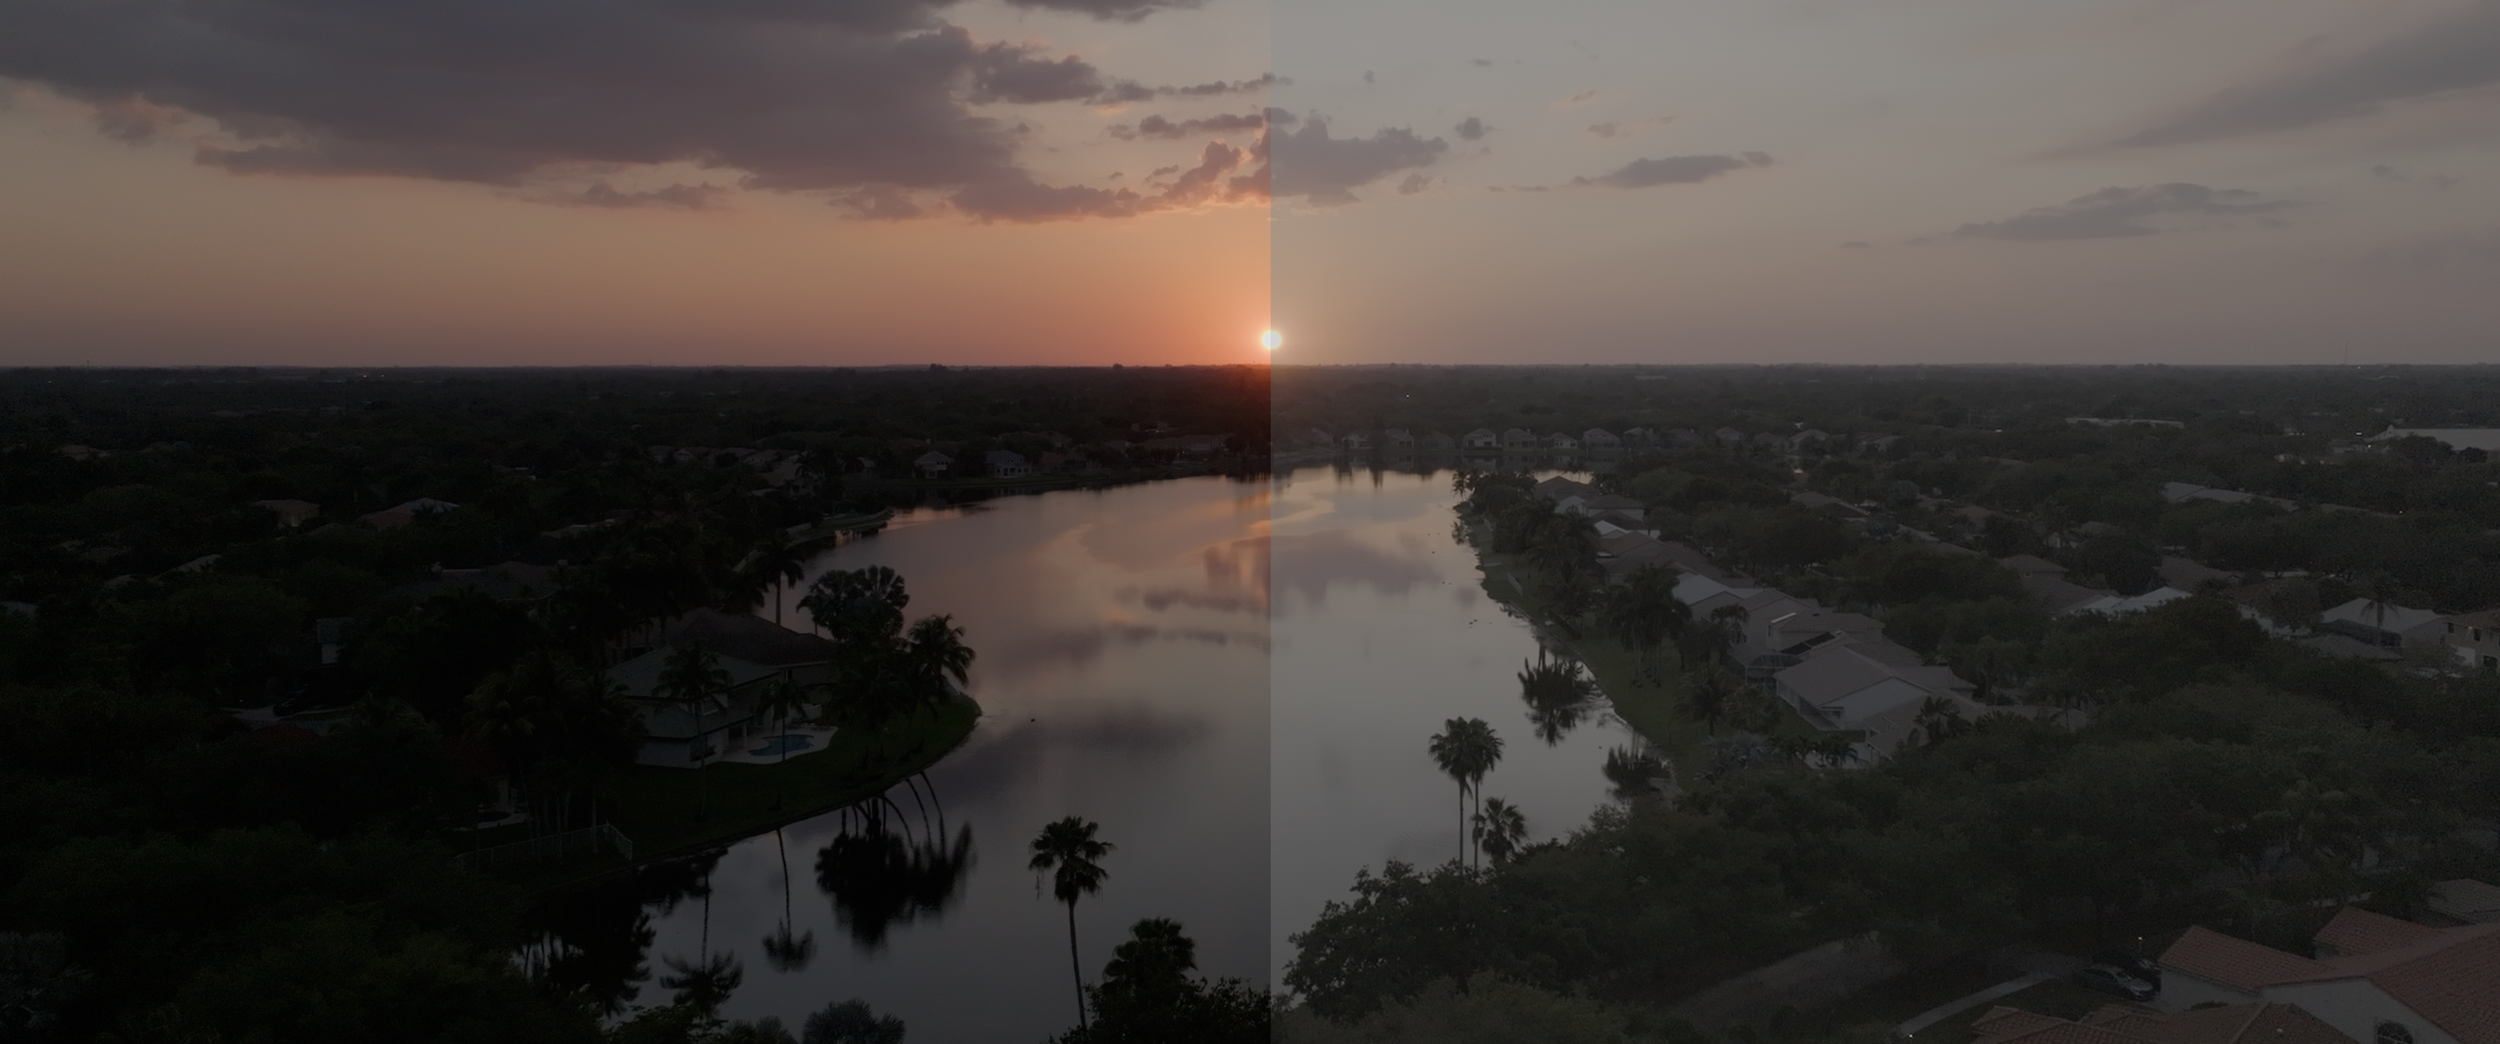
Shooting in 12-bit RAW helped me capture the subtle hues of the setting sun.
Camera: Fujifilm Xe1 I Lens: Nikon Nikkor-H 28mm I Year: 2022
Finally, it’s for those who have tons of drive space. RAW files (video or still) take up a lot of room on Hard Drives, which will cost you money in the long term.
In Conclusion
Source: Adobestock.com
While RAW is an amazing tool to have at one’s fingertips, it’s a feature that shouldn’t be used haphazardly and is not a substitute for proper camera operation. It exists to help the artist capture tones and colors that wouldn’t otherwise be able to have been captured in a linear, compressed format.
With that said, once you nail down the basics, and you’re ready to take your images to the next level, RAW is the way to go.
Creative Exposure
Exposure is a pretty common topic when it comes to still or motion cameras. I would say that the majority of the time, exposure is taught in a very rigid manner; aka the camera must be properly exposed, and there’s no room for creative interpretation. In recent years, the technique that’s being taught to reach said “proper exposure” is expose to the right, left and or middle. Each method acts as a means to negate certain negative effects of digital cameras. If you expose to the left, you protect your highlights from clipping, but if you expose the right, your image will have cleaner shadows. And if you expose to the middle, this is deemed “proper exposure.“

Funnily enough, this “technical” approach, while it seems savvy, is rather surface-level and simplistic at its core. Instead of a plethora of exposure possibilities, the photographer or cinematographer is relegated to three exposure options as they wing the shutter speed dial or aperture wheel to one side or the other to fit into one of them. This is like three separate bakers. One throwing a bunch of sugar into a cake without measuring it and then another baker throwing a bunch of salt into a cake without measuring it. The final one throws in a little bit of both with no measurements either. I find this approach rather unimpressive, and to be flying by the seat of one’s pants.
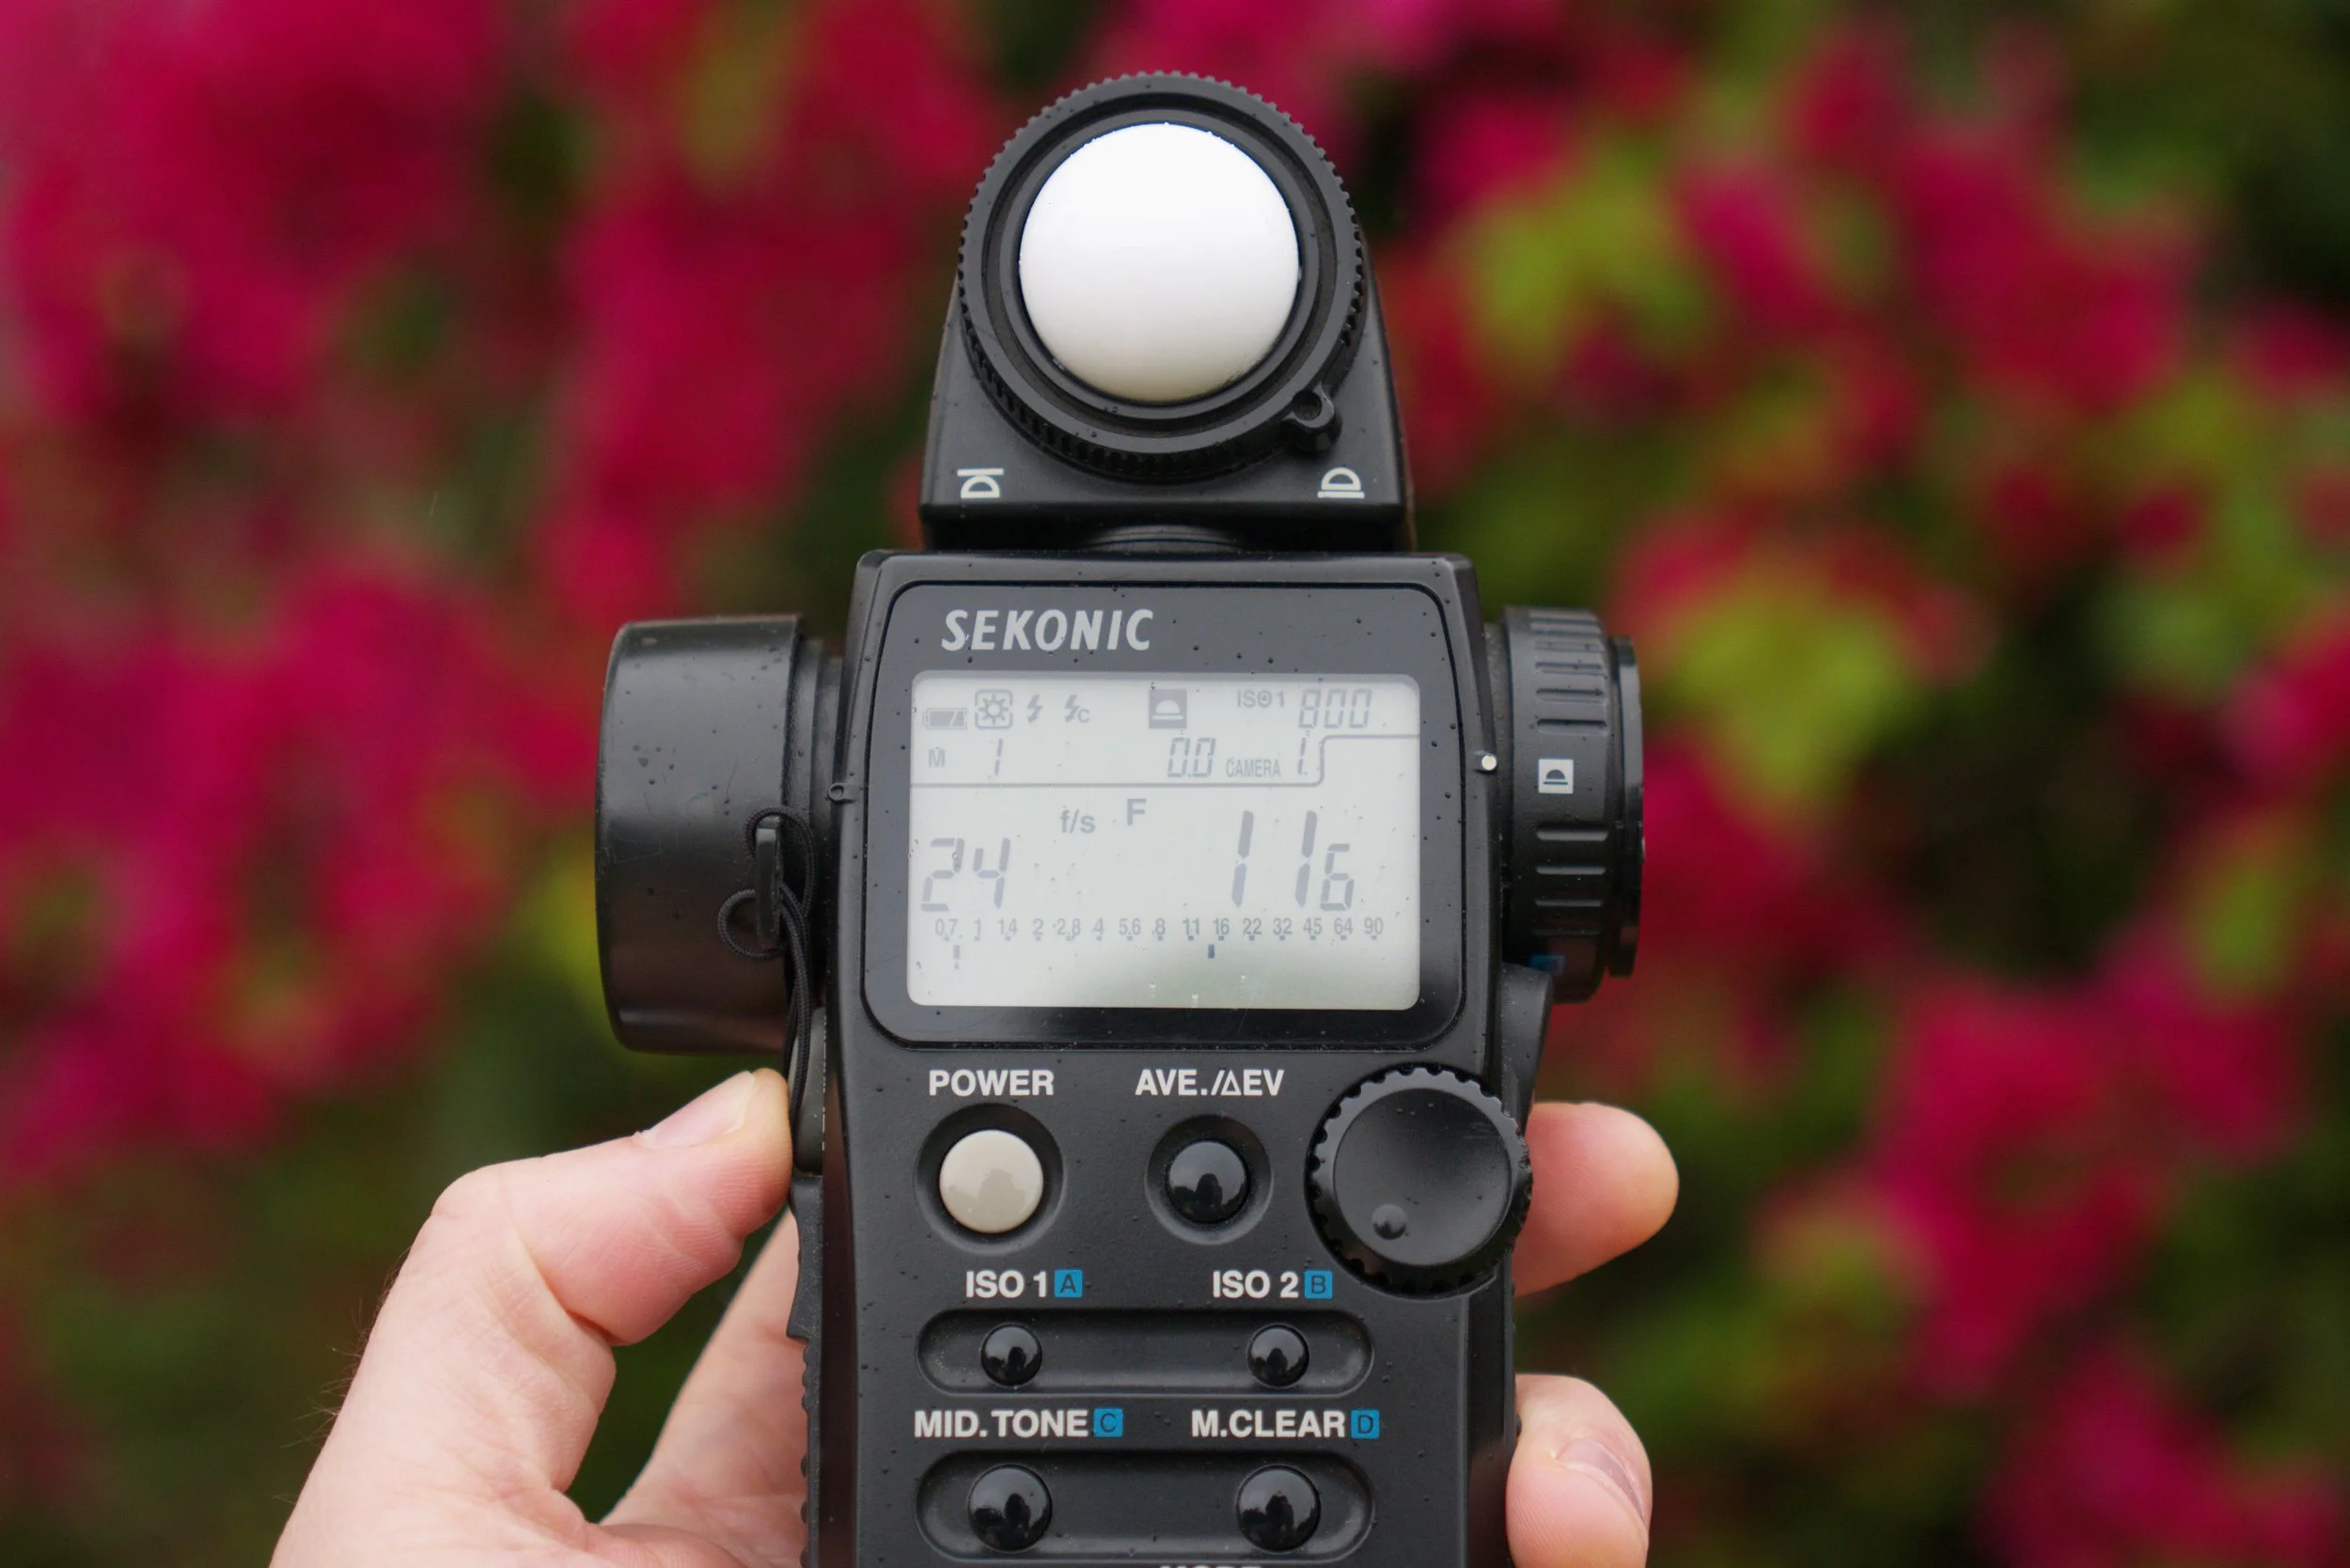
This is where creative exposure comes in to save the day; a method that allows the cinematographer way more technical control over every part of the image by exposing the camera in repeatable mathematical increments rather than broad strokes. The meter can read light in whole, half-stop increments and more, providing the freedom to choose exposure options that can be recorded down and repeated like a recipe.
The exposure you choose is to aid the story you are telling rather than fitting a mold. For example, let’s say that I’m photographing foliage in a green field, and I want the image to look lush because that’s the story. Well… I would expose at 18% middle gray, otherwise known as a balanced, neural exposure.
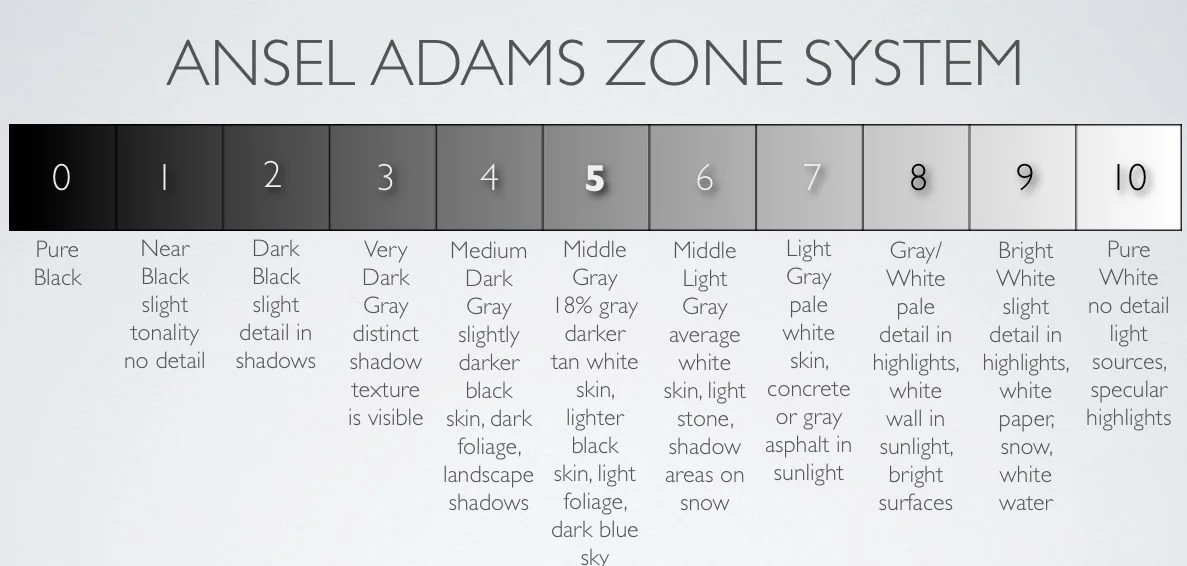
Source: Speckund.com
Without an in-depth explanation, just know than light meters are calibrated to always reach 18% middle gray, and if the number on your lens matches up with the number on the meter, this equals middle of the road exposure. In this case, I exposed 1/2 a stop over 18% middle gray because I wanted to see into my shadows a tad more, something that I wouldn’t be able to do in the expose the left, right and center system.
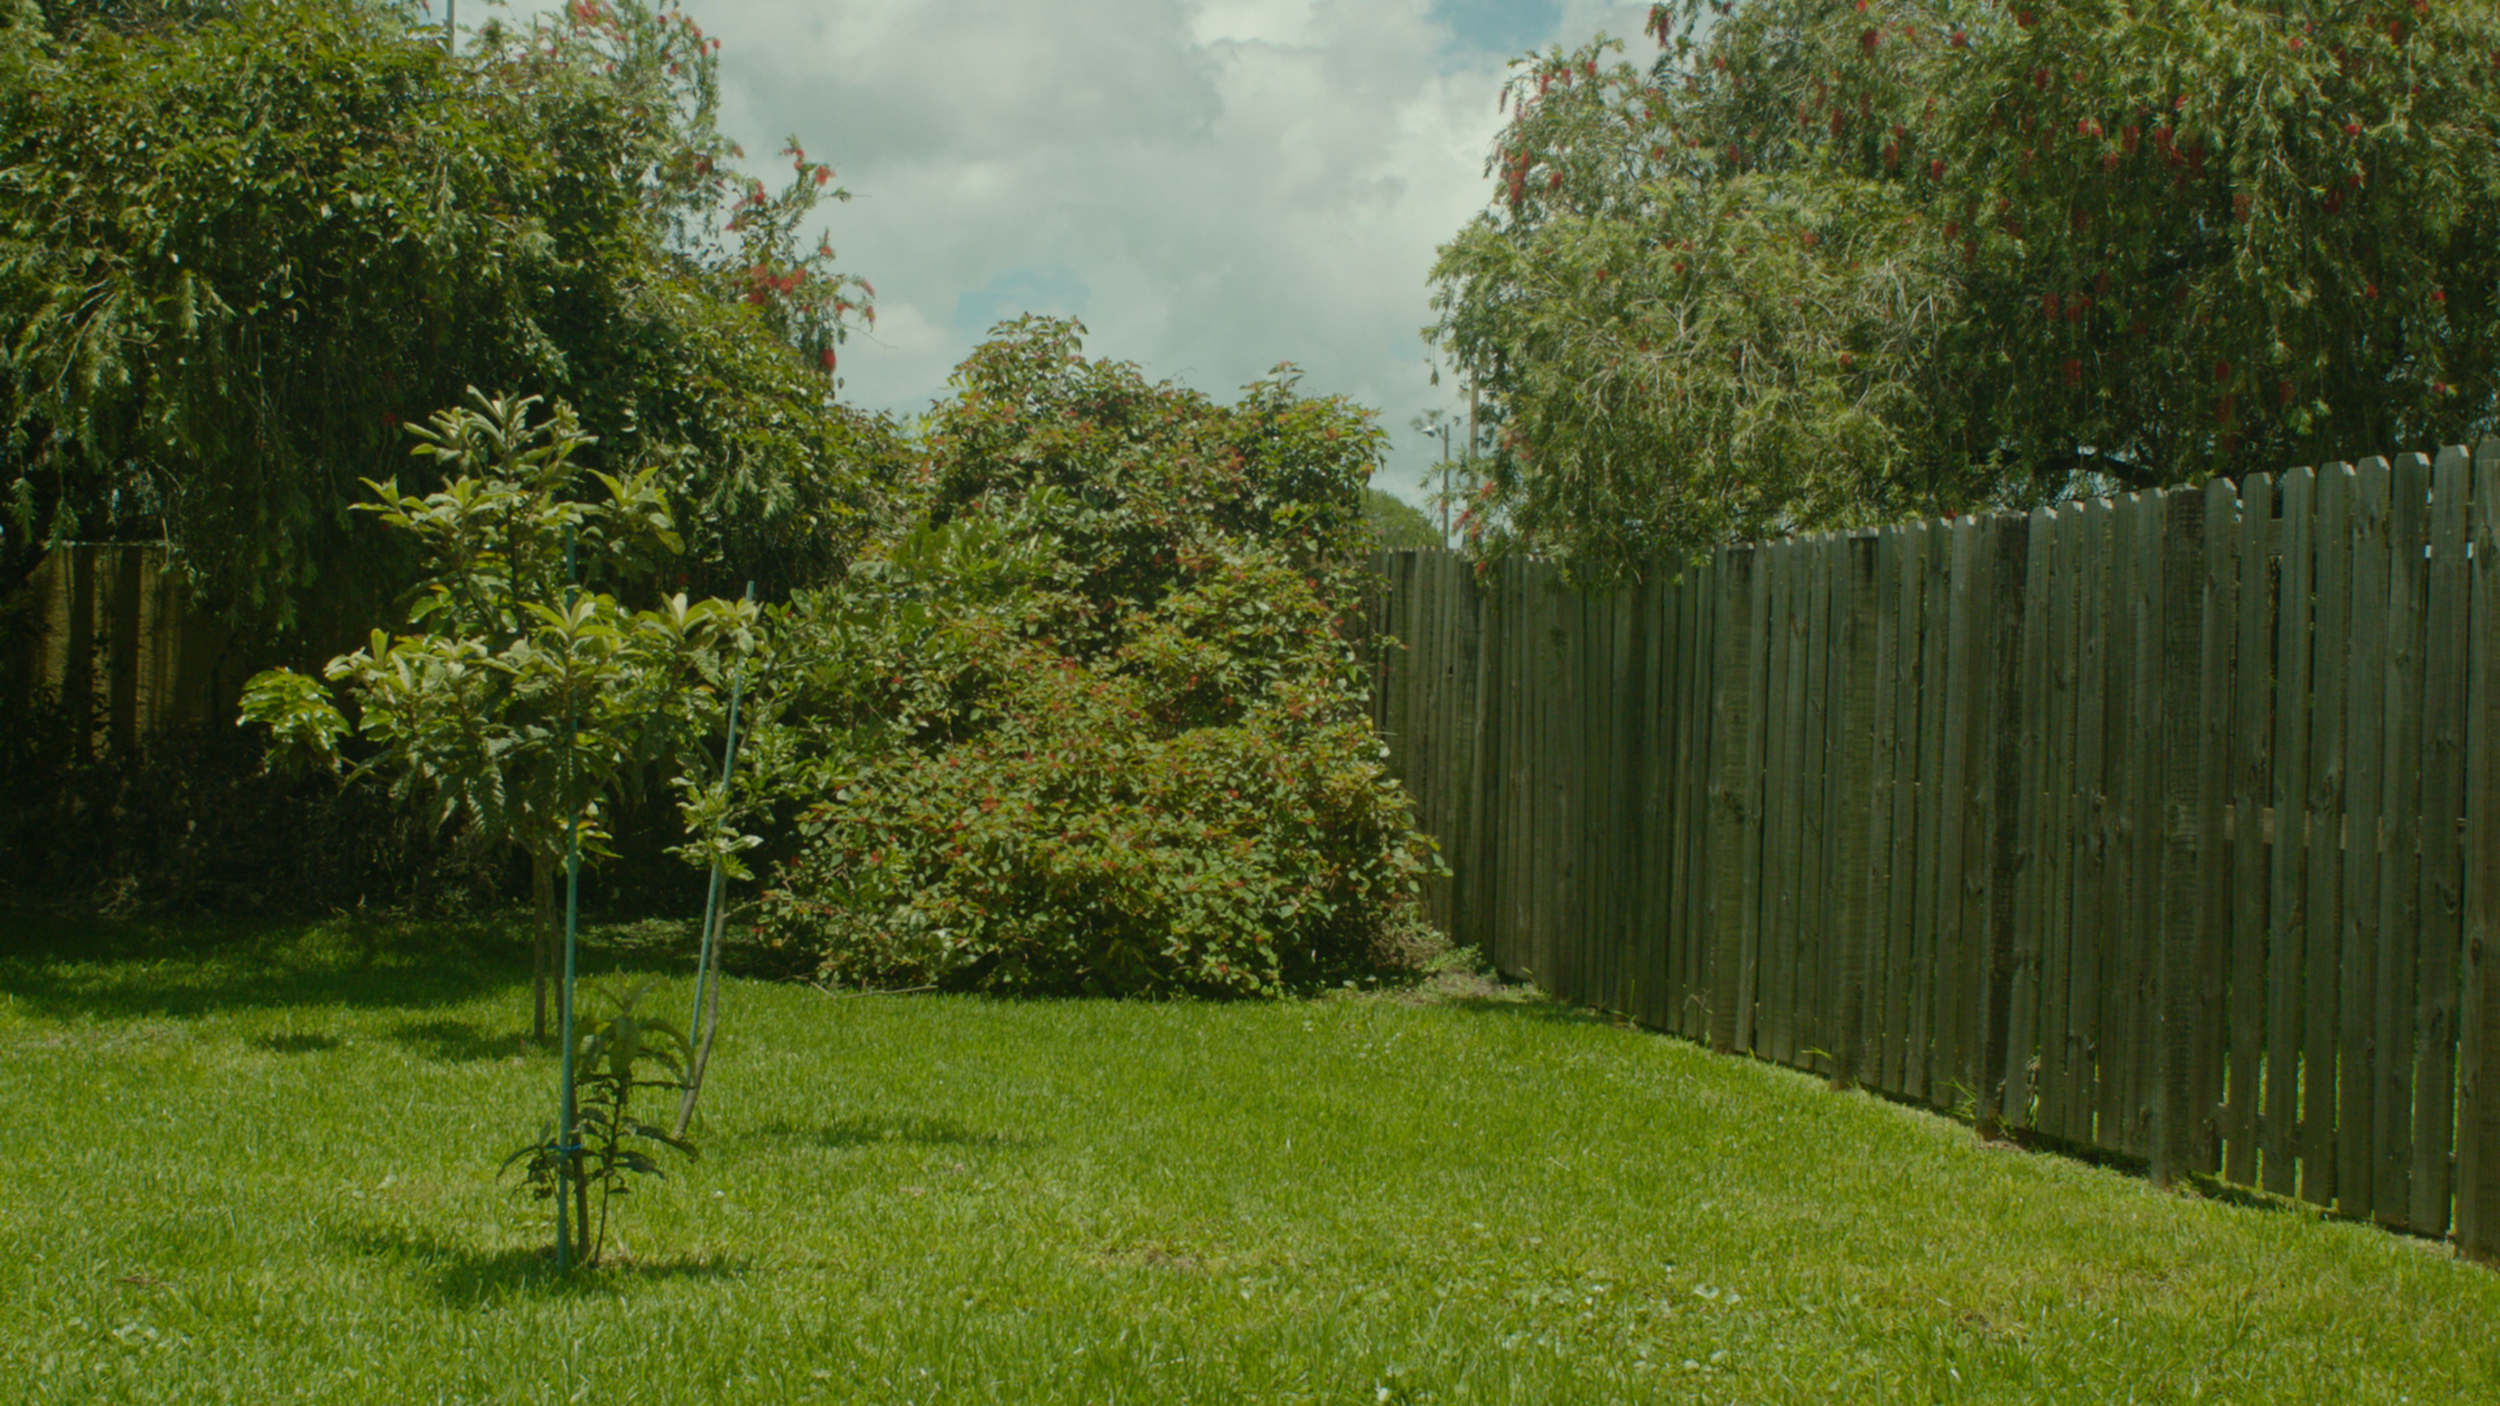
The meter read at an f11, and I shot at an 8/11 split.
Let’s say I took that same scene, and I wanted to make it look dried out and dusty. Well, I could over expose the image by 2 stops, and the image would definitely look hot and dry.
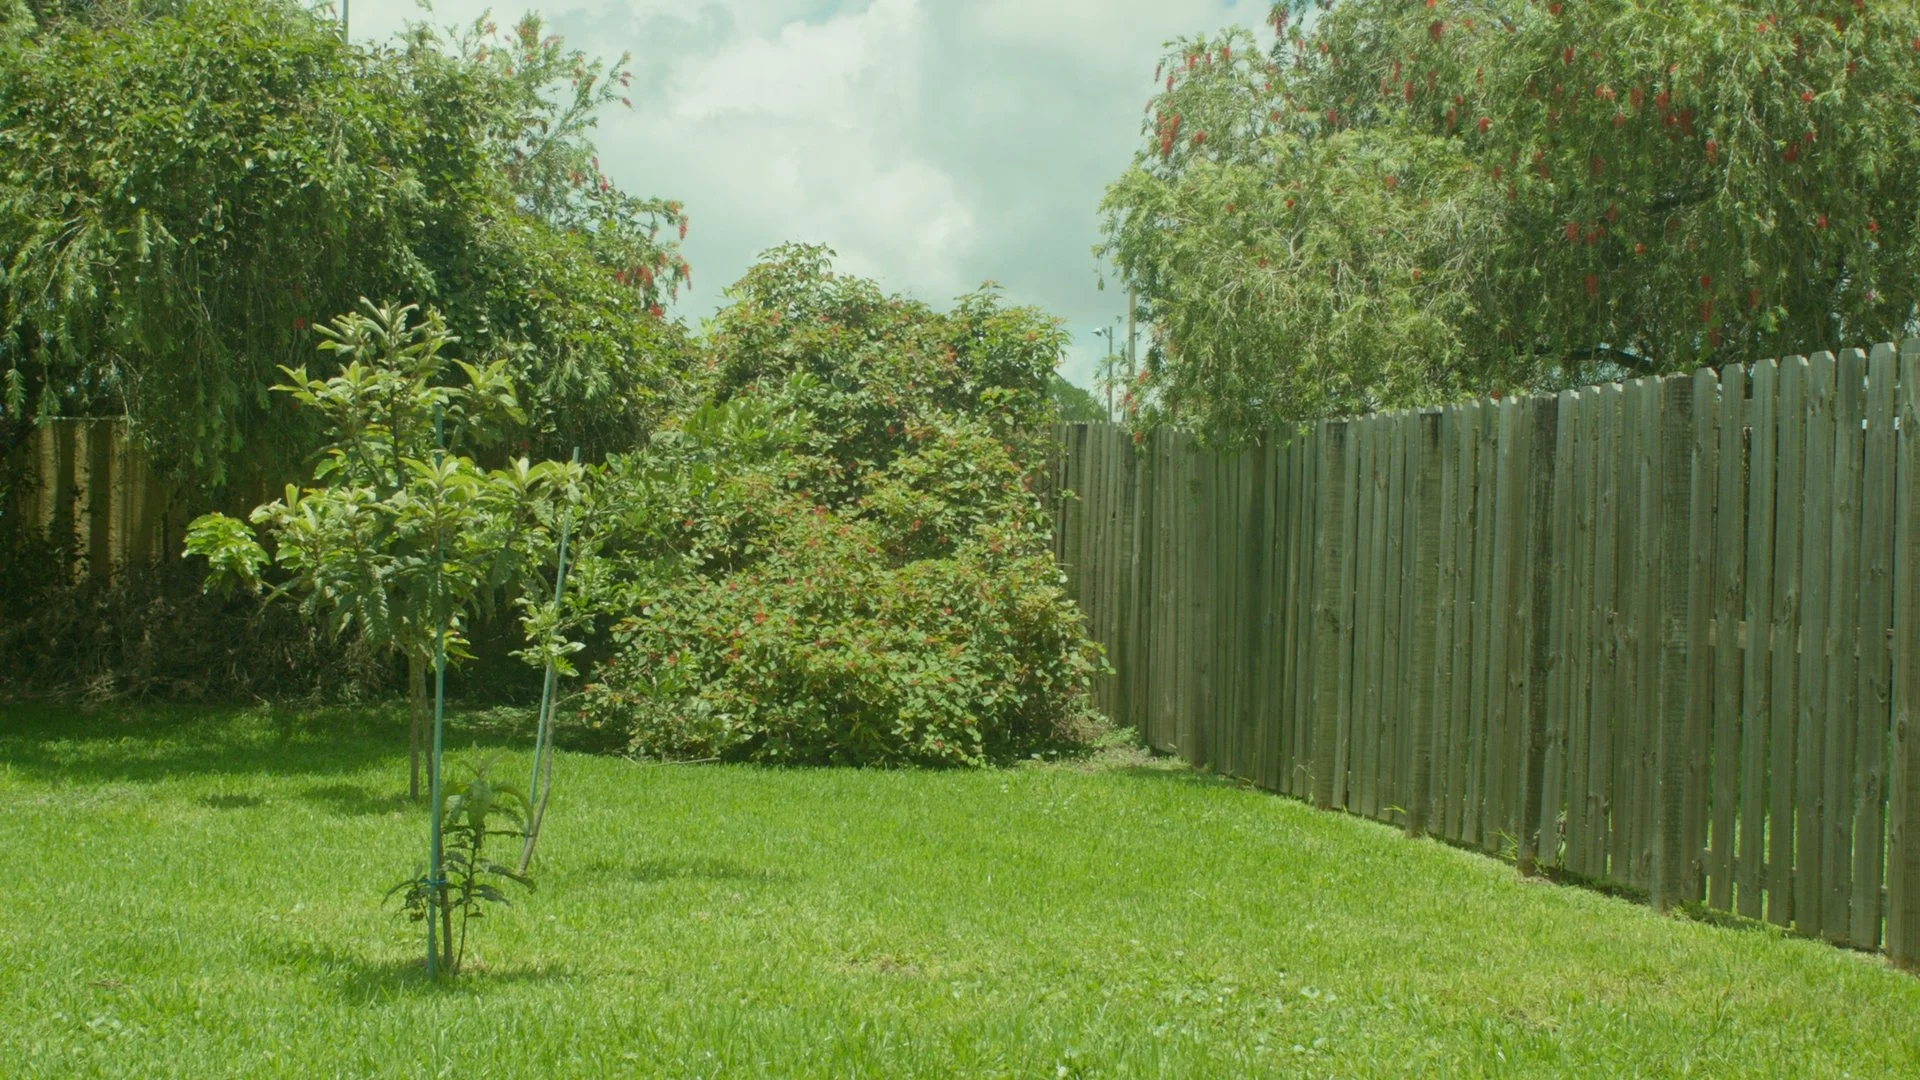
My ND 0.6 was swapped for an ND 0.3, and the meter read at an f11.
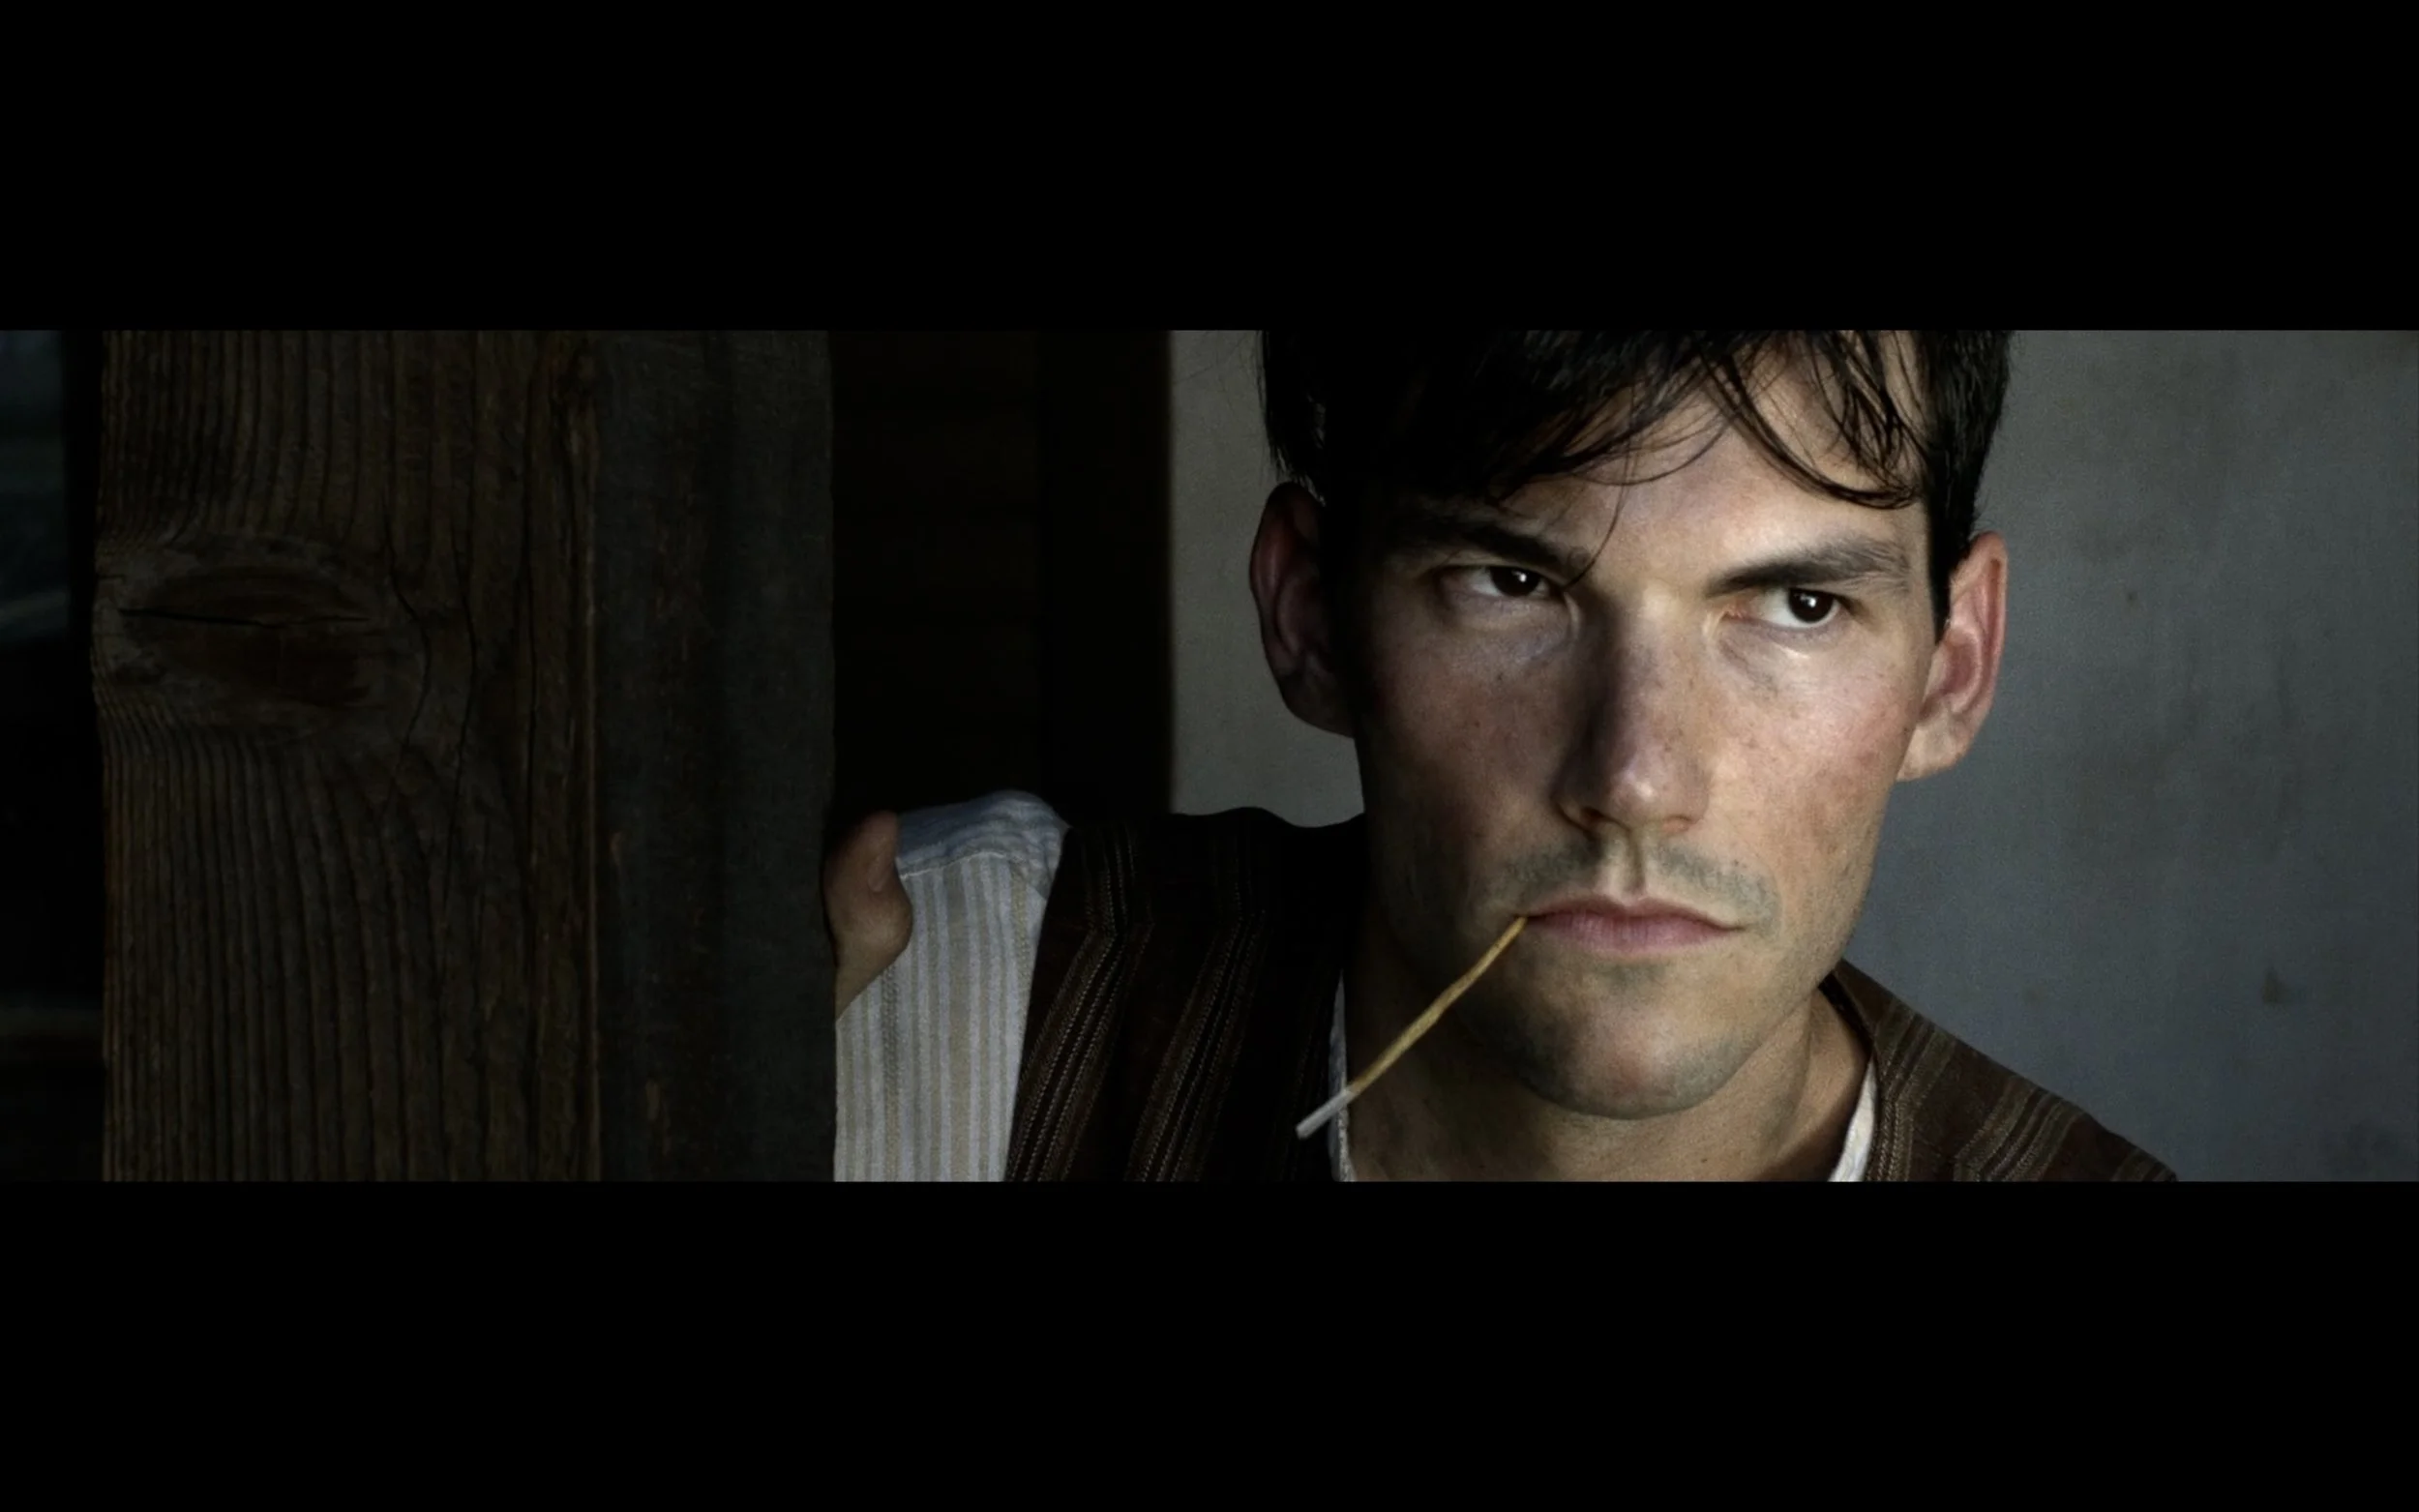
To further drive the point home, here’s another example of what I just showed you but from the movies “Hostiles” and “True Grit”.
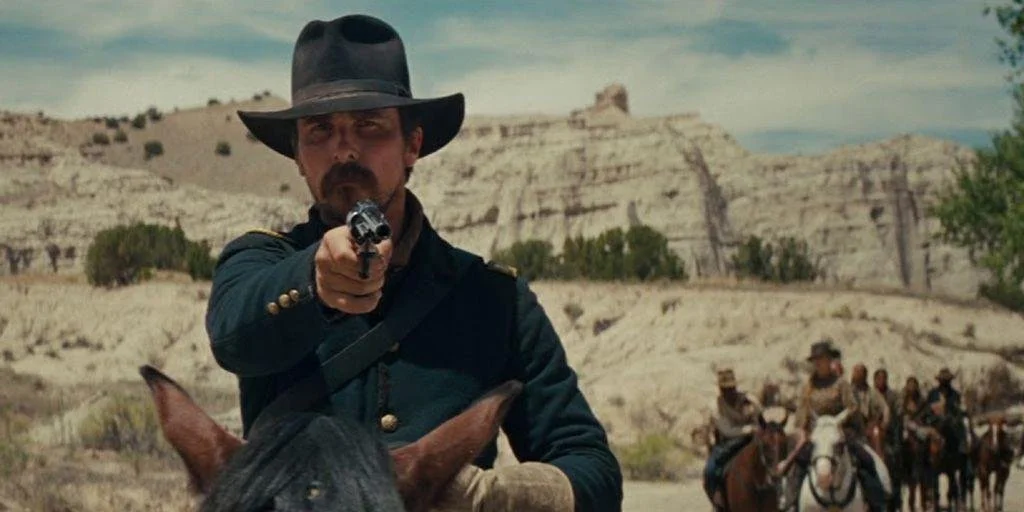
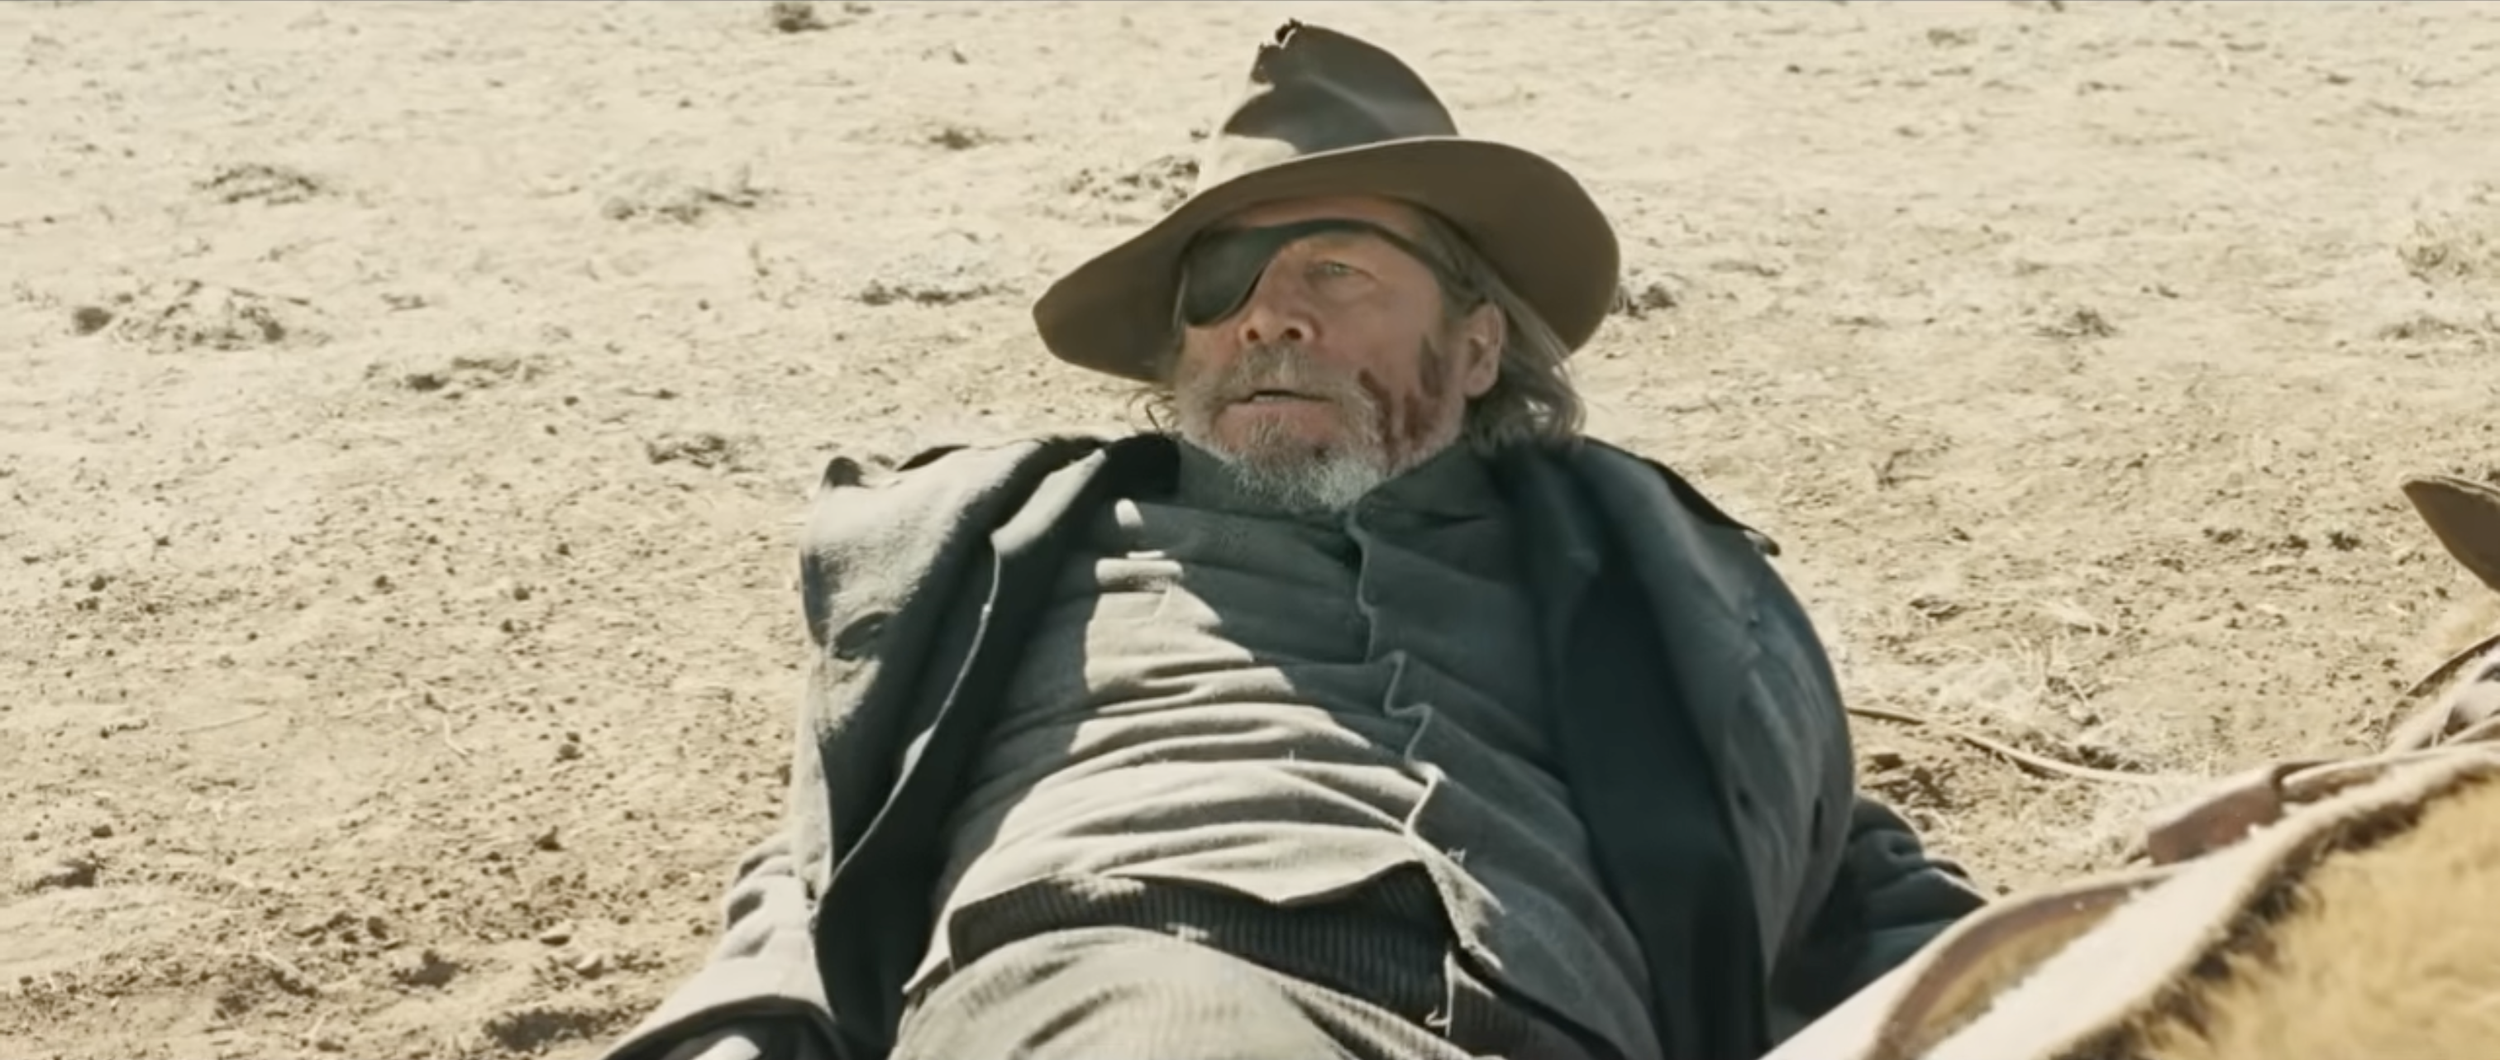
As you can see, these are two separate movies with very similar backgrounds, yet each is exposed differently. One is close to 18 percent middle gray, and the other looks to be over exposed by about one and a half to two stops.
This is the power of creative exposure. You can have the same scene, expose it multiple ways, and each will tell the viewer a different story.

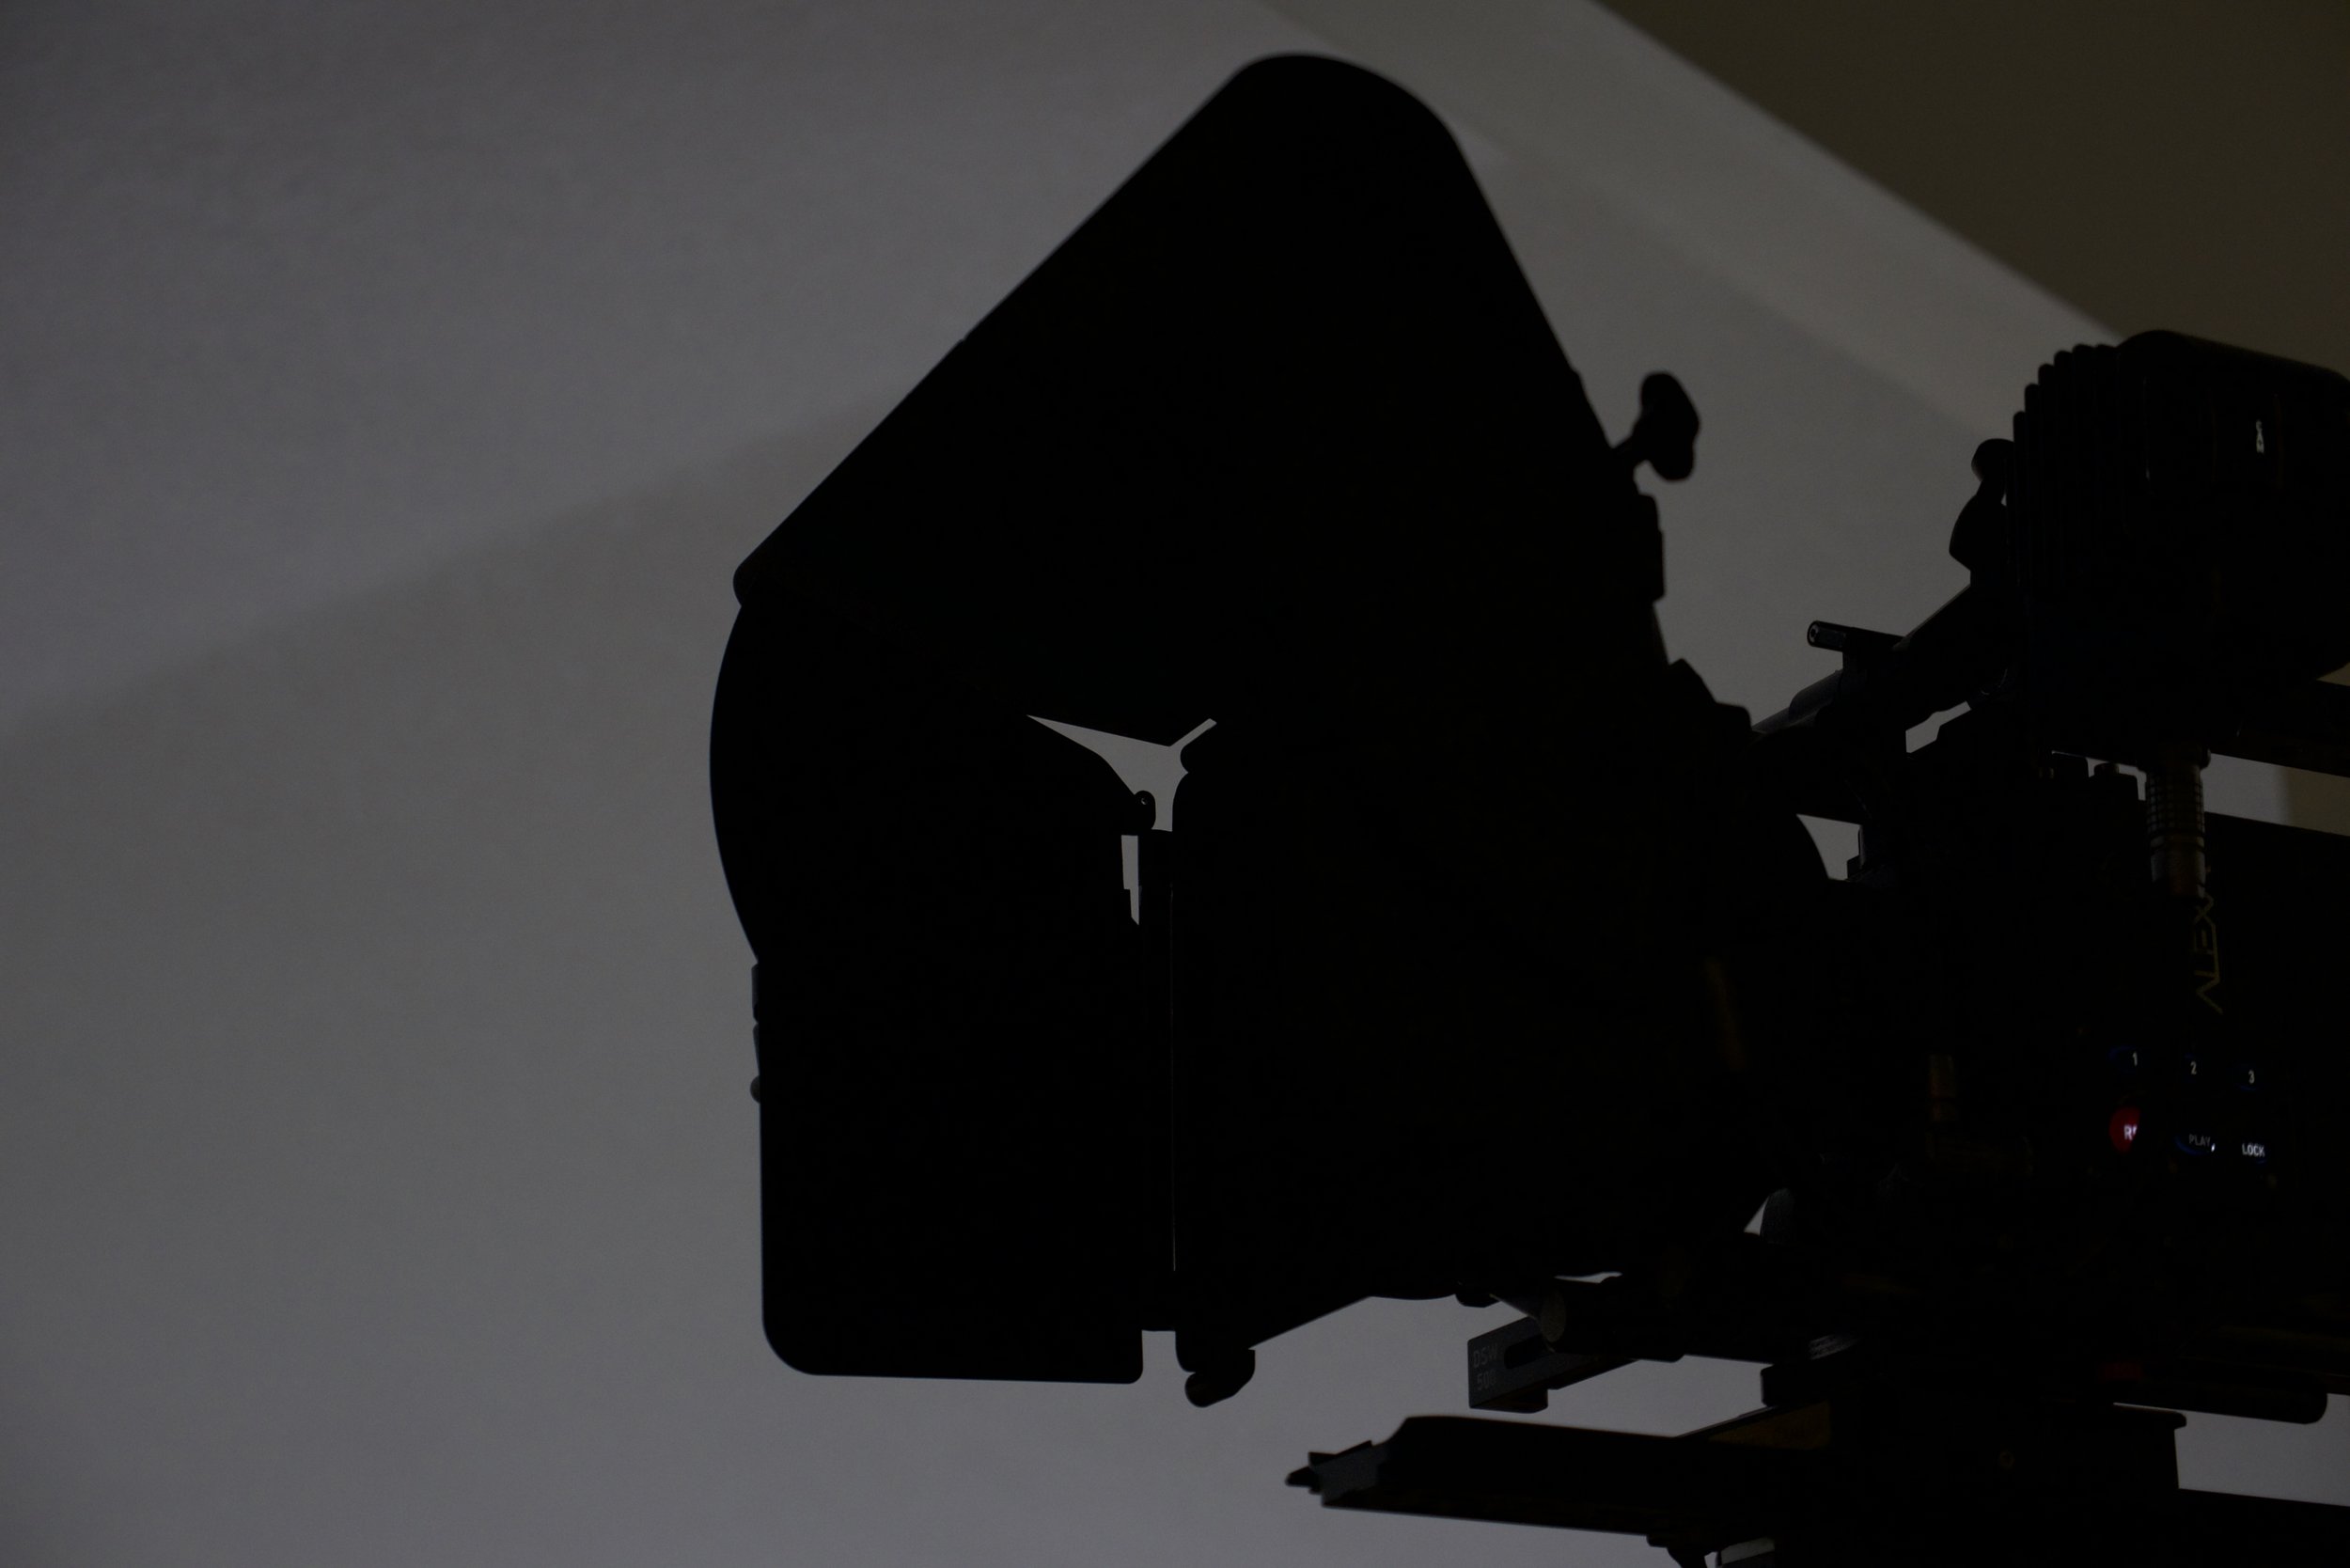
What is a Matte Box?
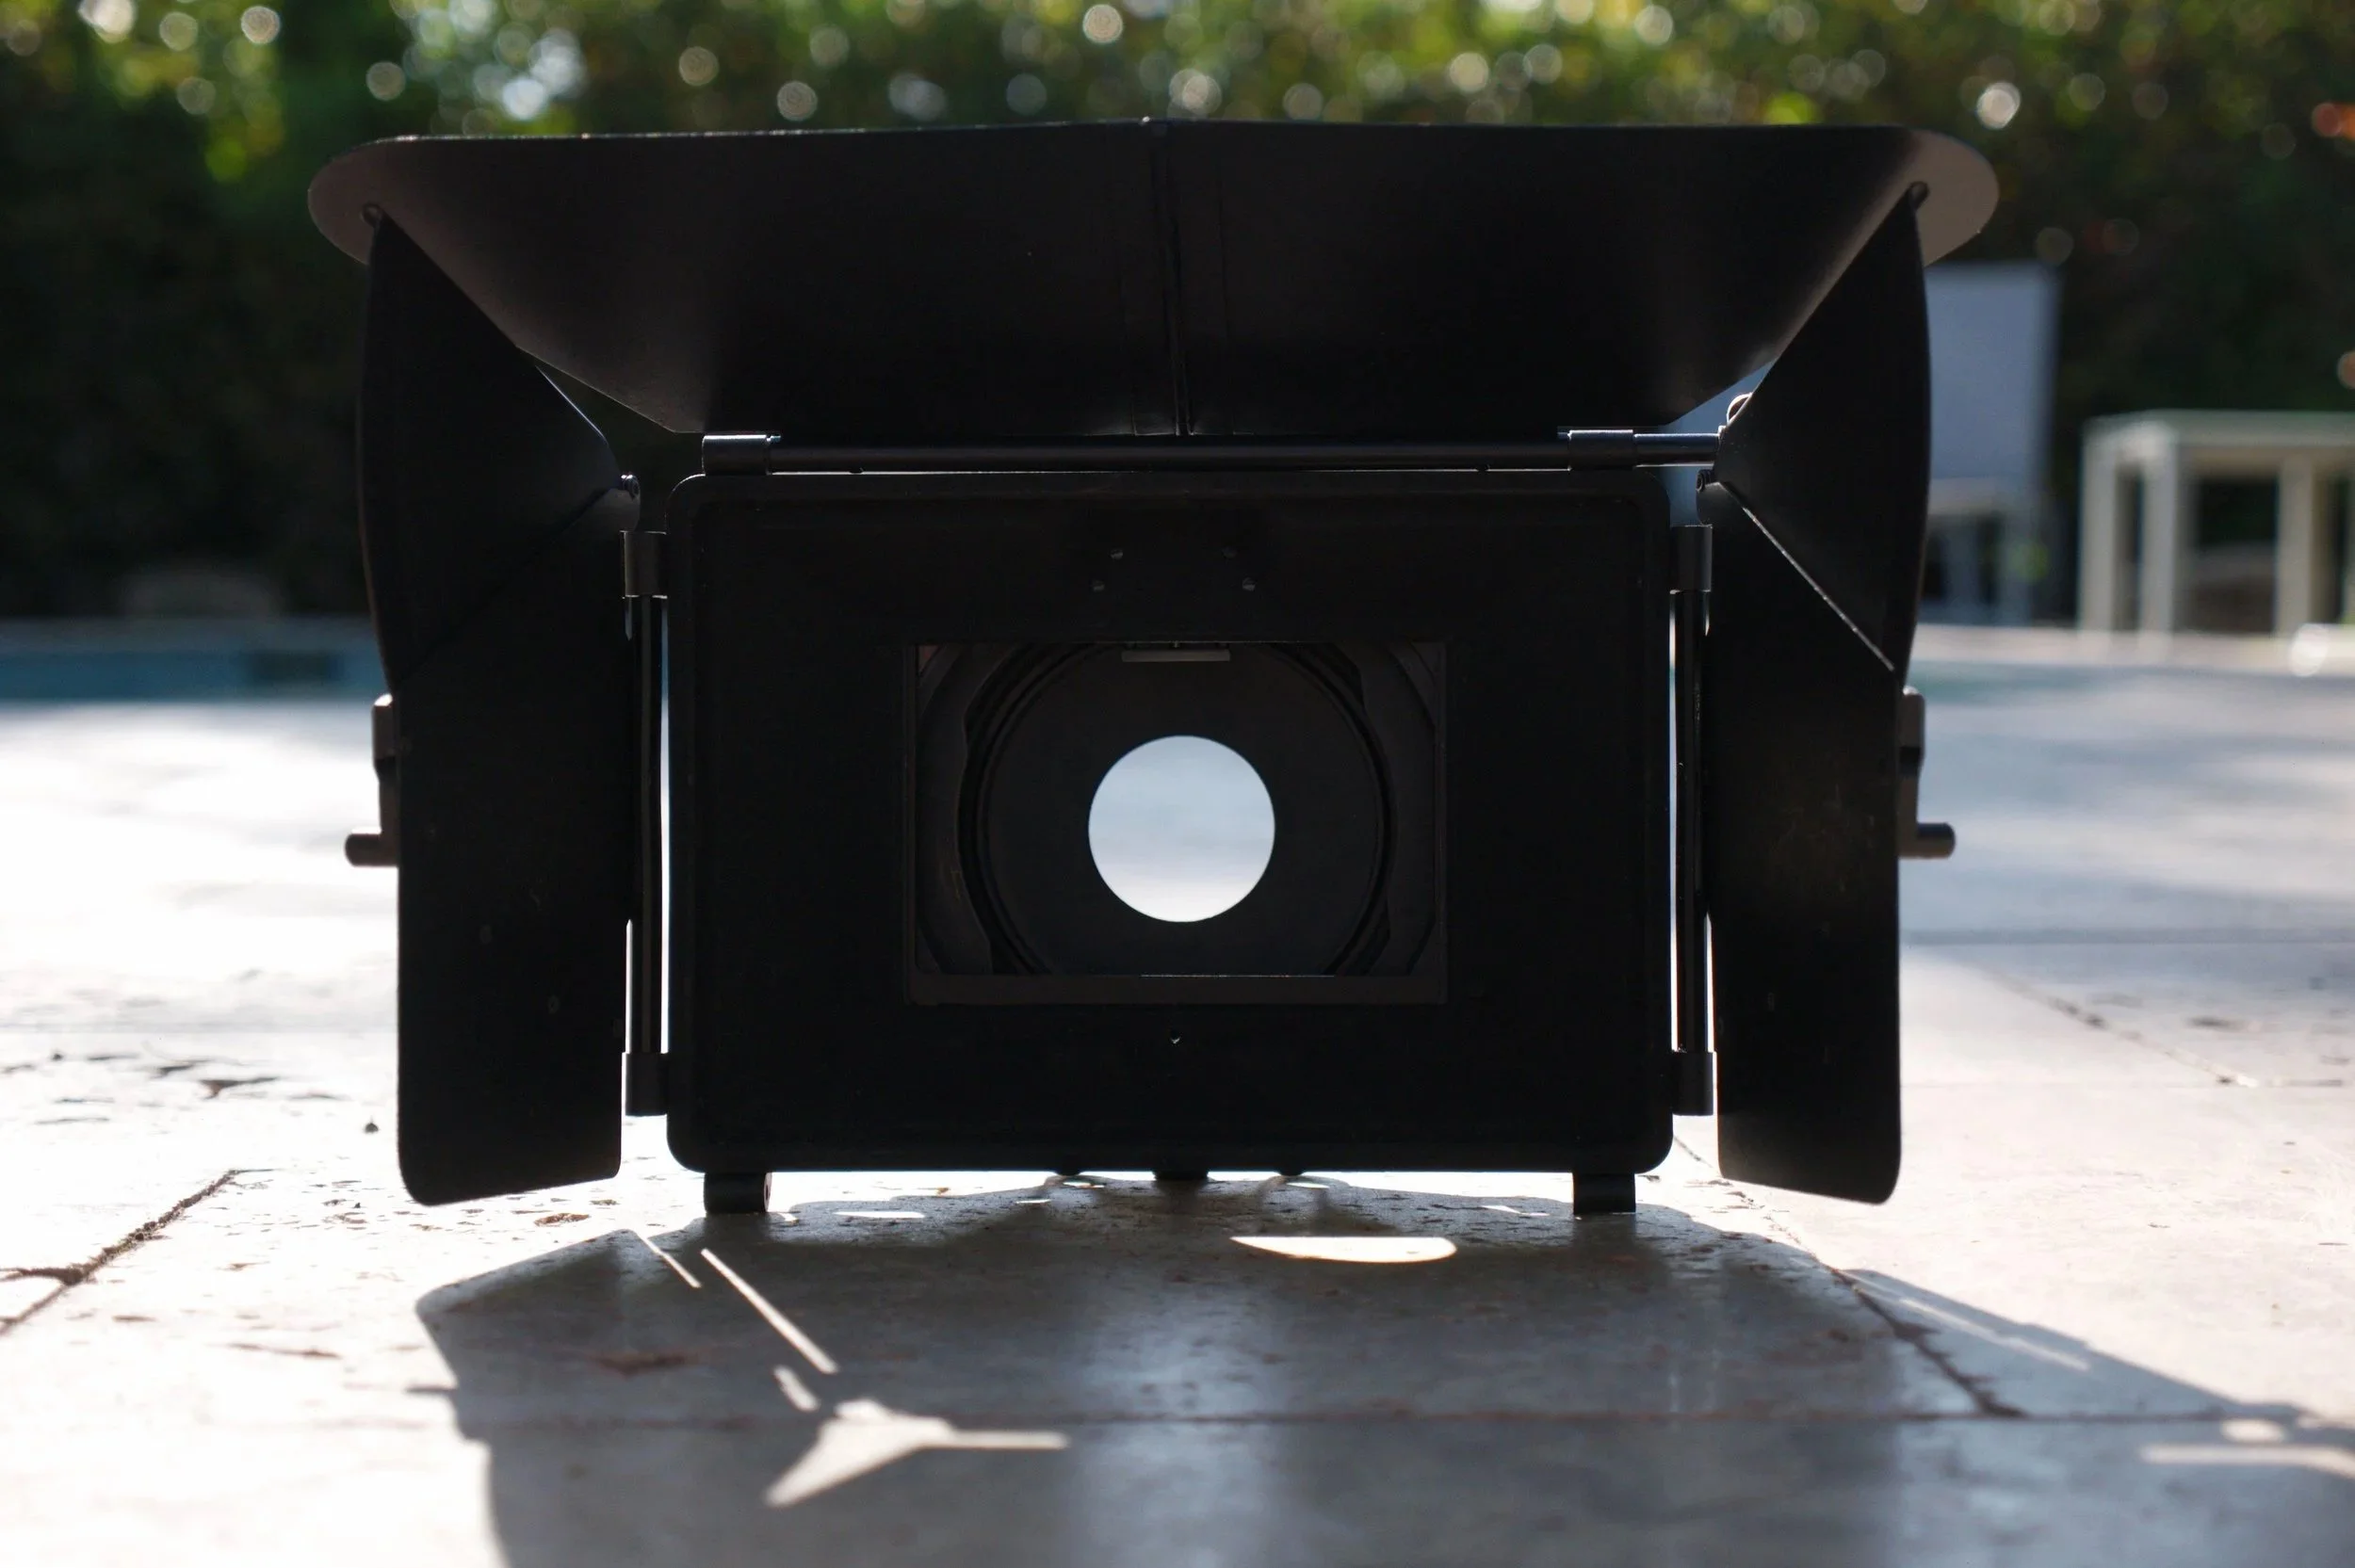
This essential piece of kit is a multifunctional necessity. It is a handgrip for long handheld shots, a filter holder and a shade to protect your lens from stray beams of light.
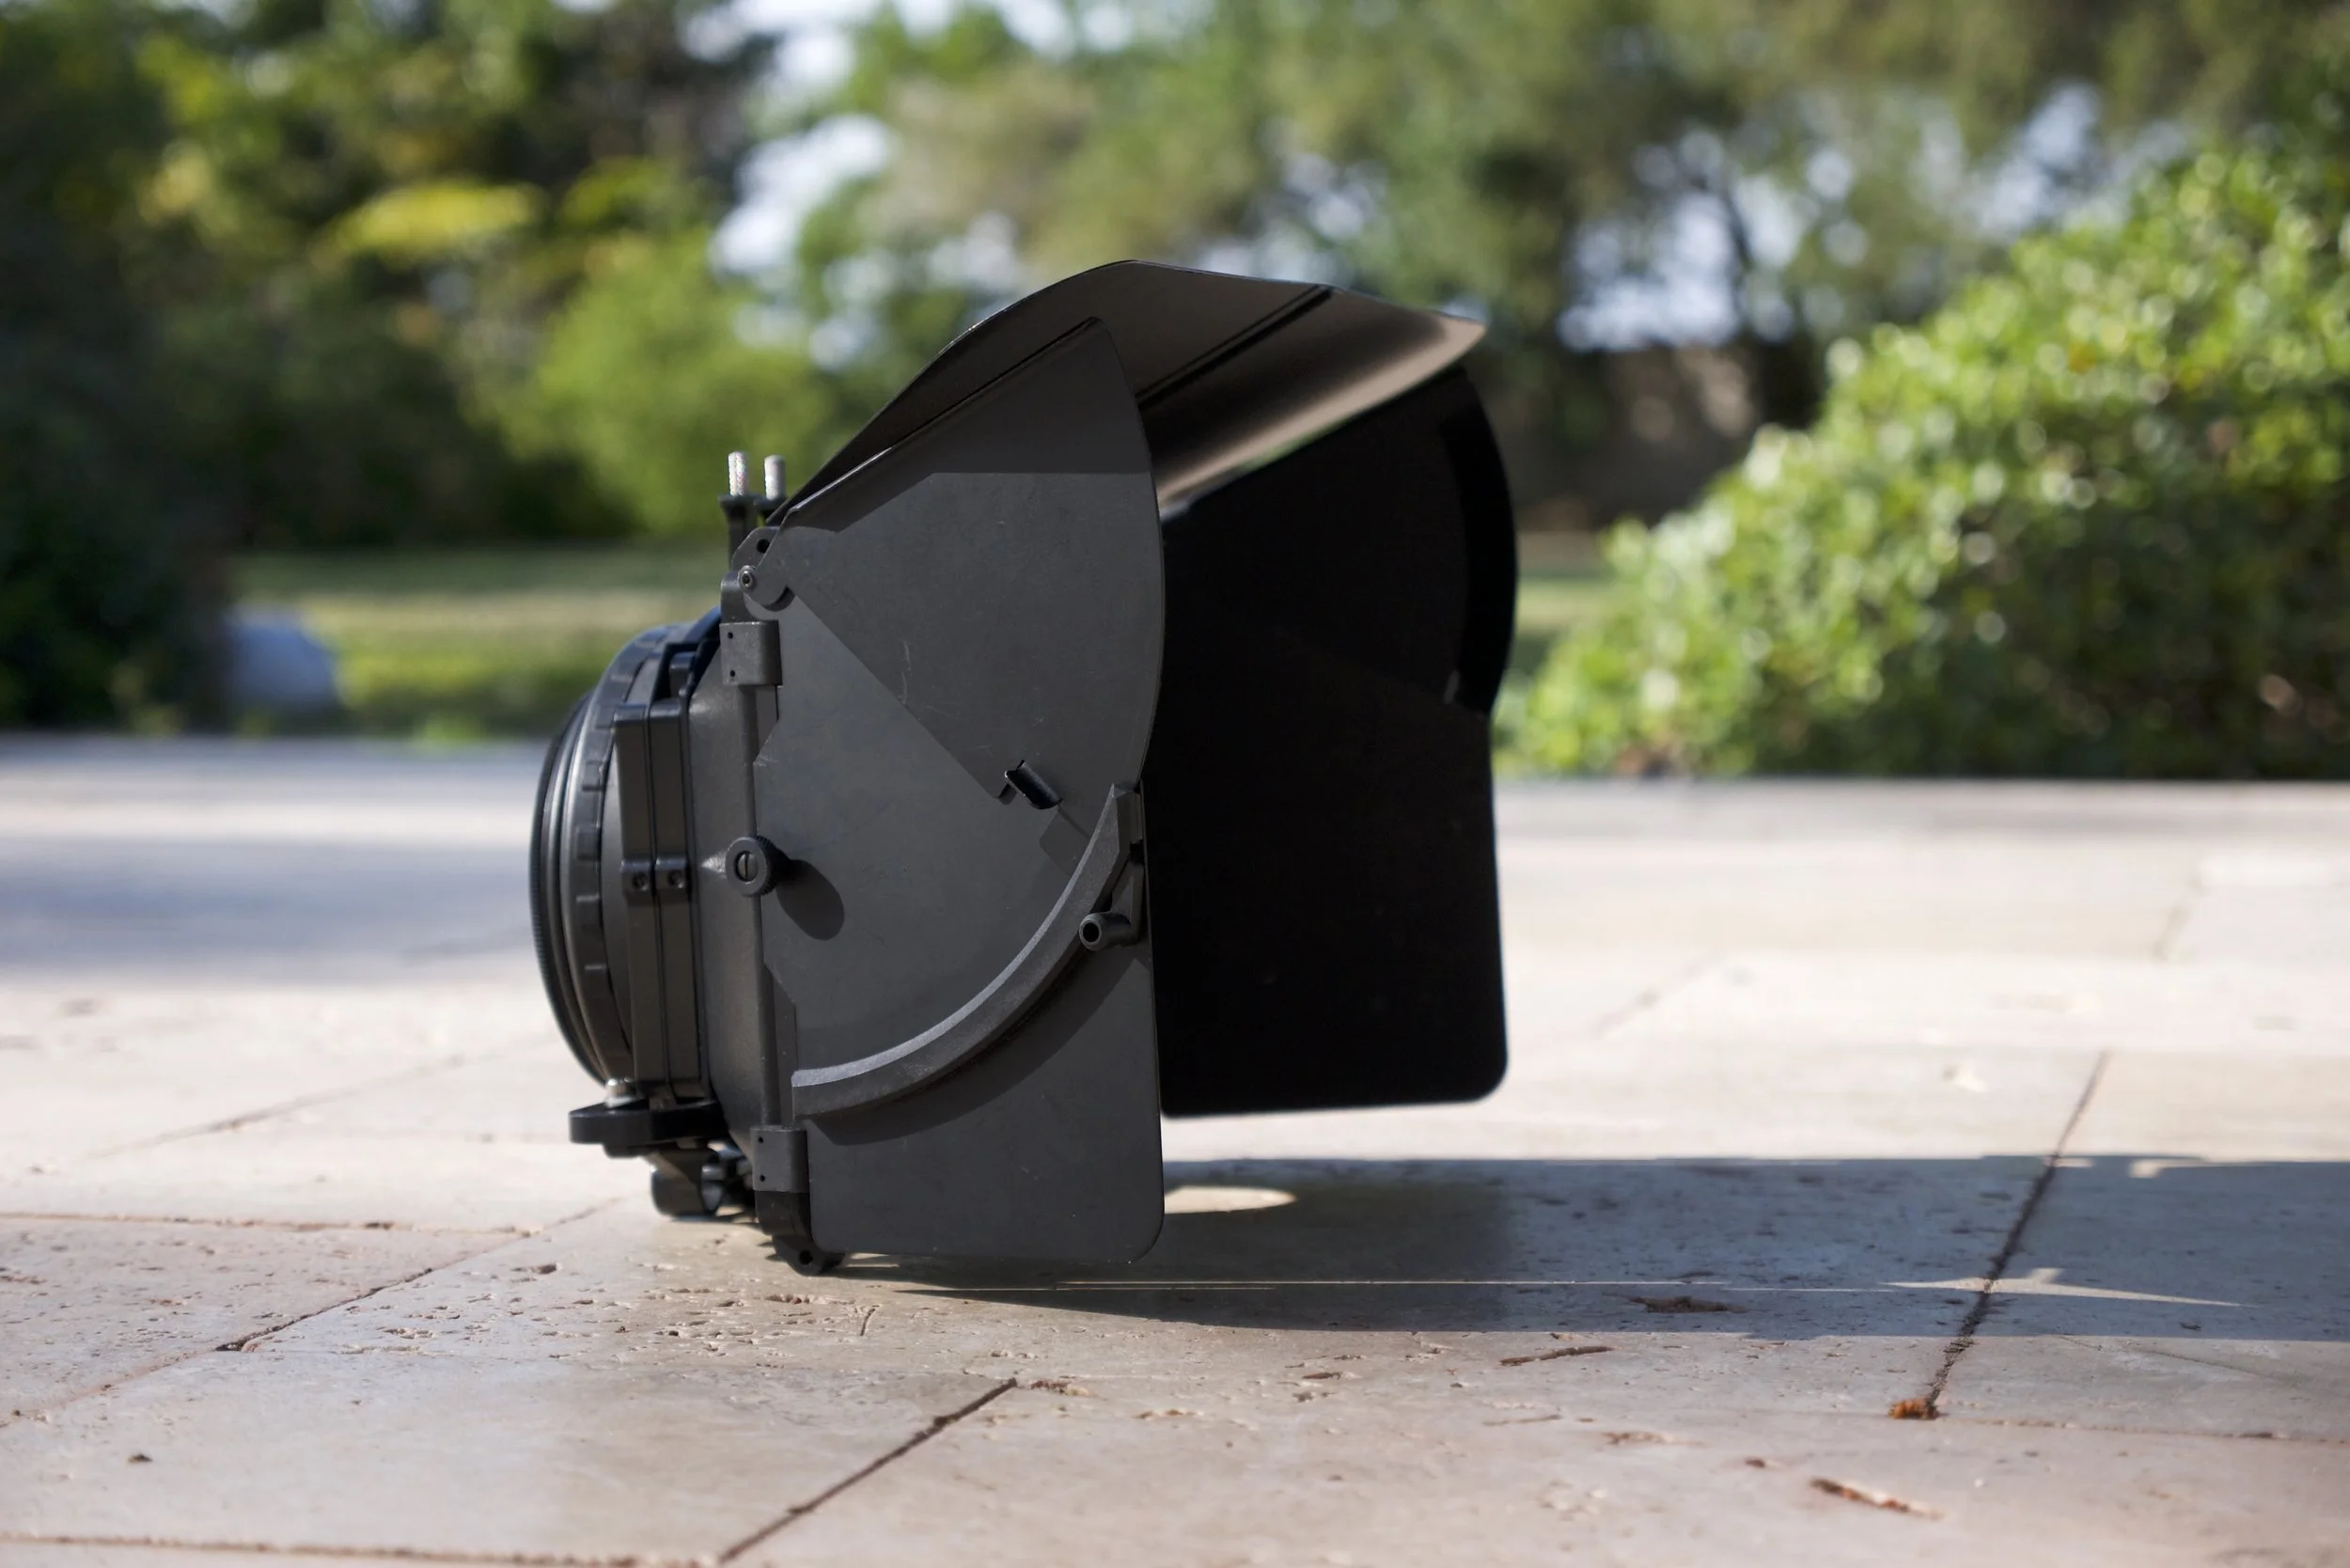
Filtration, in my opinion, is the most important feature of this device. Unlike photography lenses, cinema lenses lack front-filter threads, a feature that allows the owner to screw on circular pieces of glass for filtration purposes. Being that filmmaking is a fast-paced environment that requires split-second decisions, a screw-on filter makes little sense.
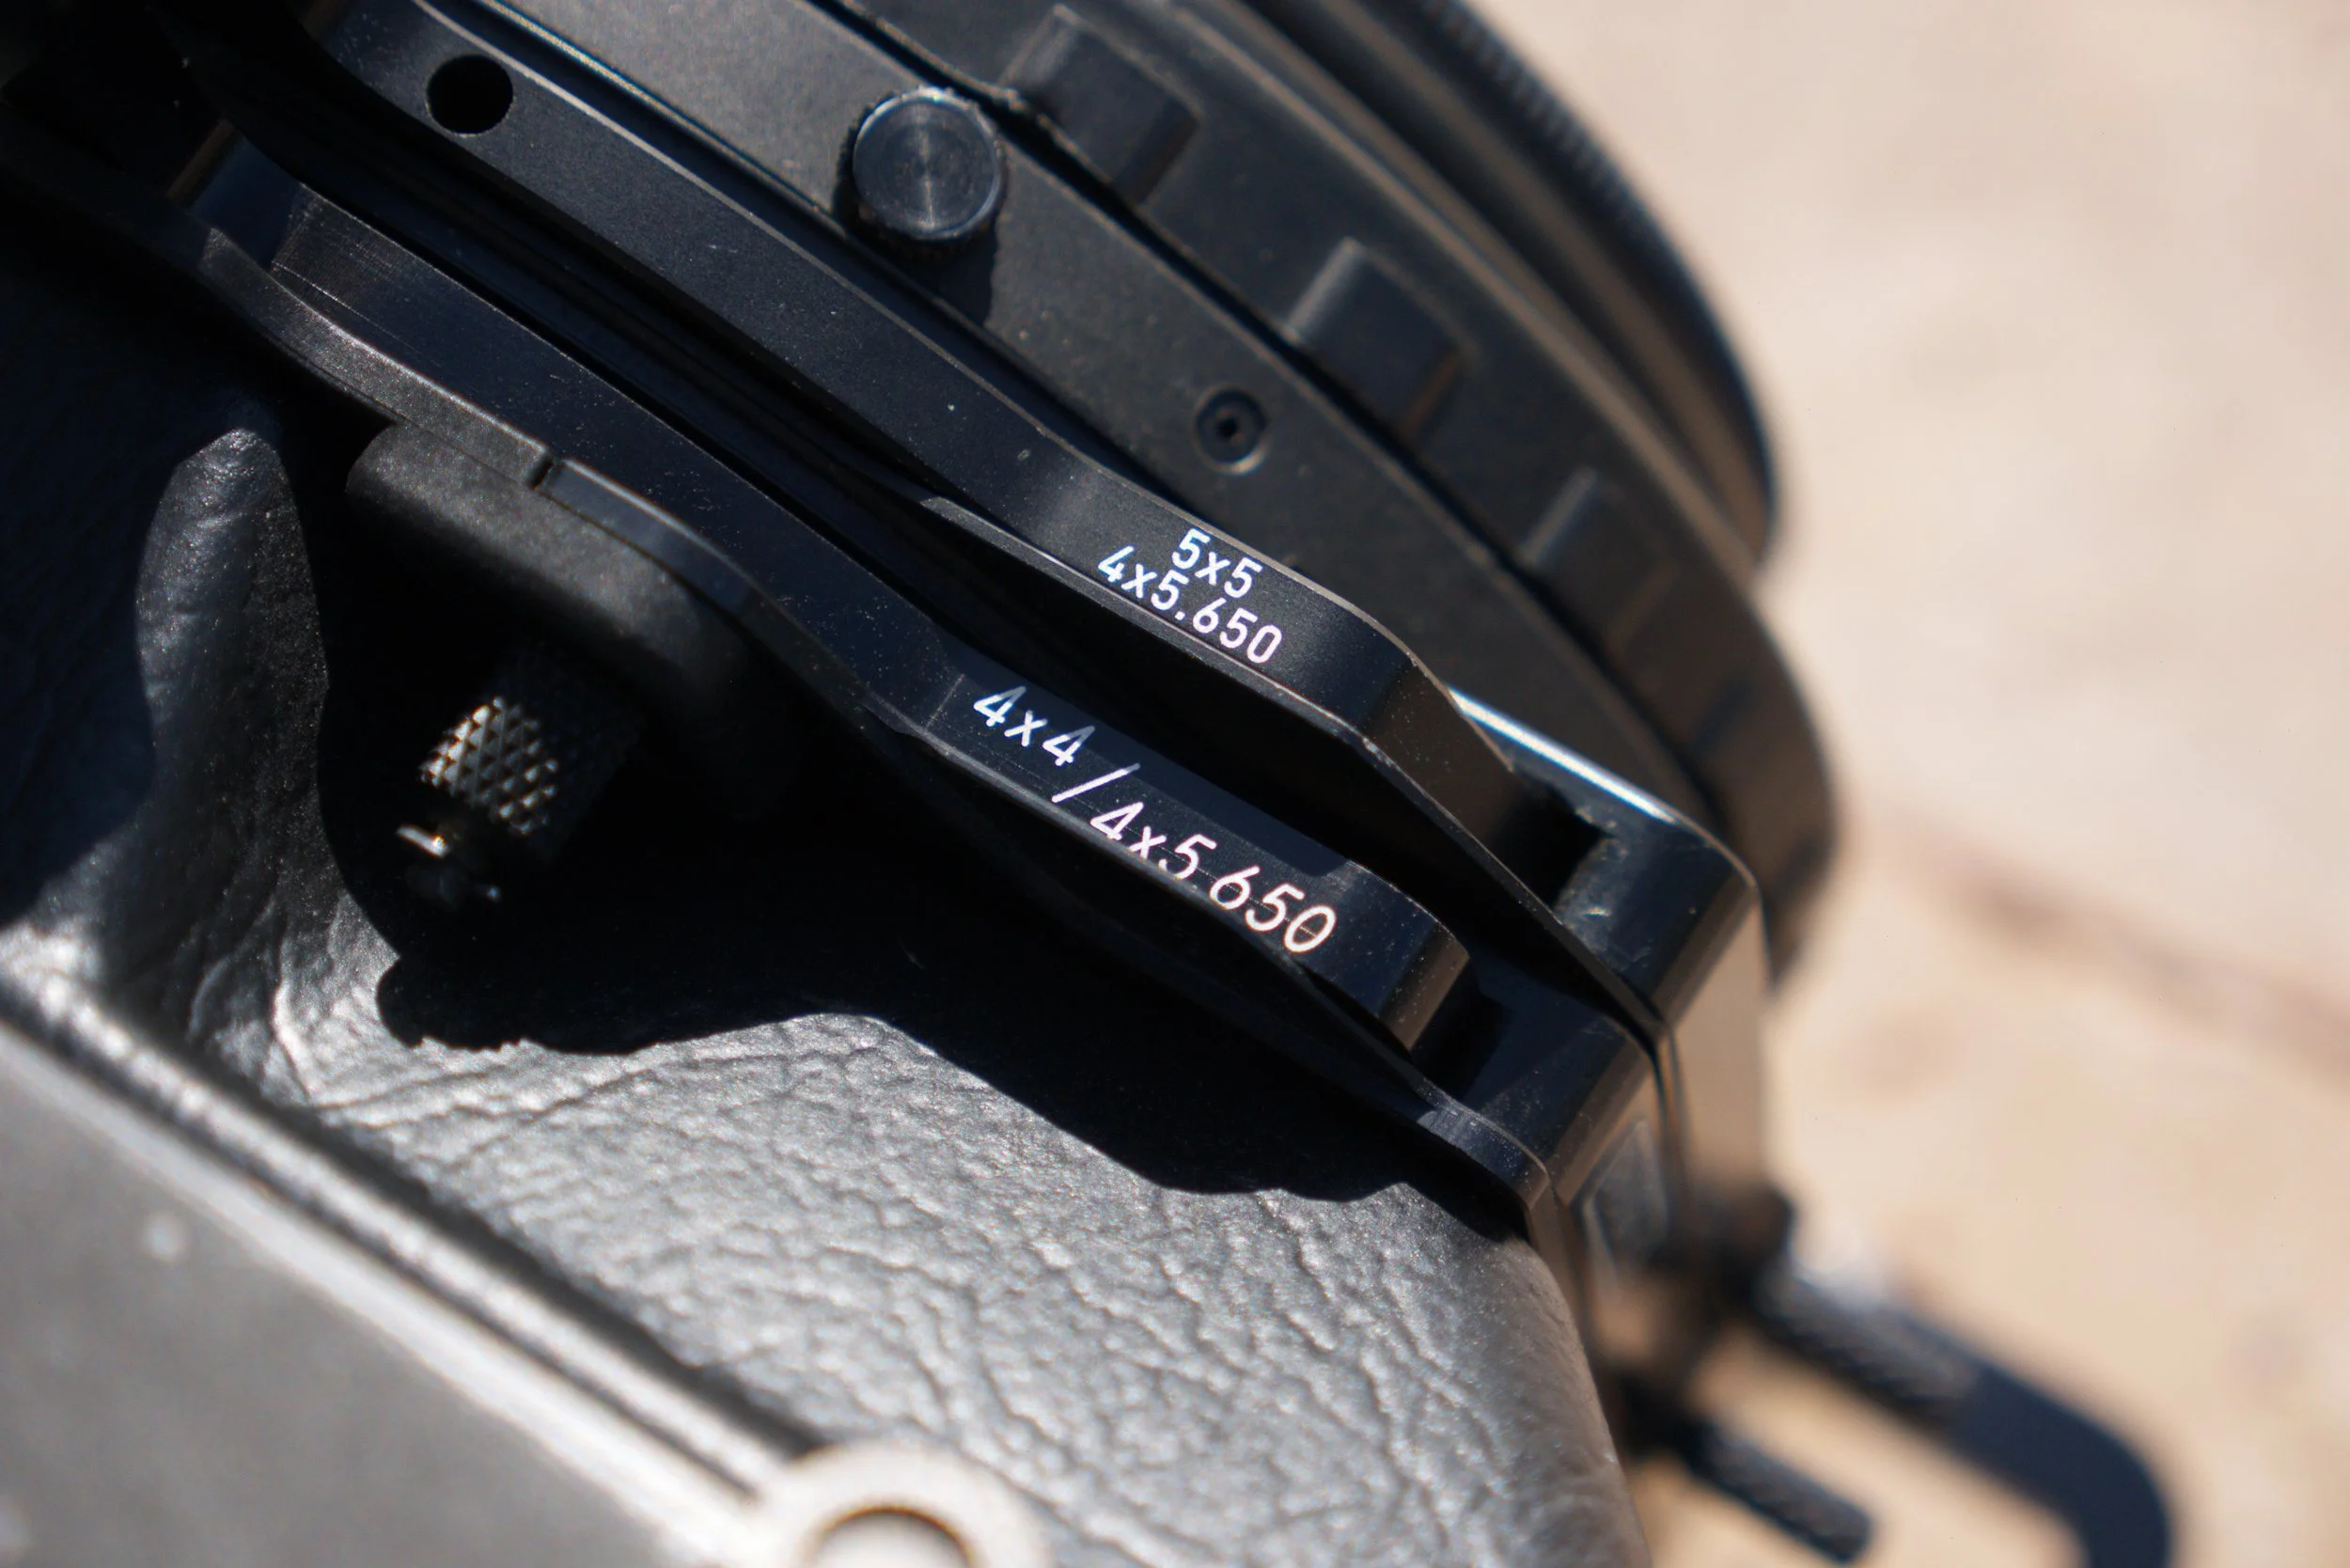
Matte boxes normally include two filter tray sizes of 4×5.65 and 6.6×6.6, but can also accommodate leaner sizes such as 4x4 and 5x5. Unlike a 4×4 filter size, these wider sizes (4×5.65 and 6.6×6.6) are rectangular in nature and prevent lenses from experiencing vignetting, a phenomenon where the edges of the frame become darkened.
If one were to shoot outdoors, the edges could become a bright white or even overexposed in certain cases.
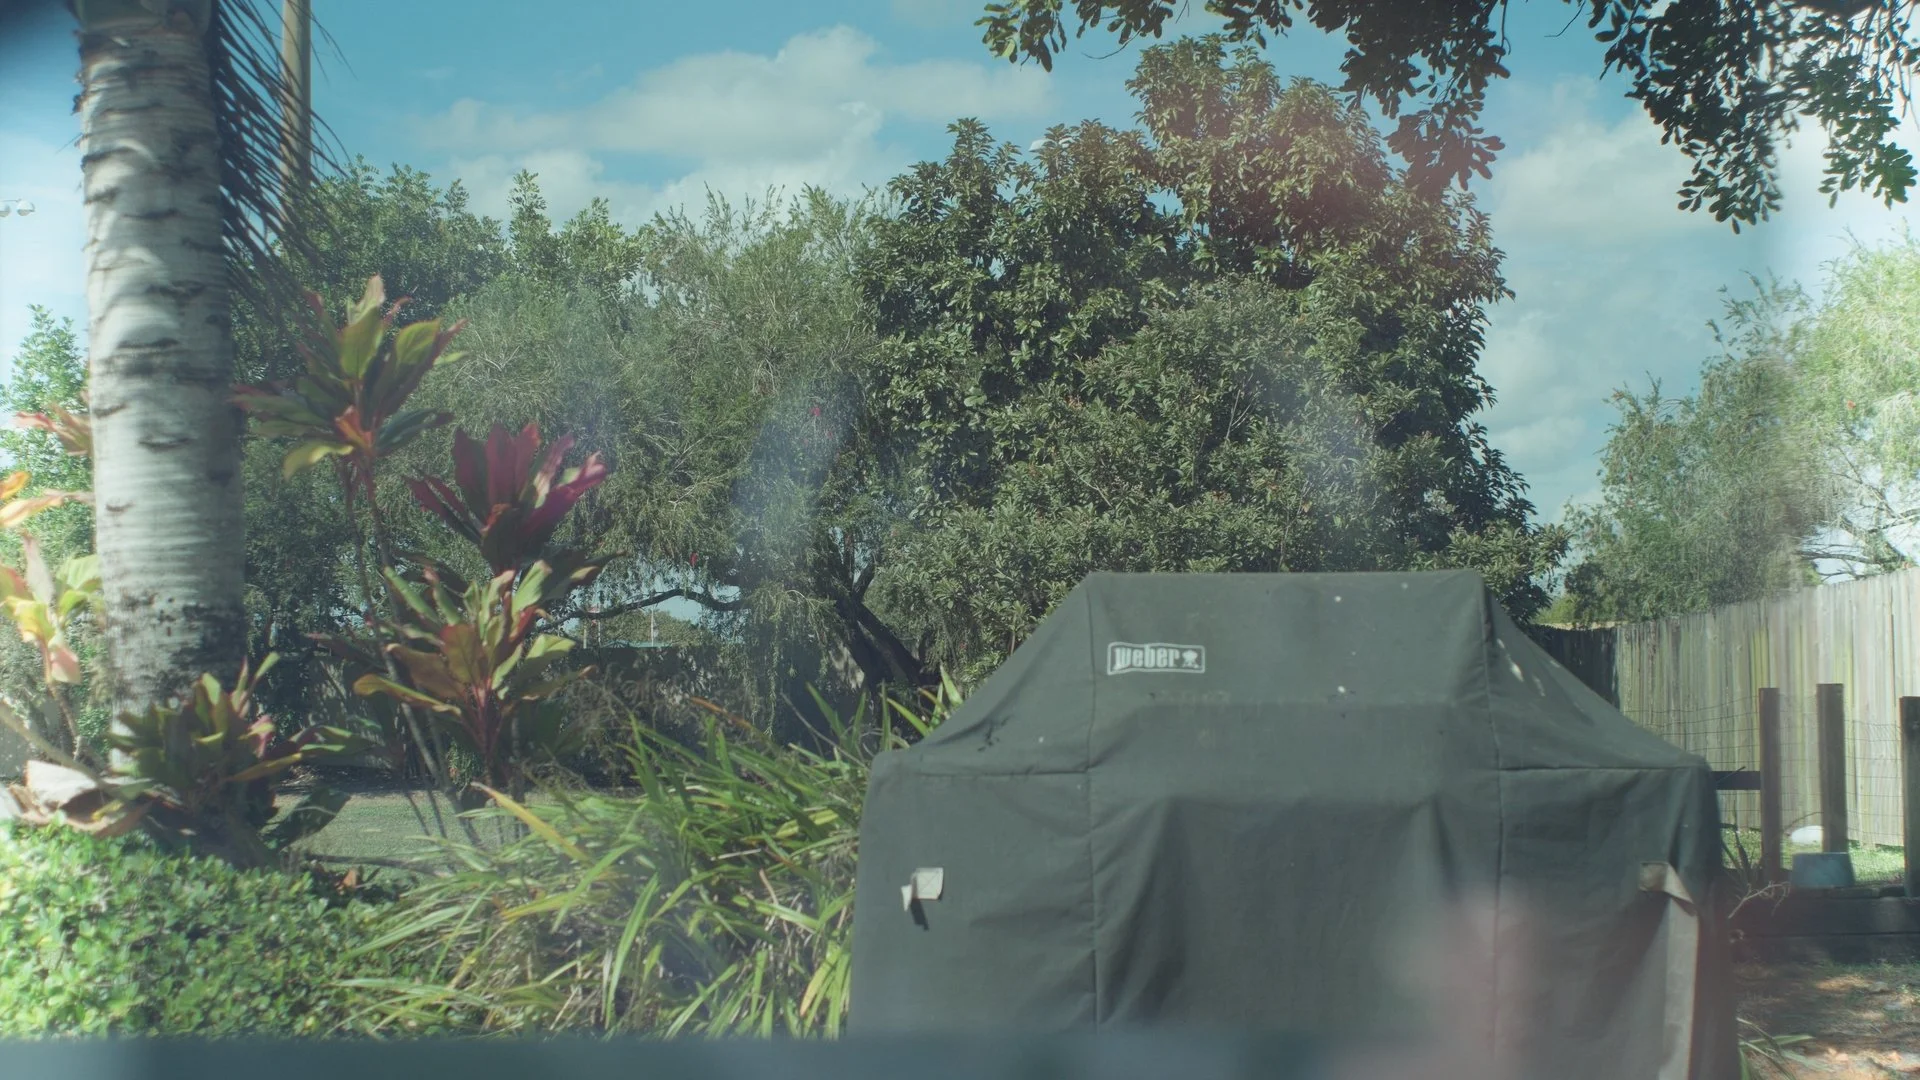
4×4 glass in front of 4×5.65 glass. The left and right sides are over exposed. There’s even a slight vignette from the matte box on the top left.
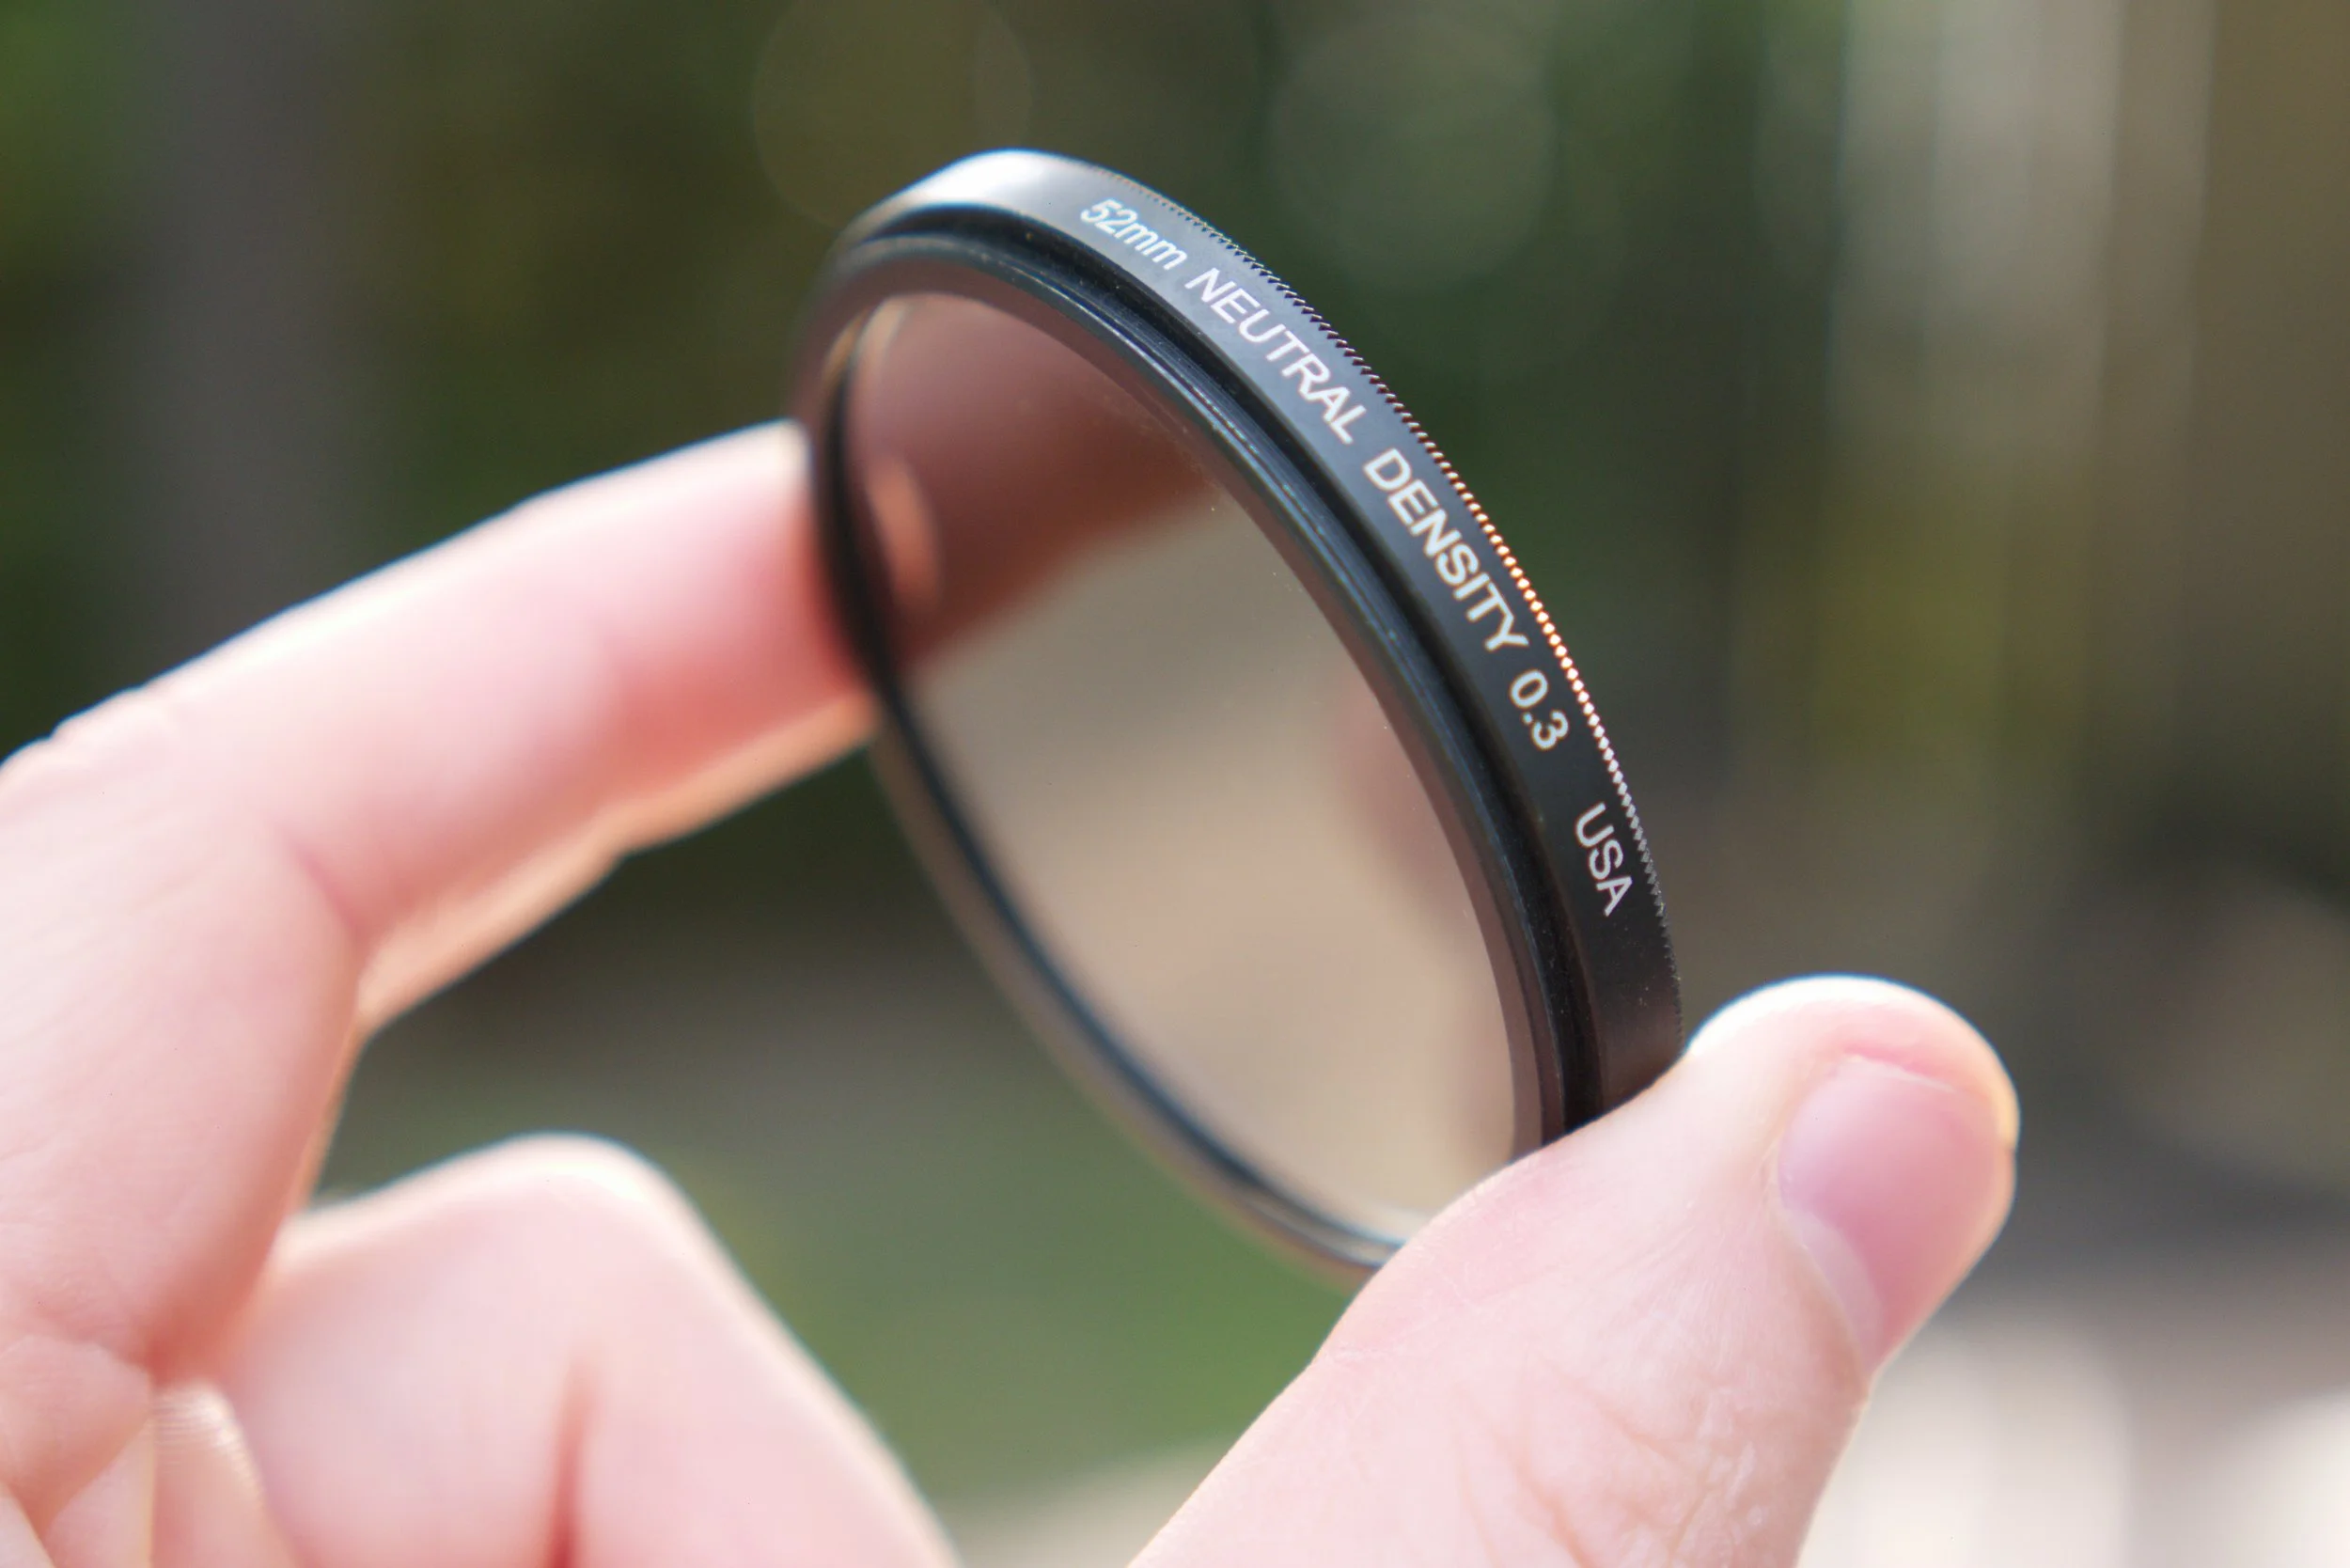
One of the most common filters is Neutral Density (ND). Think of this piece of glass as a pair sunglasses for your camera sensor. Due to the low shutter speed that filmmaking adopted in its infancy and higher base ISOs that modern camera companies have implemented, placing a piece of darkening glass in front of your lens is very necessary for a decent exposure.

With No ND.
ISO 1000.
f4.0 on the lens.
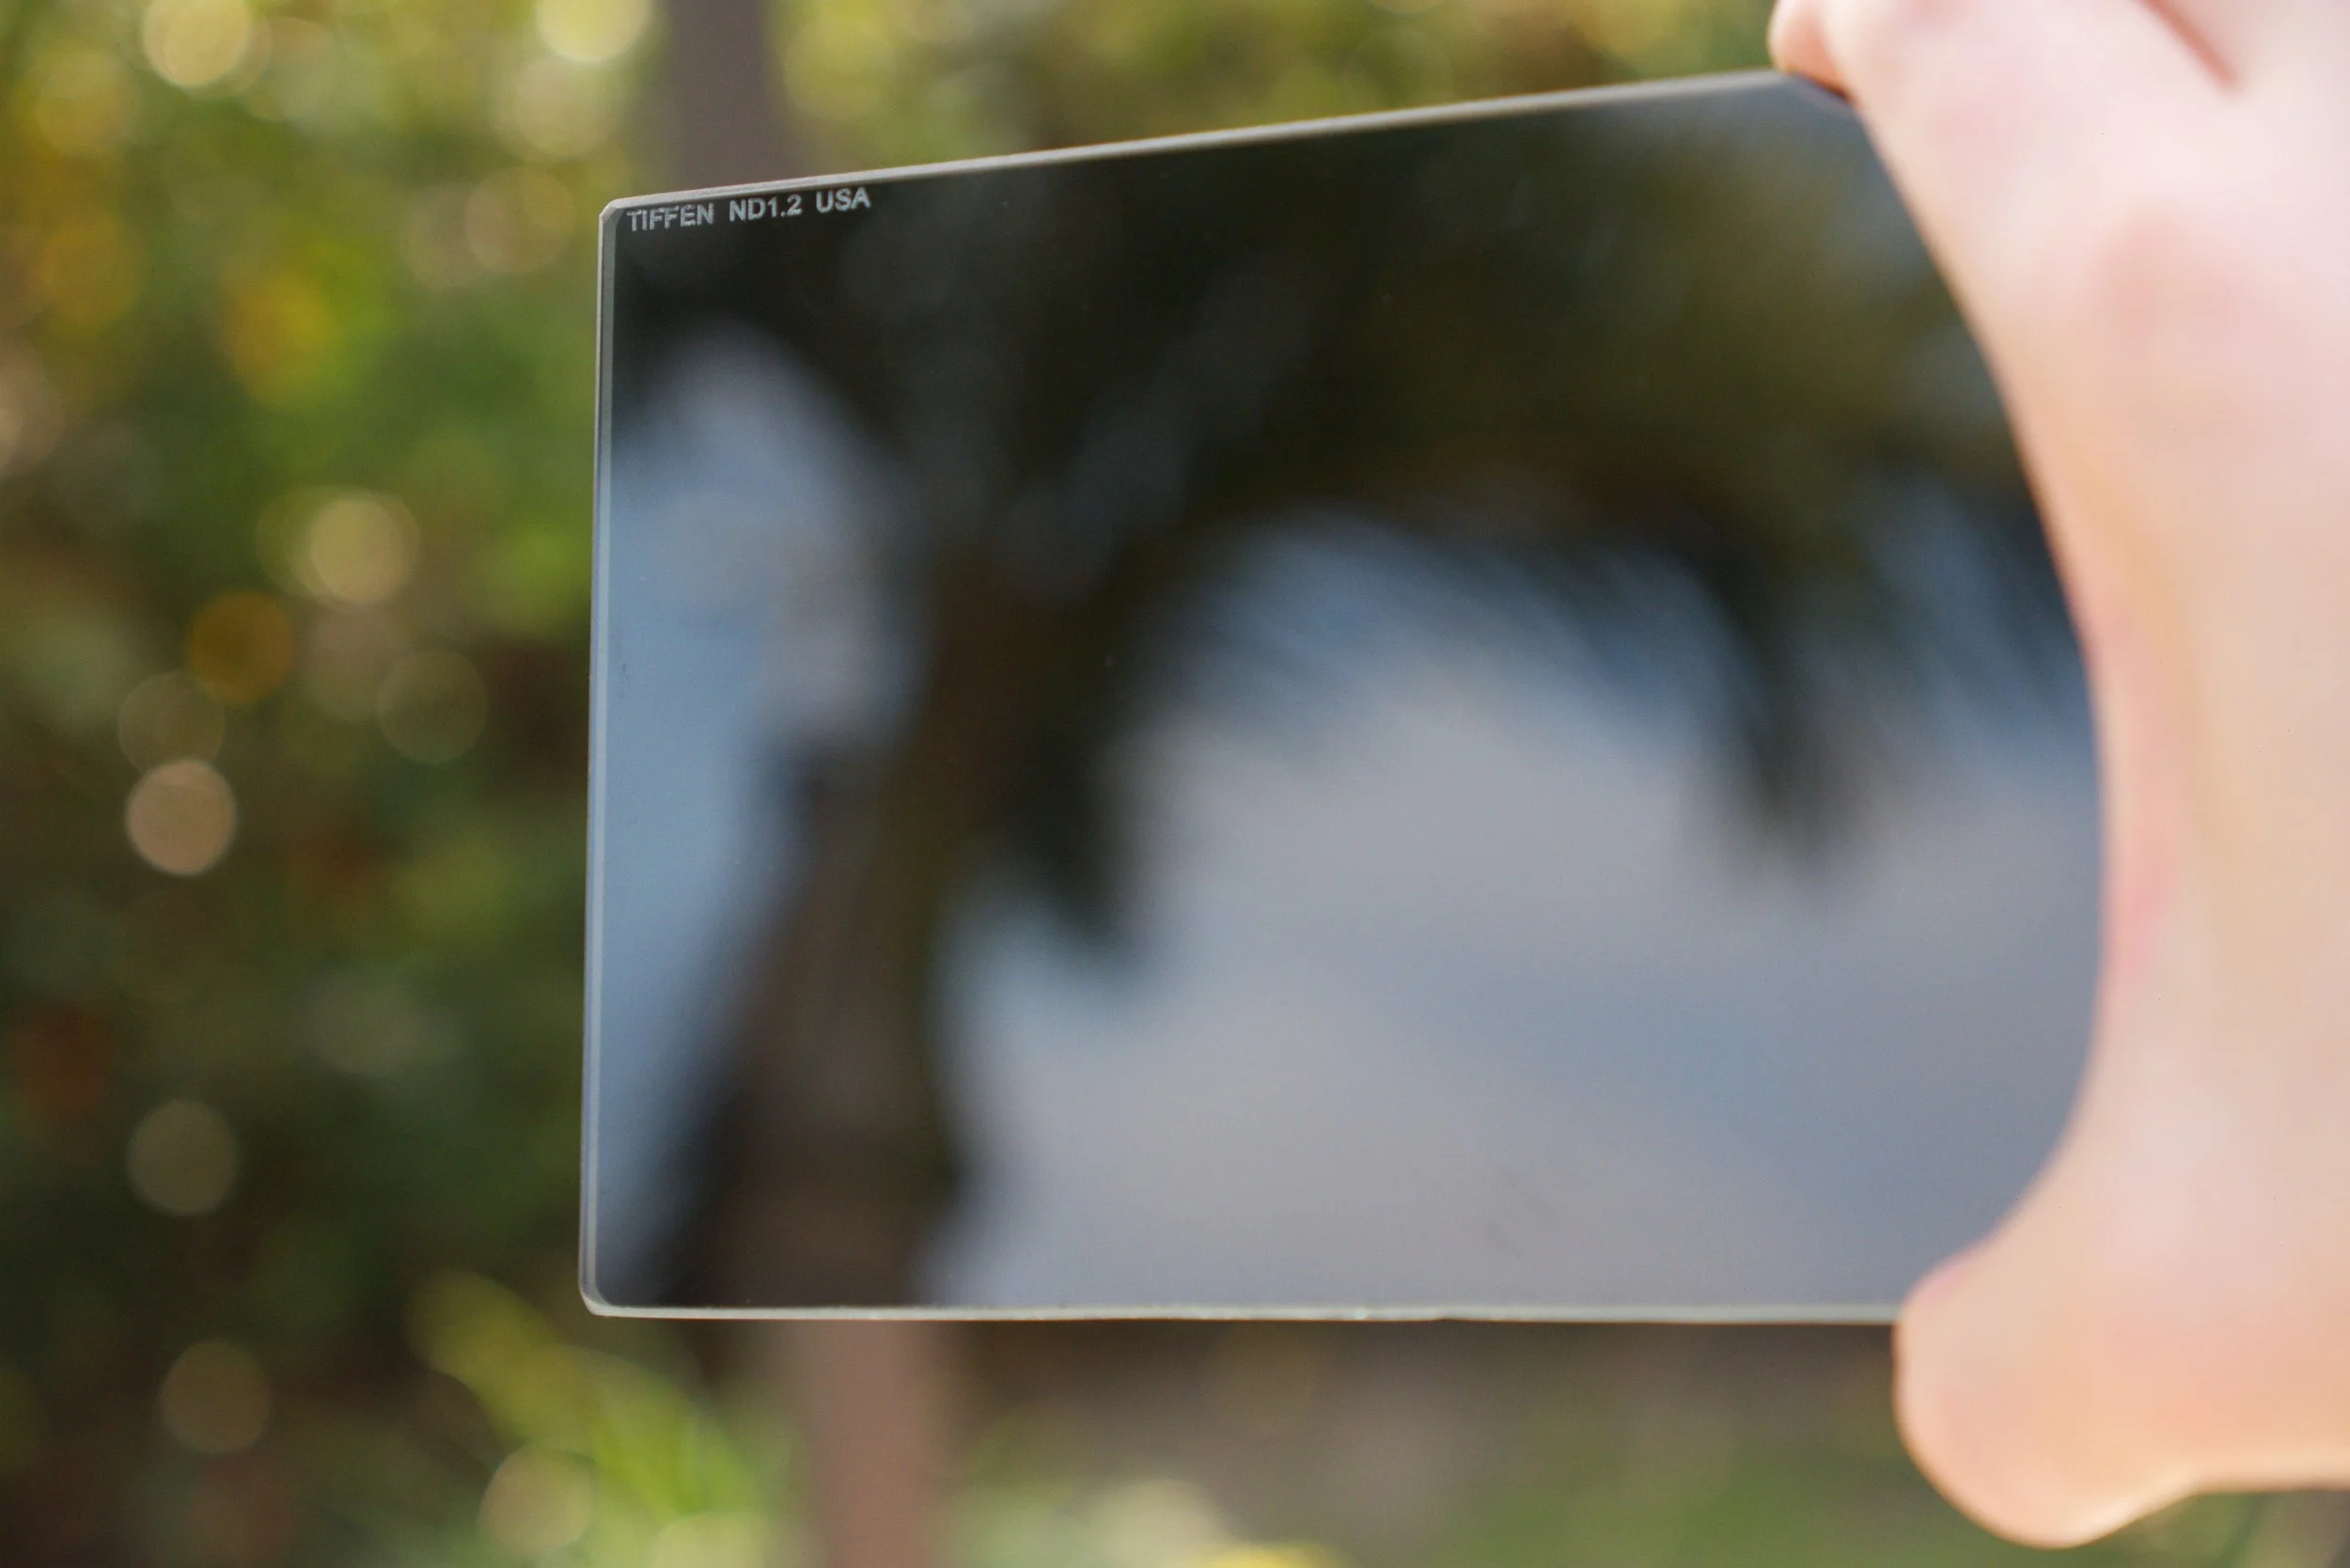
ND 1.2+0.9.
ISO 1000
Meter read at an f5.6(8) and the lens was at an f4.0.
No color correction.
Matte boxes are a key component of any cinematographer’s equipment list. If you haven’t acquired or used one before, I highly recommend heading over to your local camera rental house to try or rent. Happy hunting!
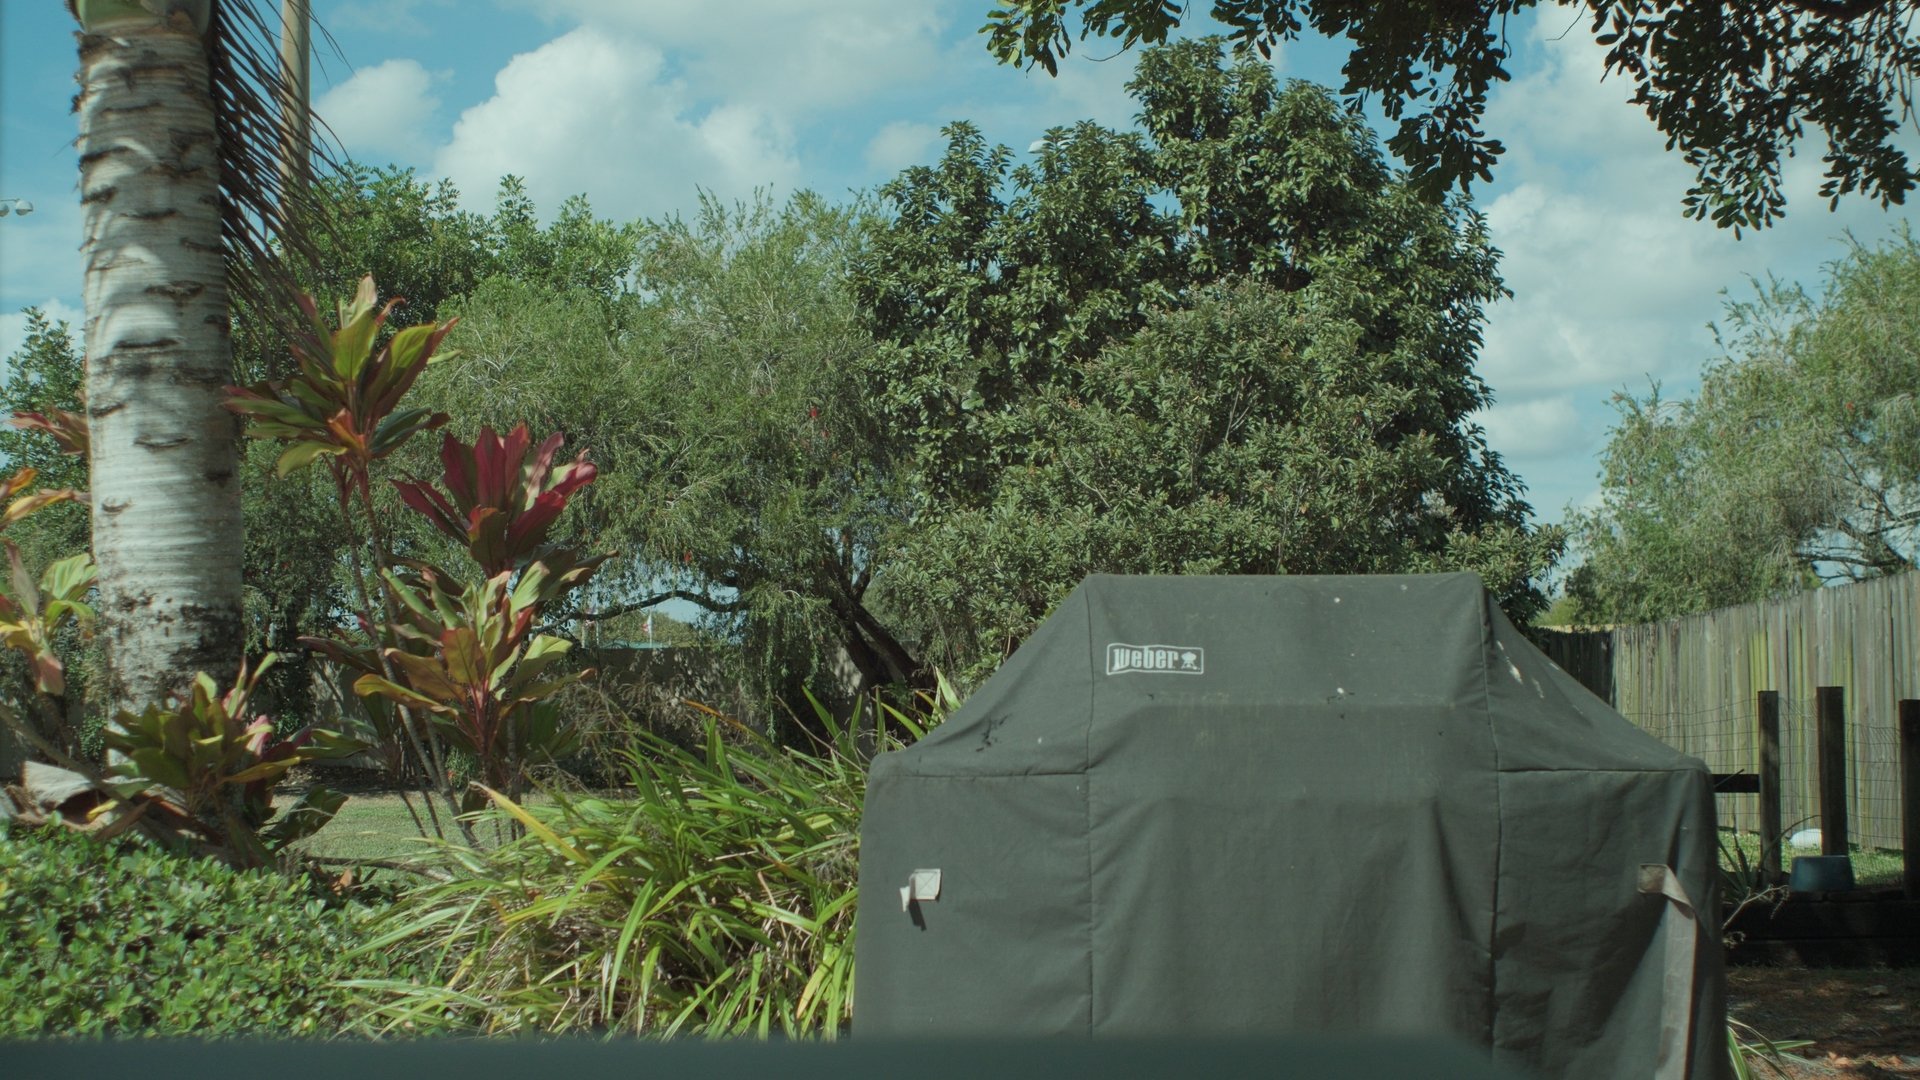
Limitations = Creativity
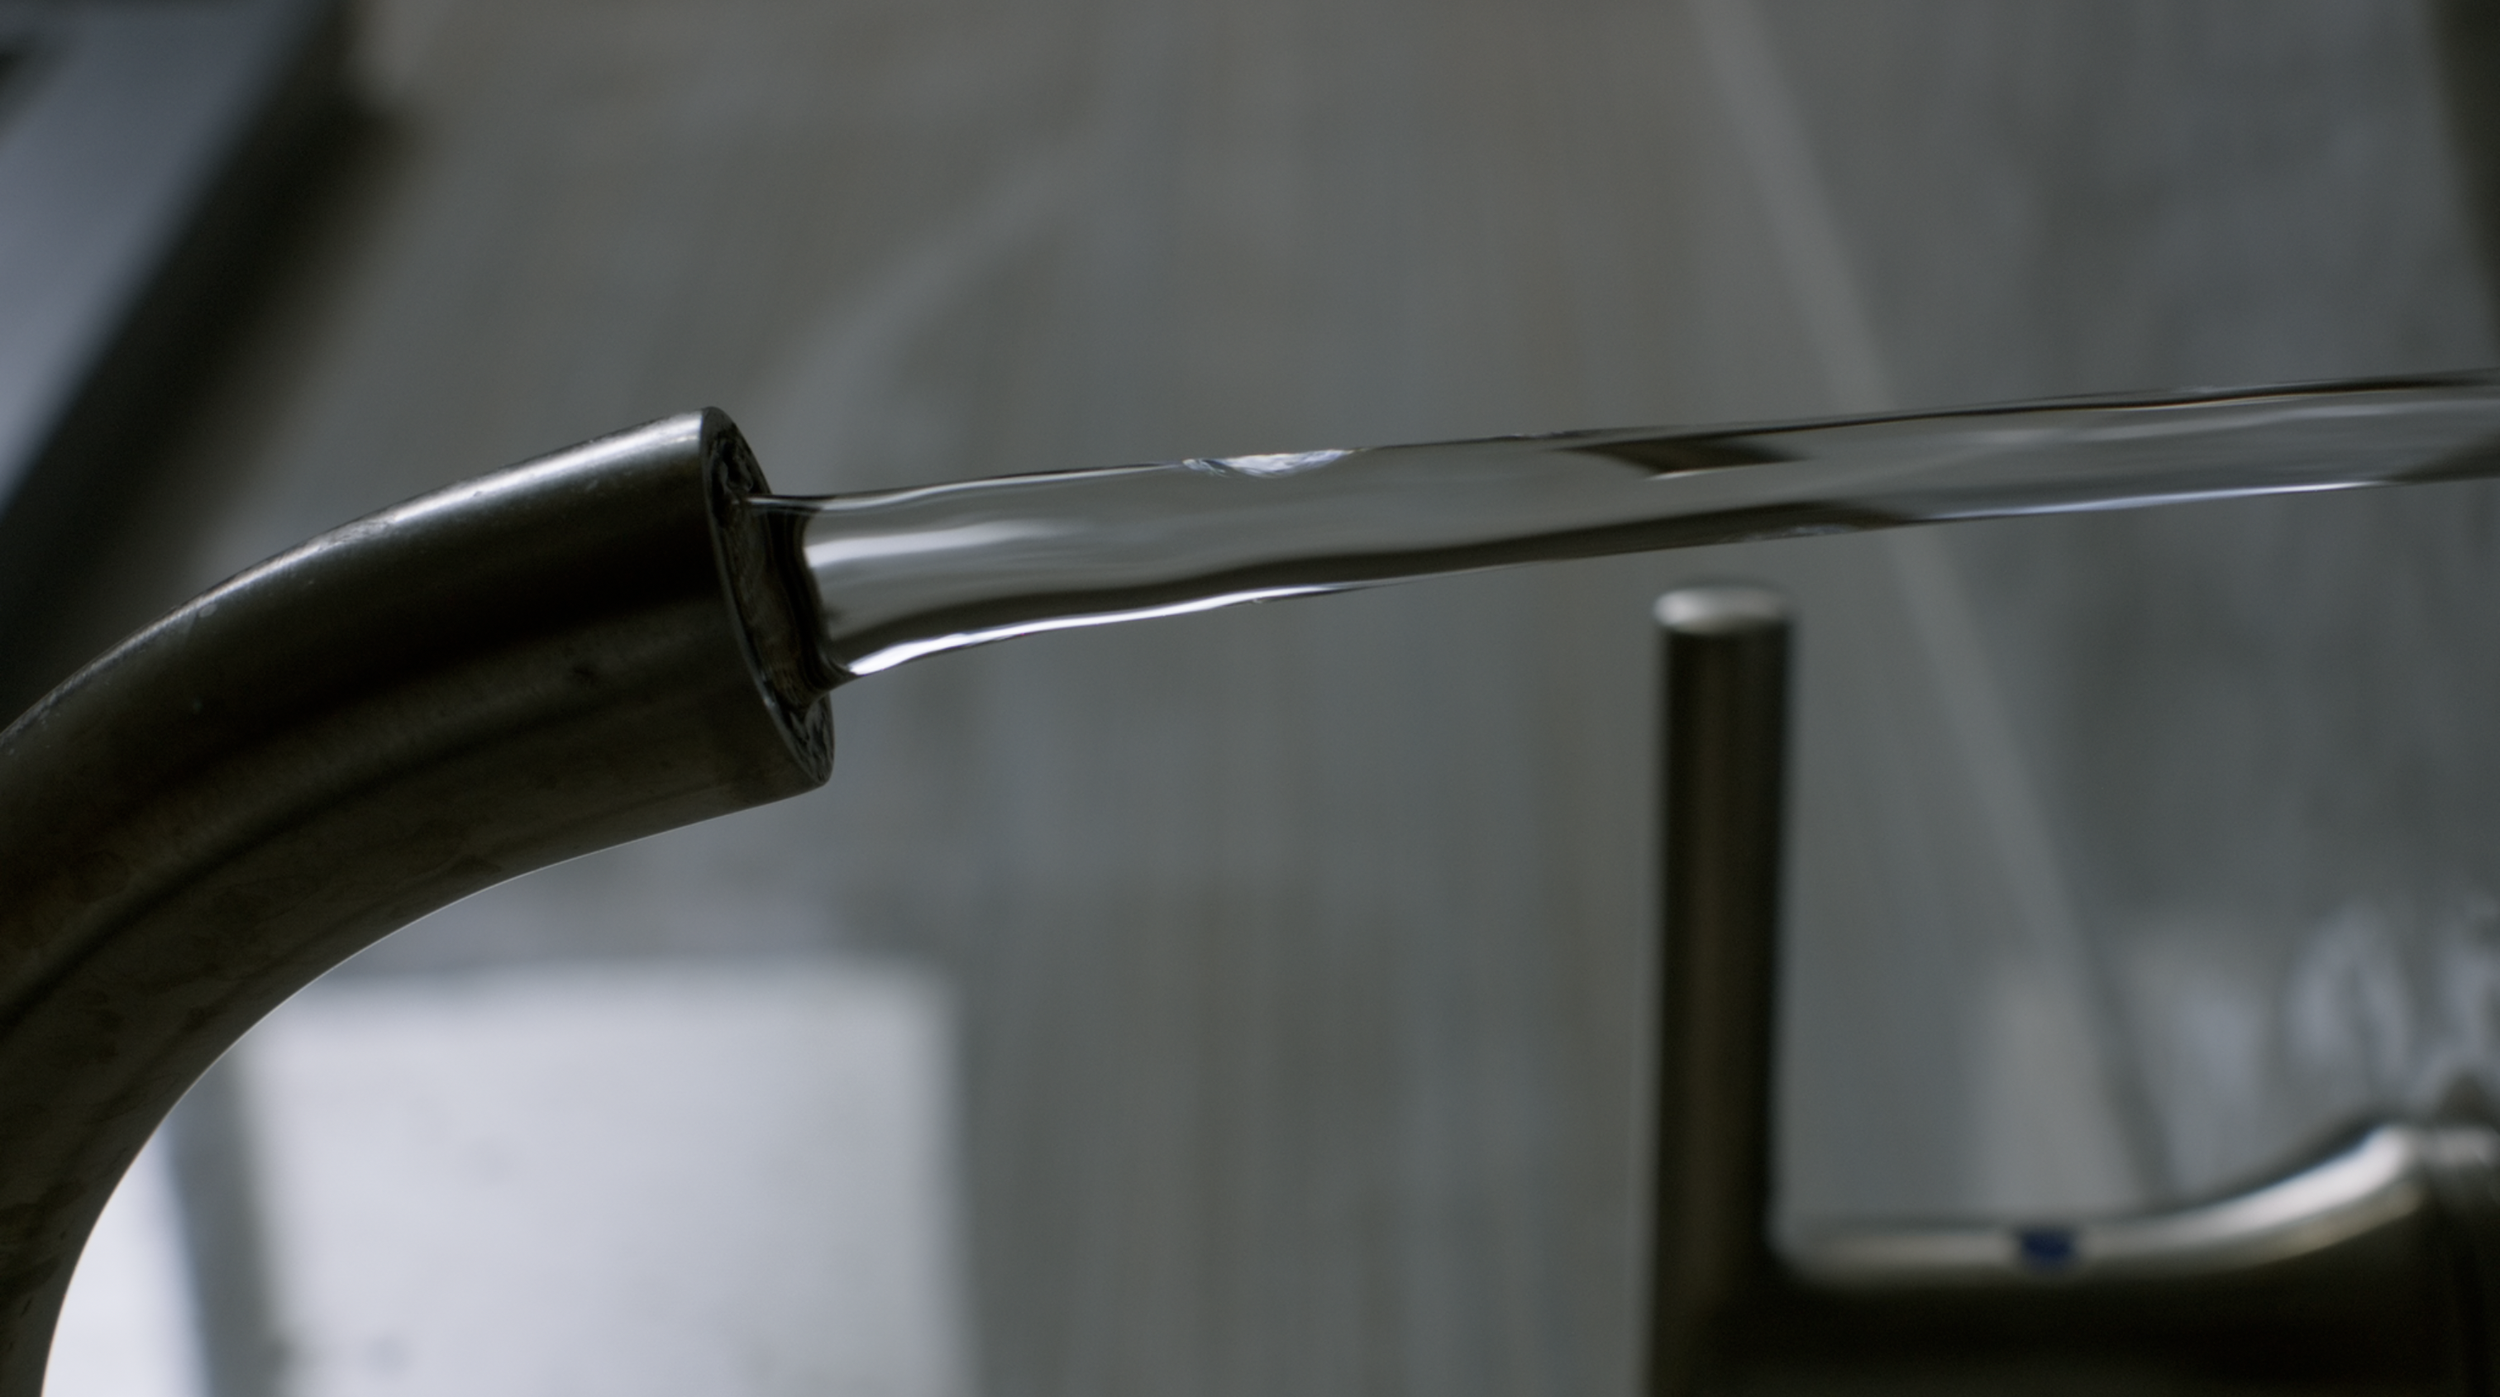
Filmmaking is creativity despite limitations. Physical limits are the catalyst that fuels filmmakers to go the extra mile to bag an image nobody, with all the equipment in the world, would have dreamt up.
This is how one achieves a POV shot looking up at someone cooking eggs or perhaps even a stylish vertical of a dirty faucet.
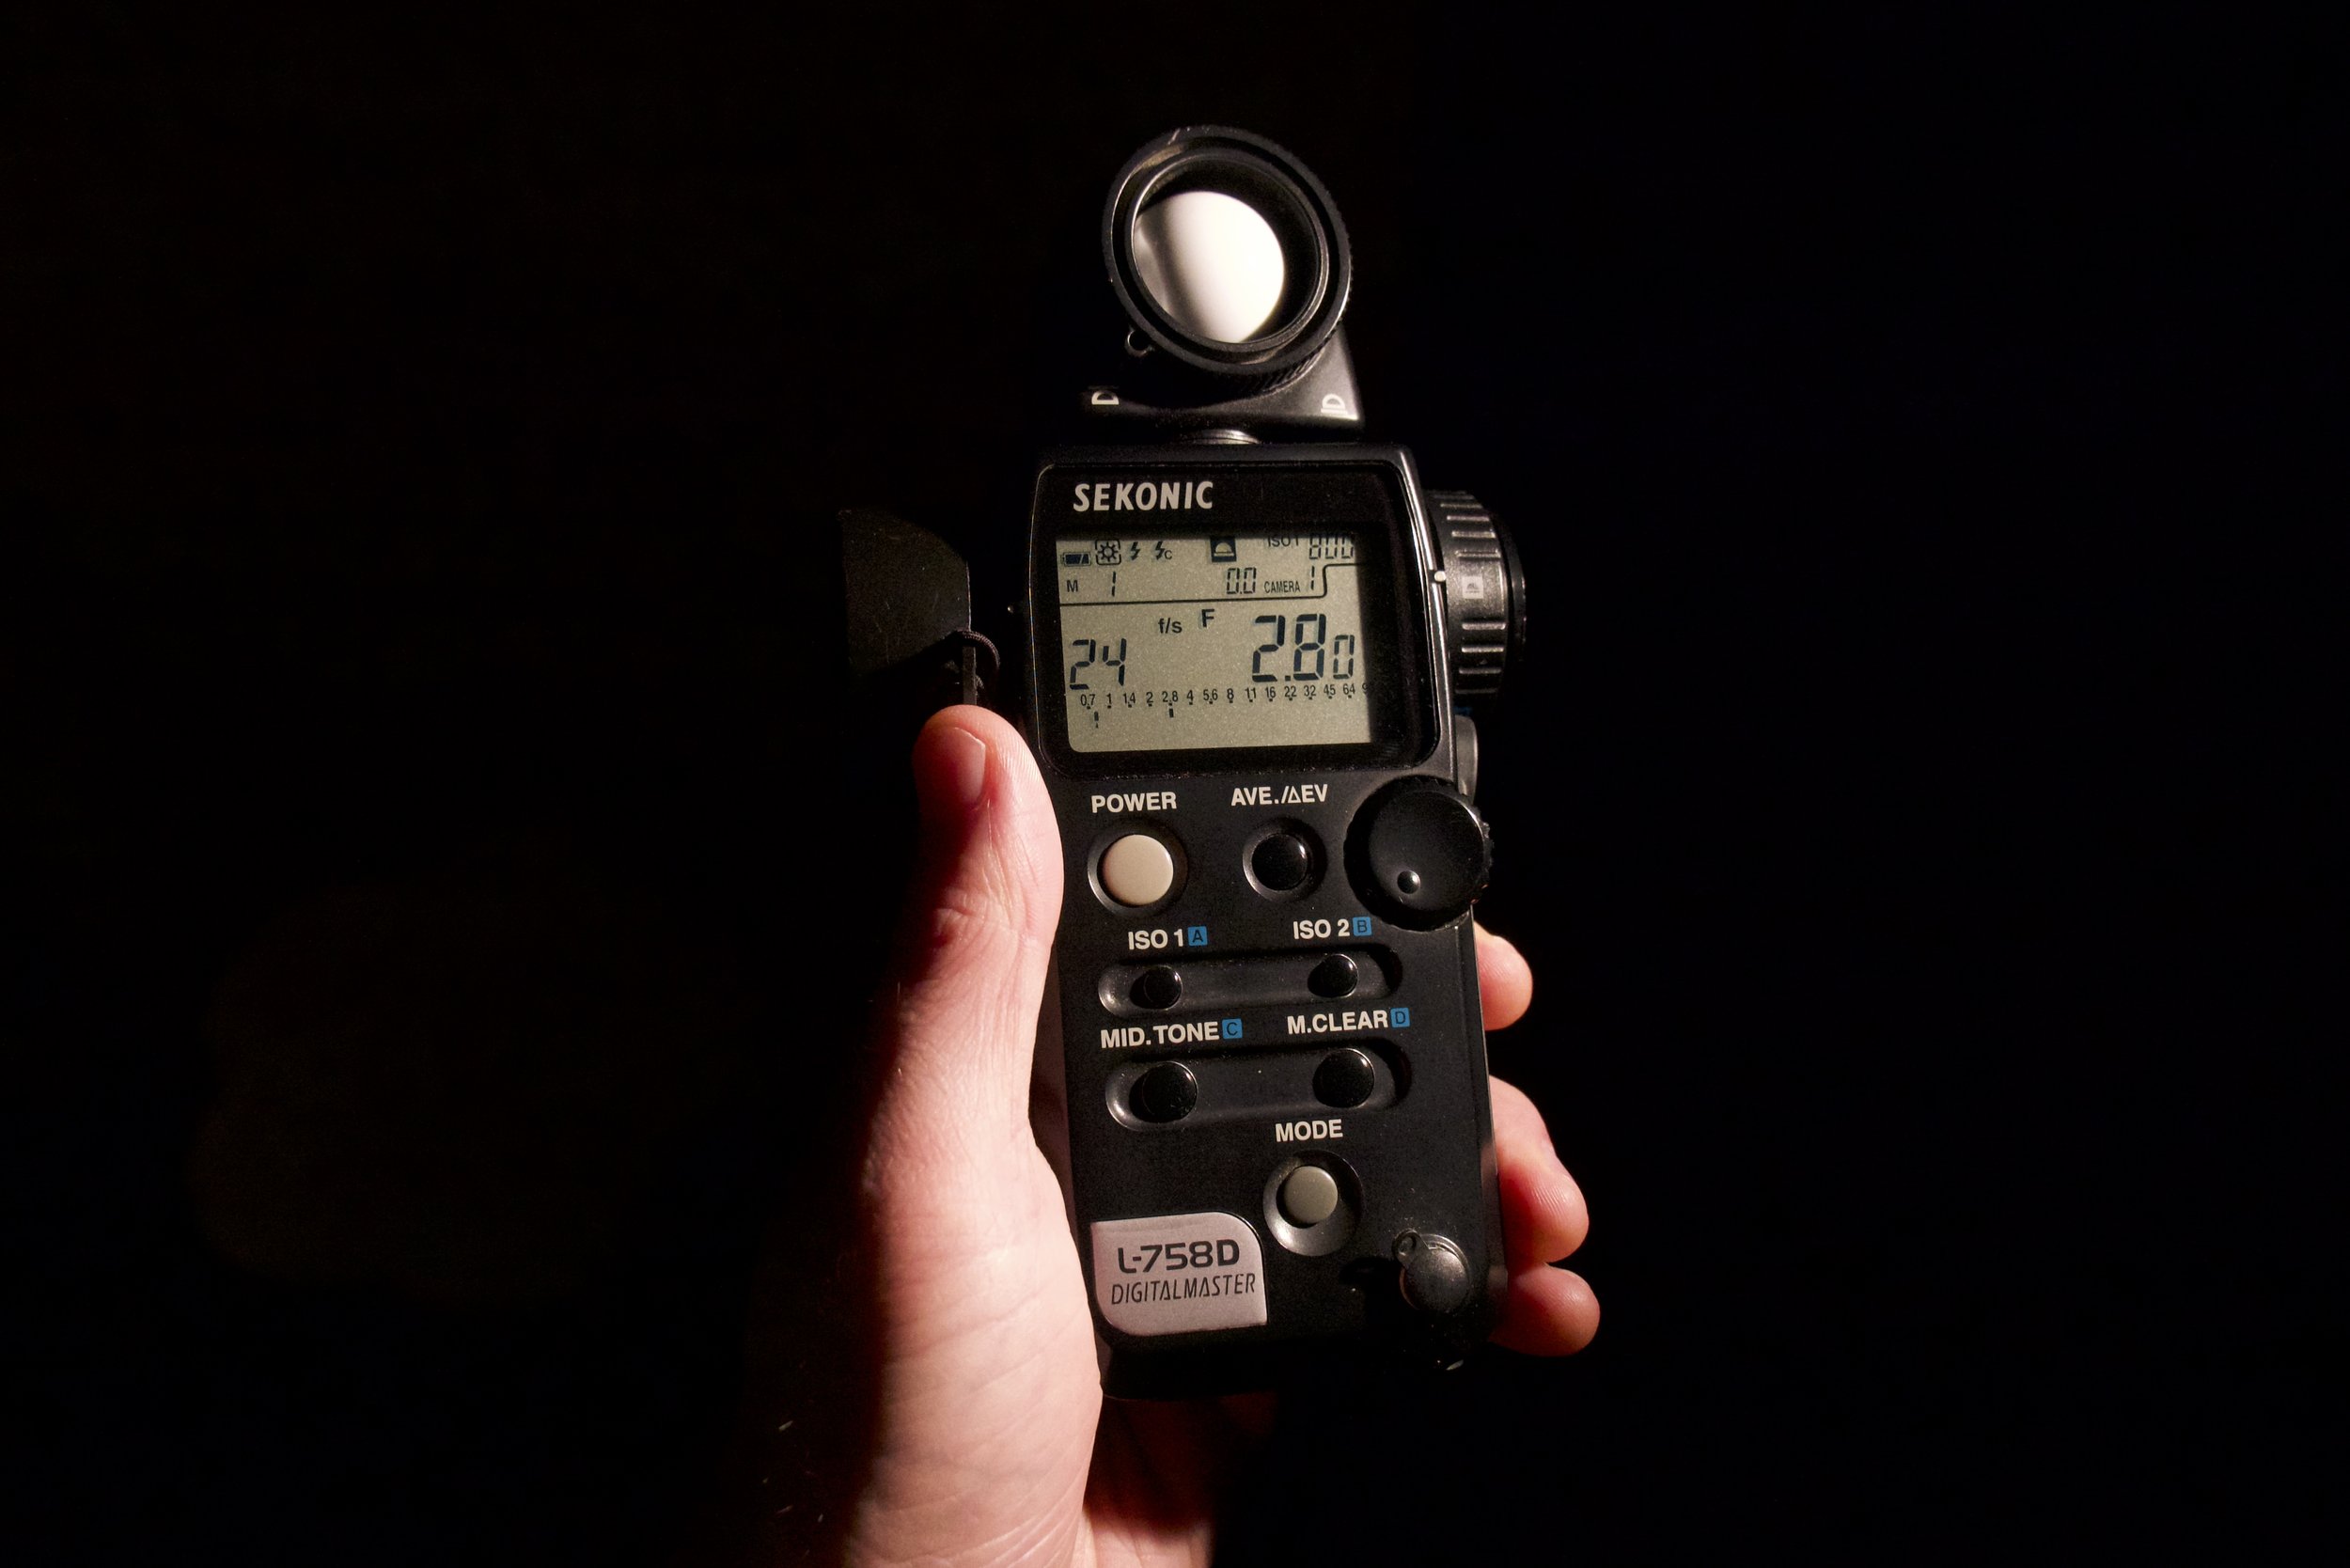
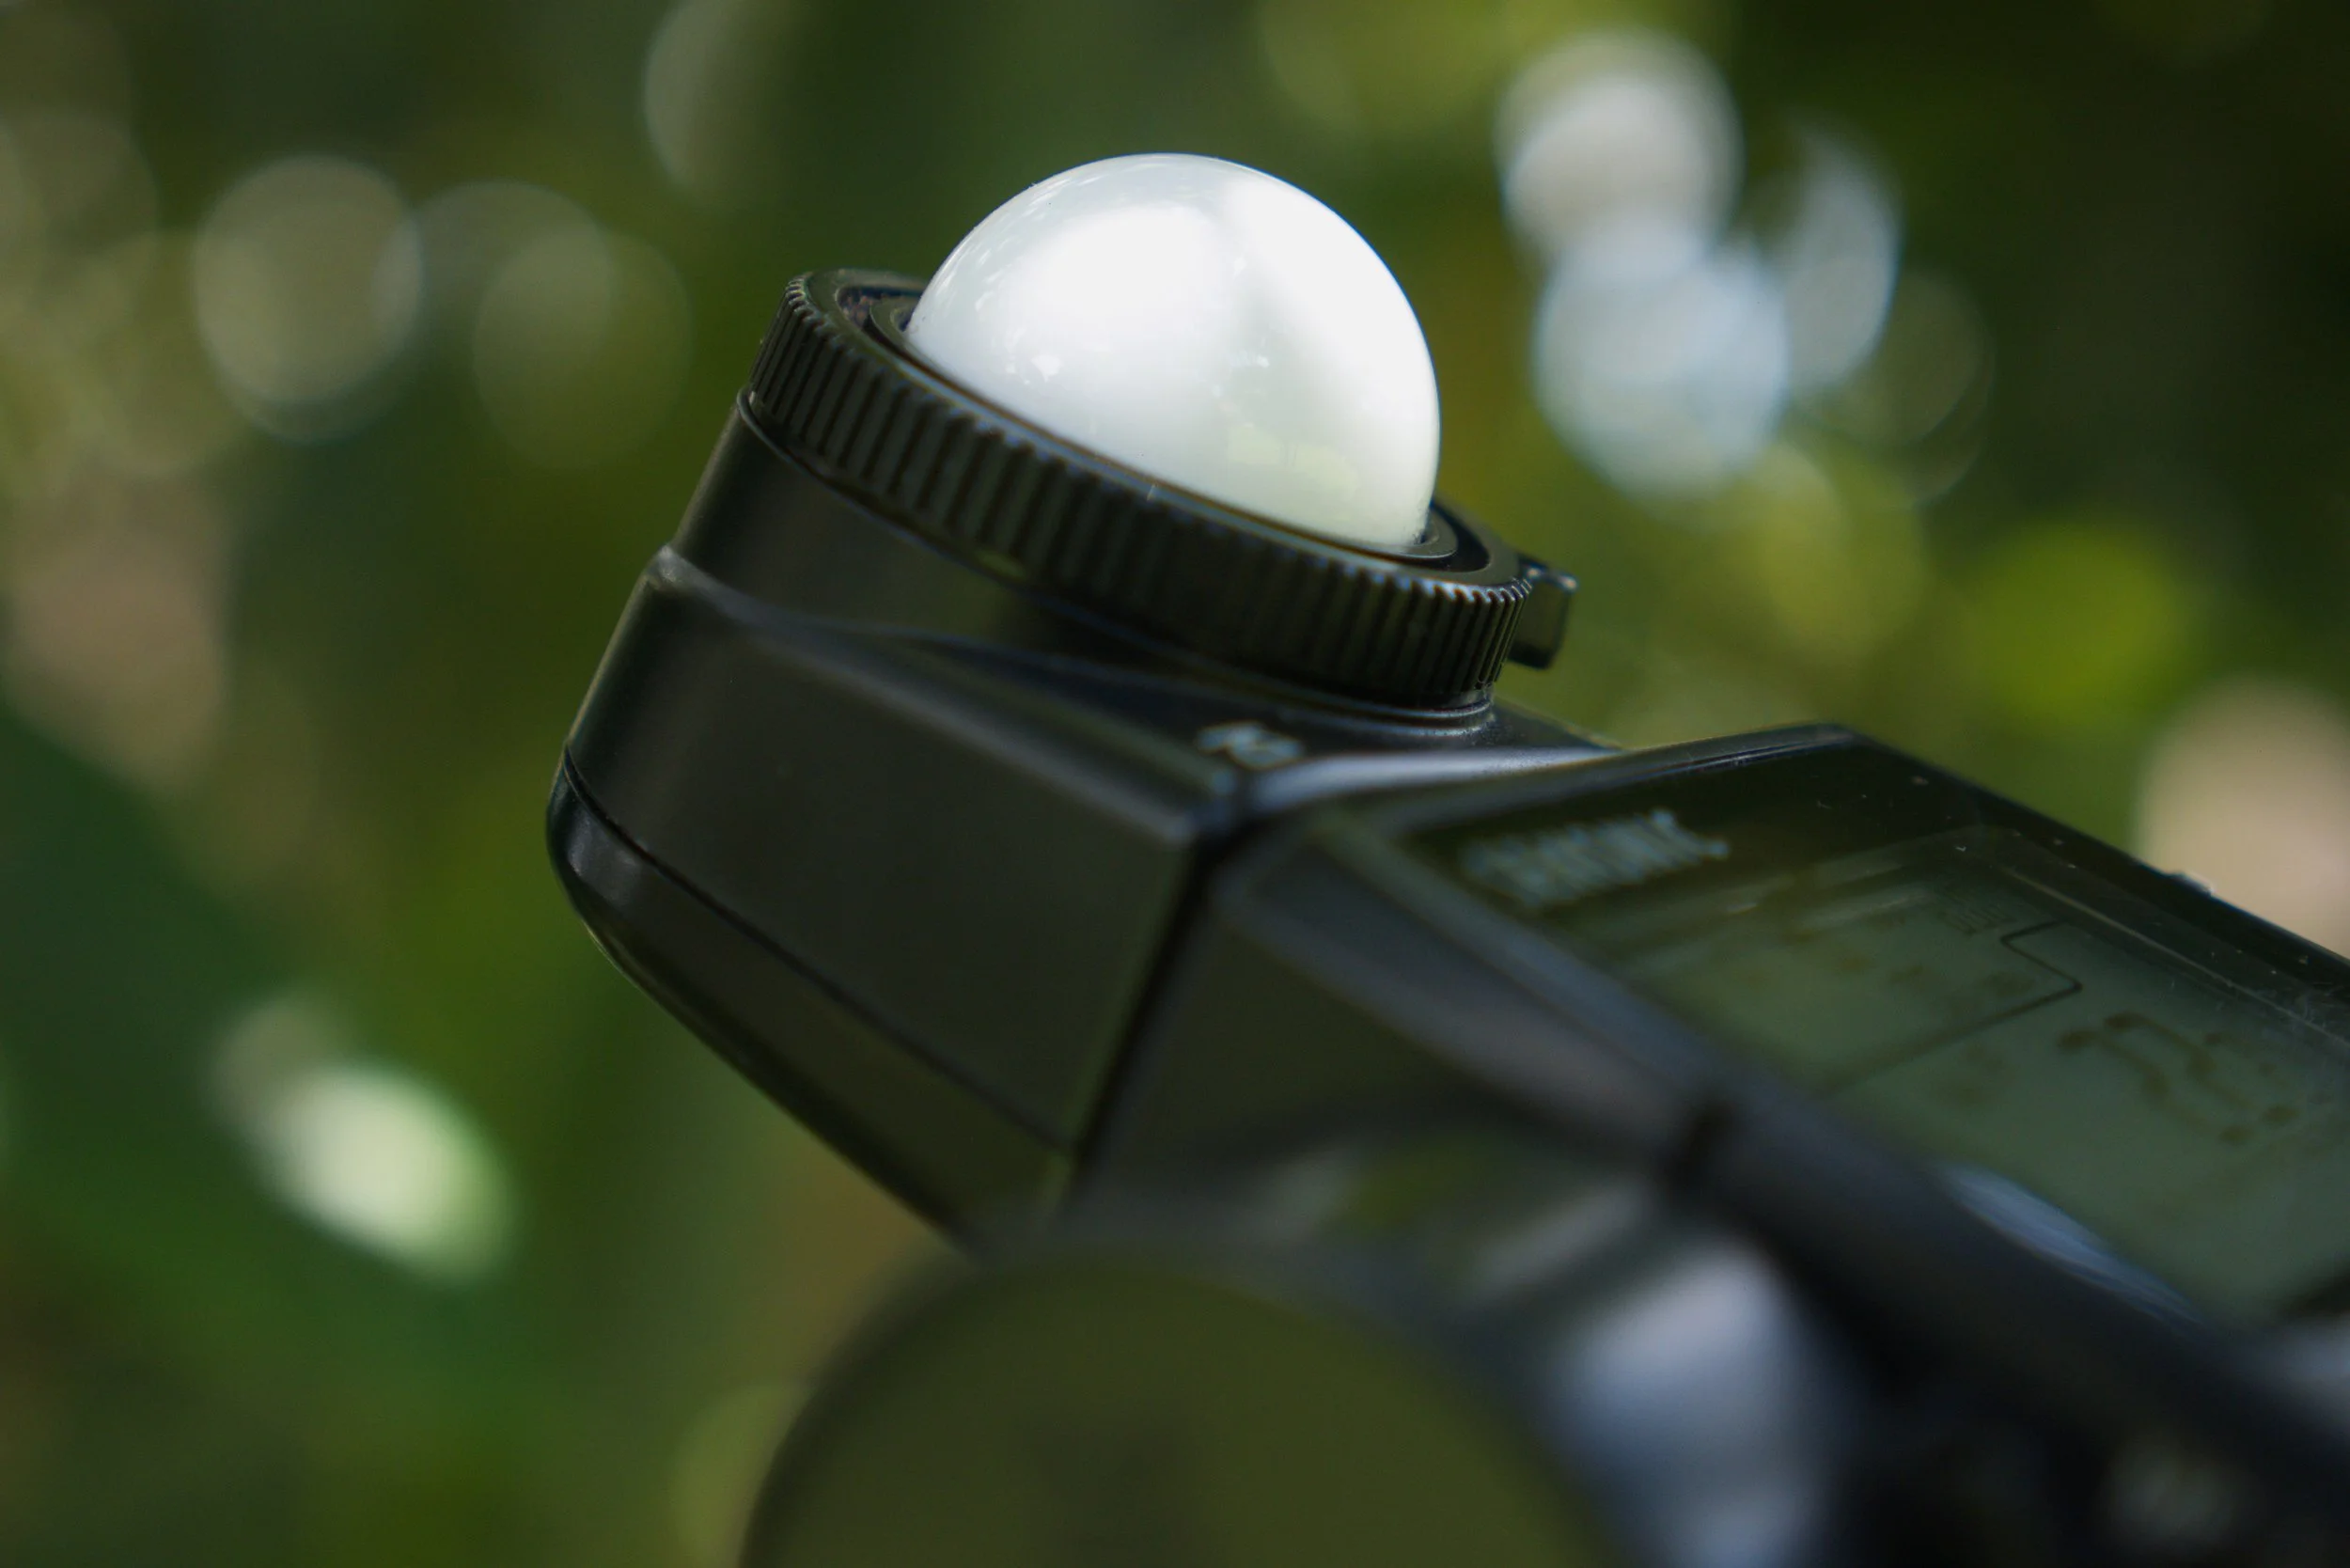
What is a Light Meter?
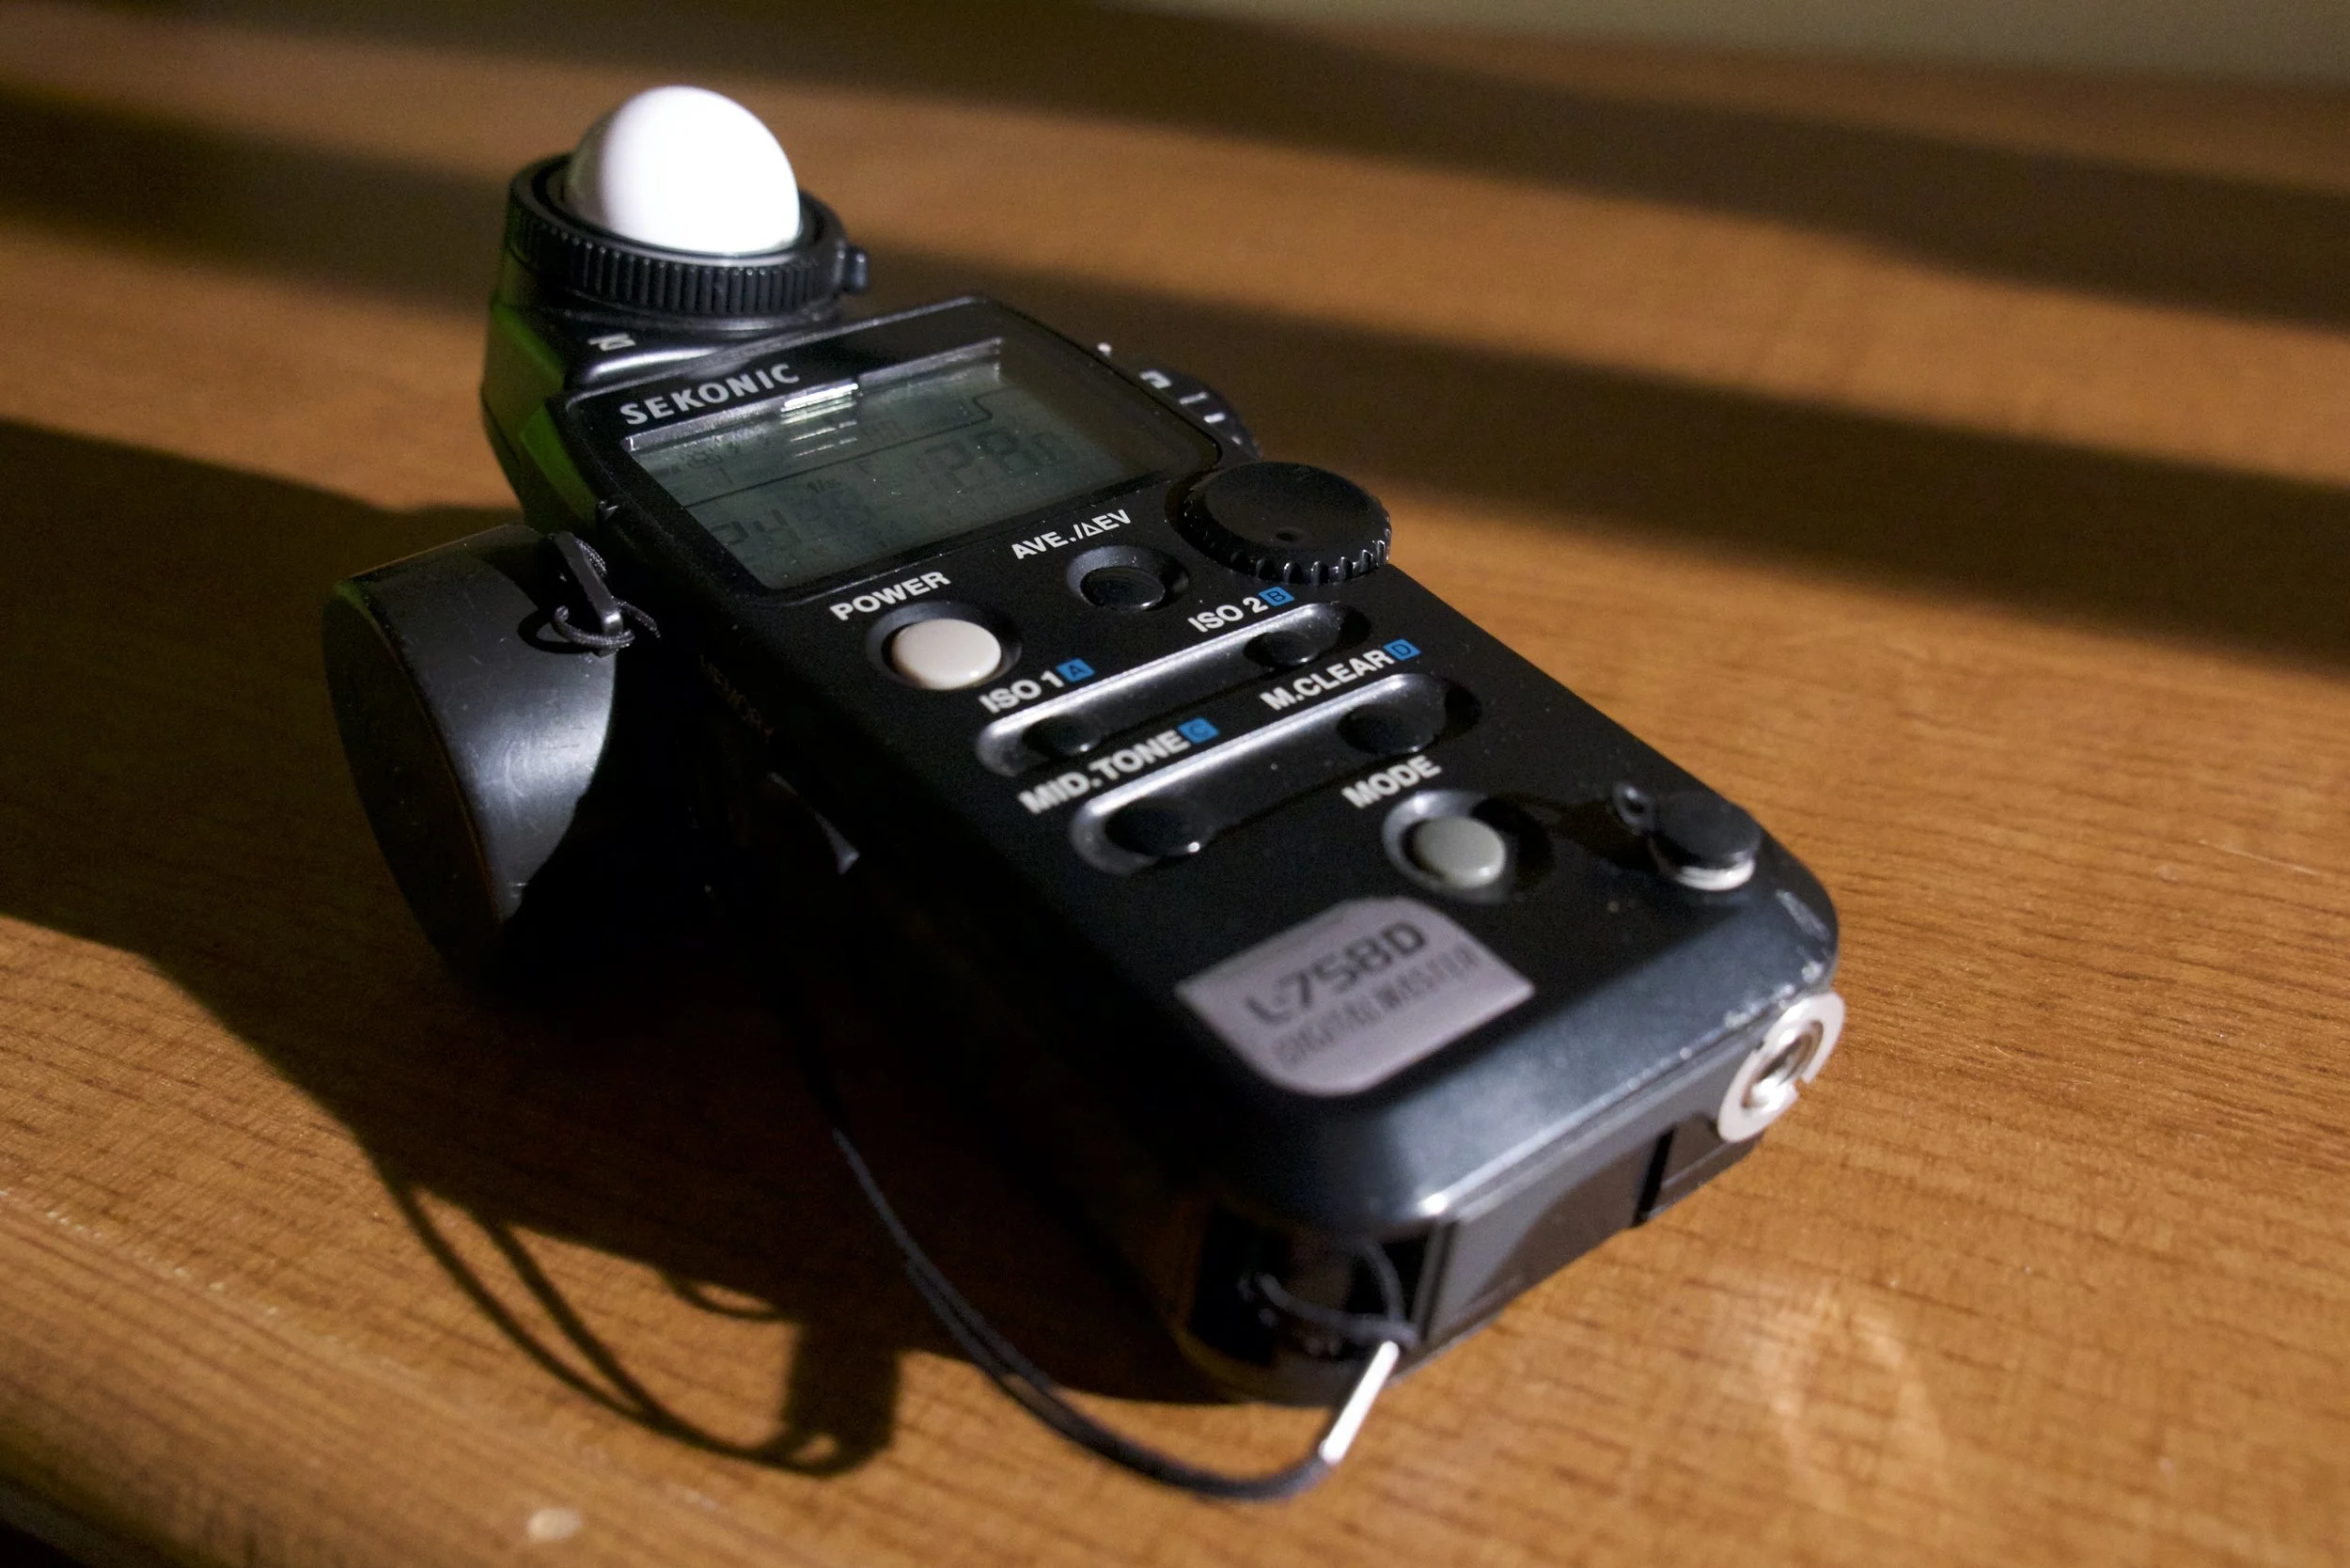
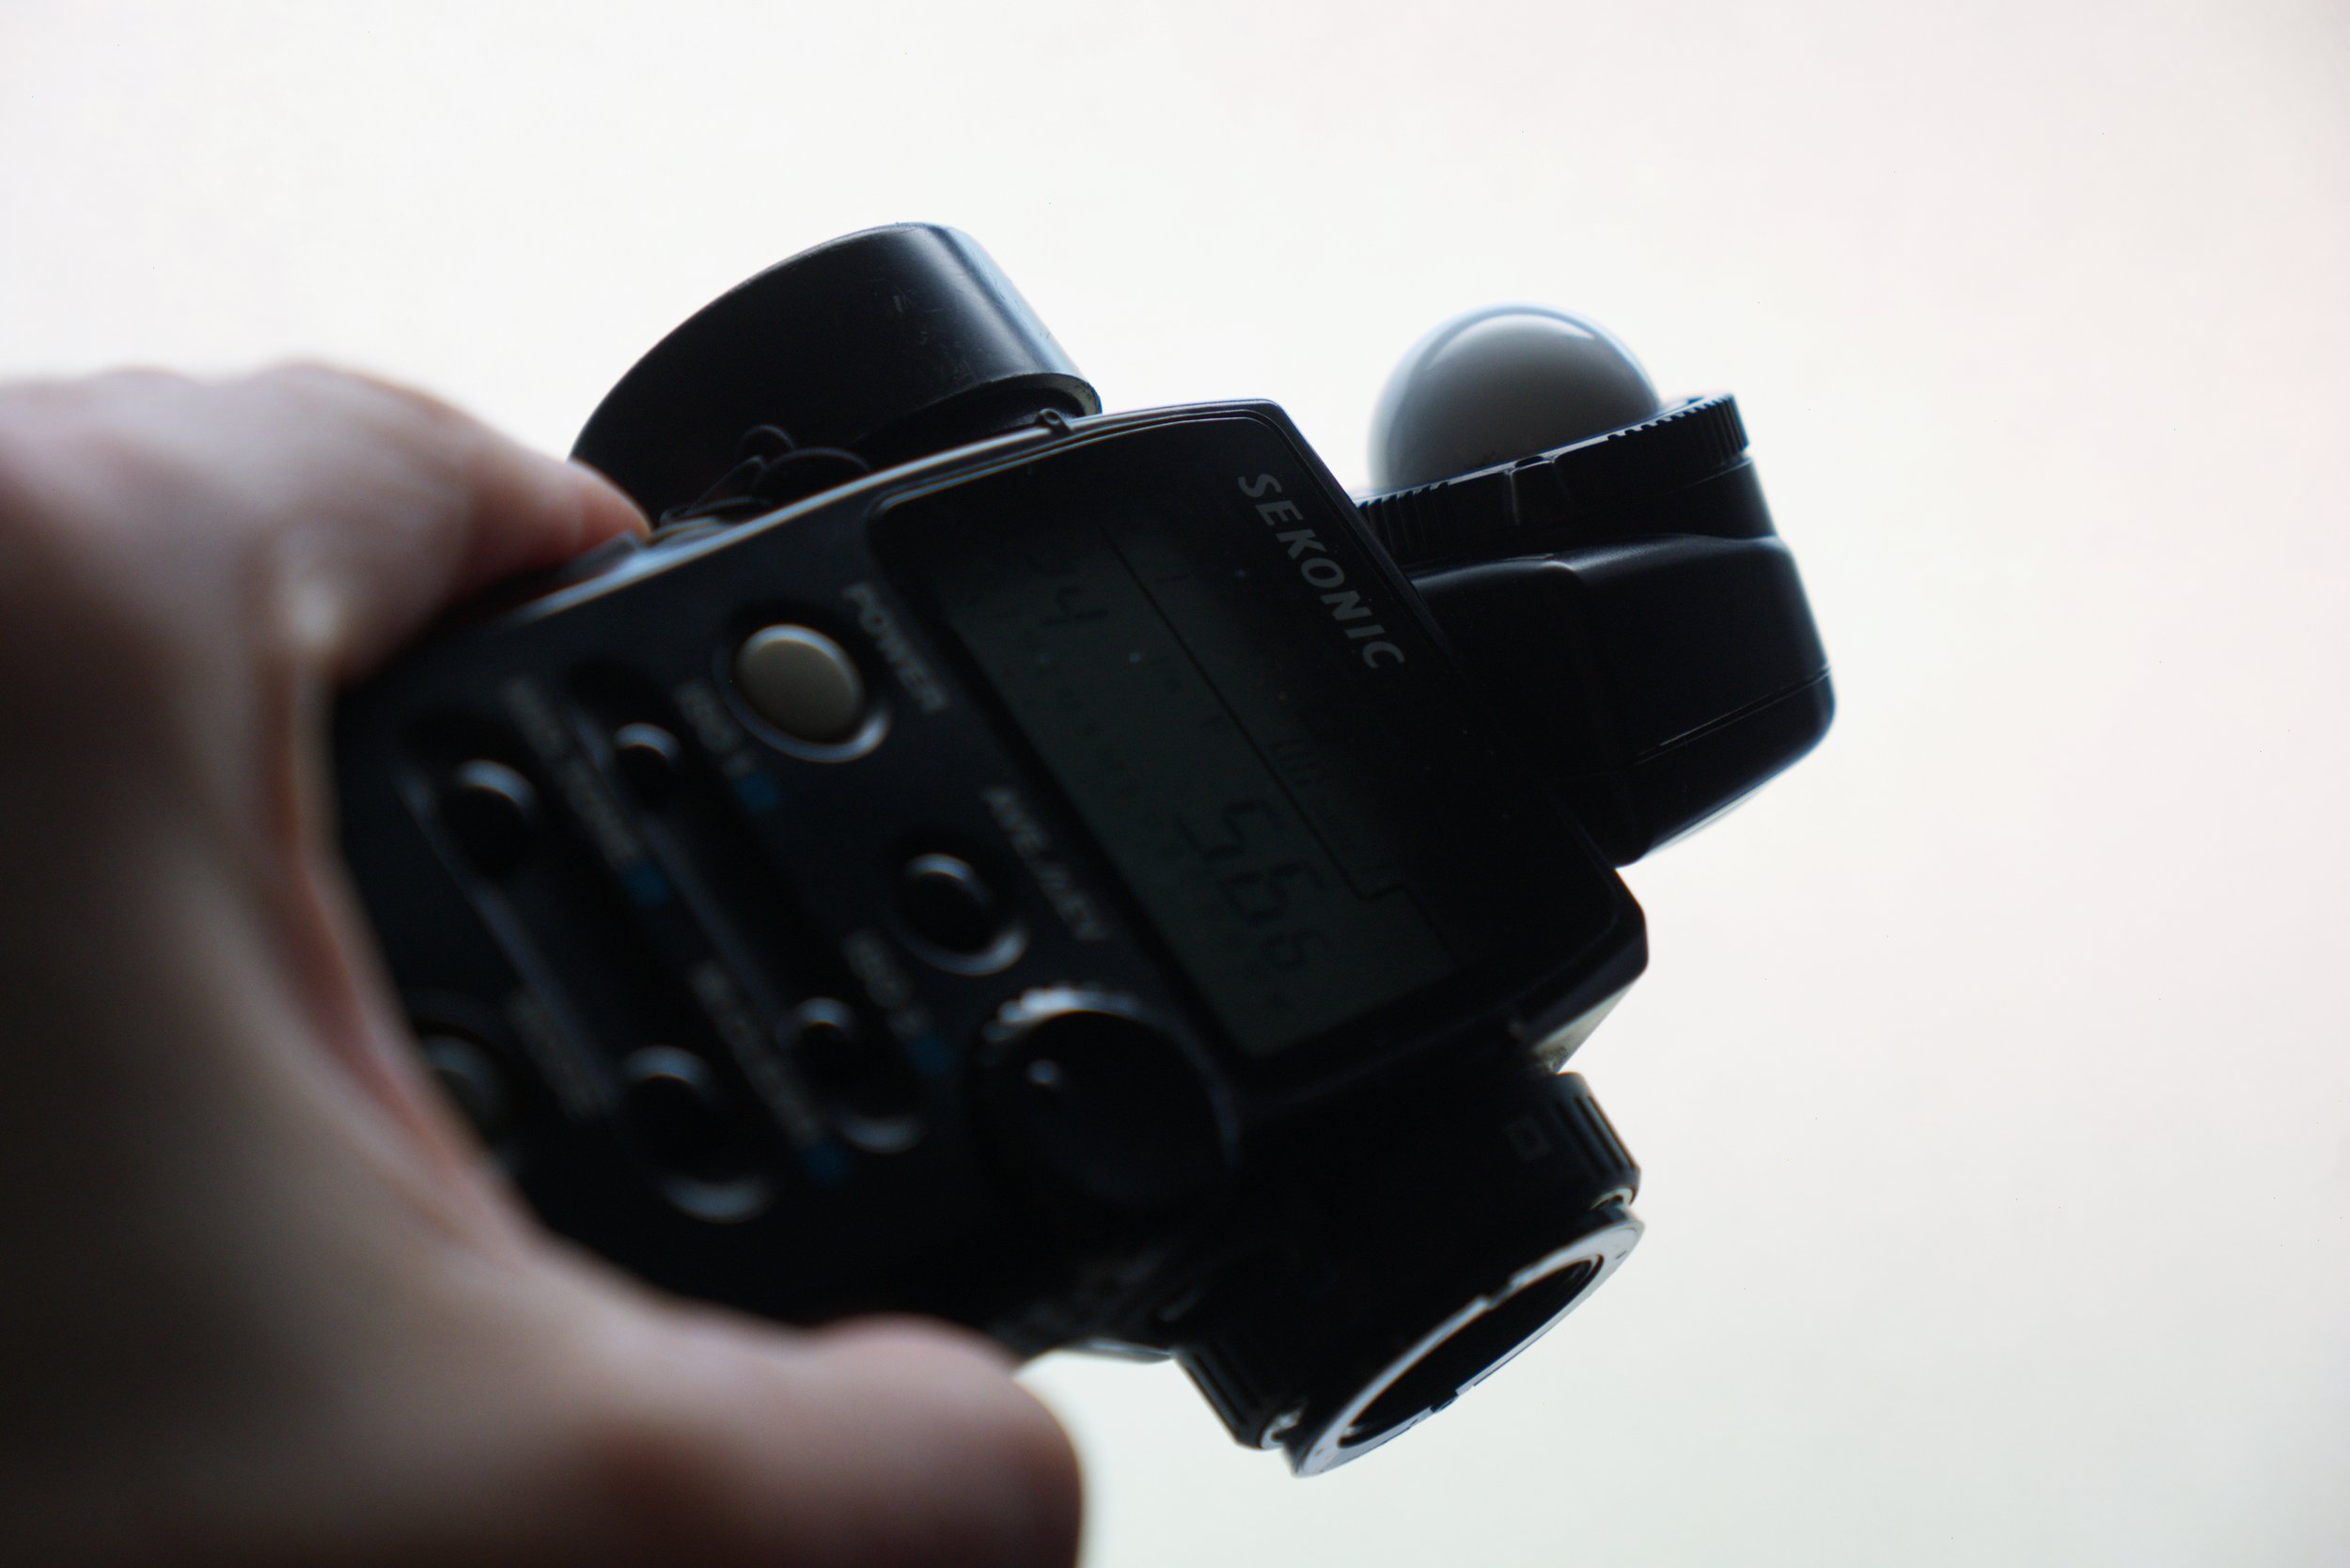
Light meters are a workman’s tool. If a cinematographer were to be compared to a homebuilder, the light meter would be the equivalent of a home-builder’s steel-tape measure. It’s a key instrument in the DP’s back pocket, and it’s crucial for measuring light.
In a world of rapidly evolving gizmos and gadgets, an honest and unbiased device that simplifies one’s on-set workflow is most certainly welcome.
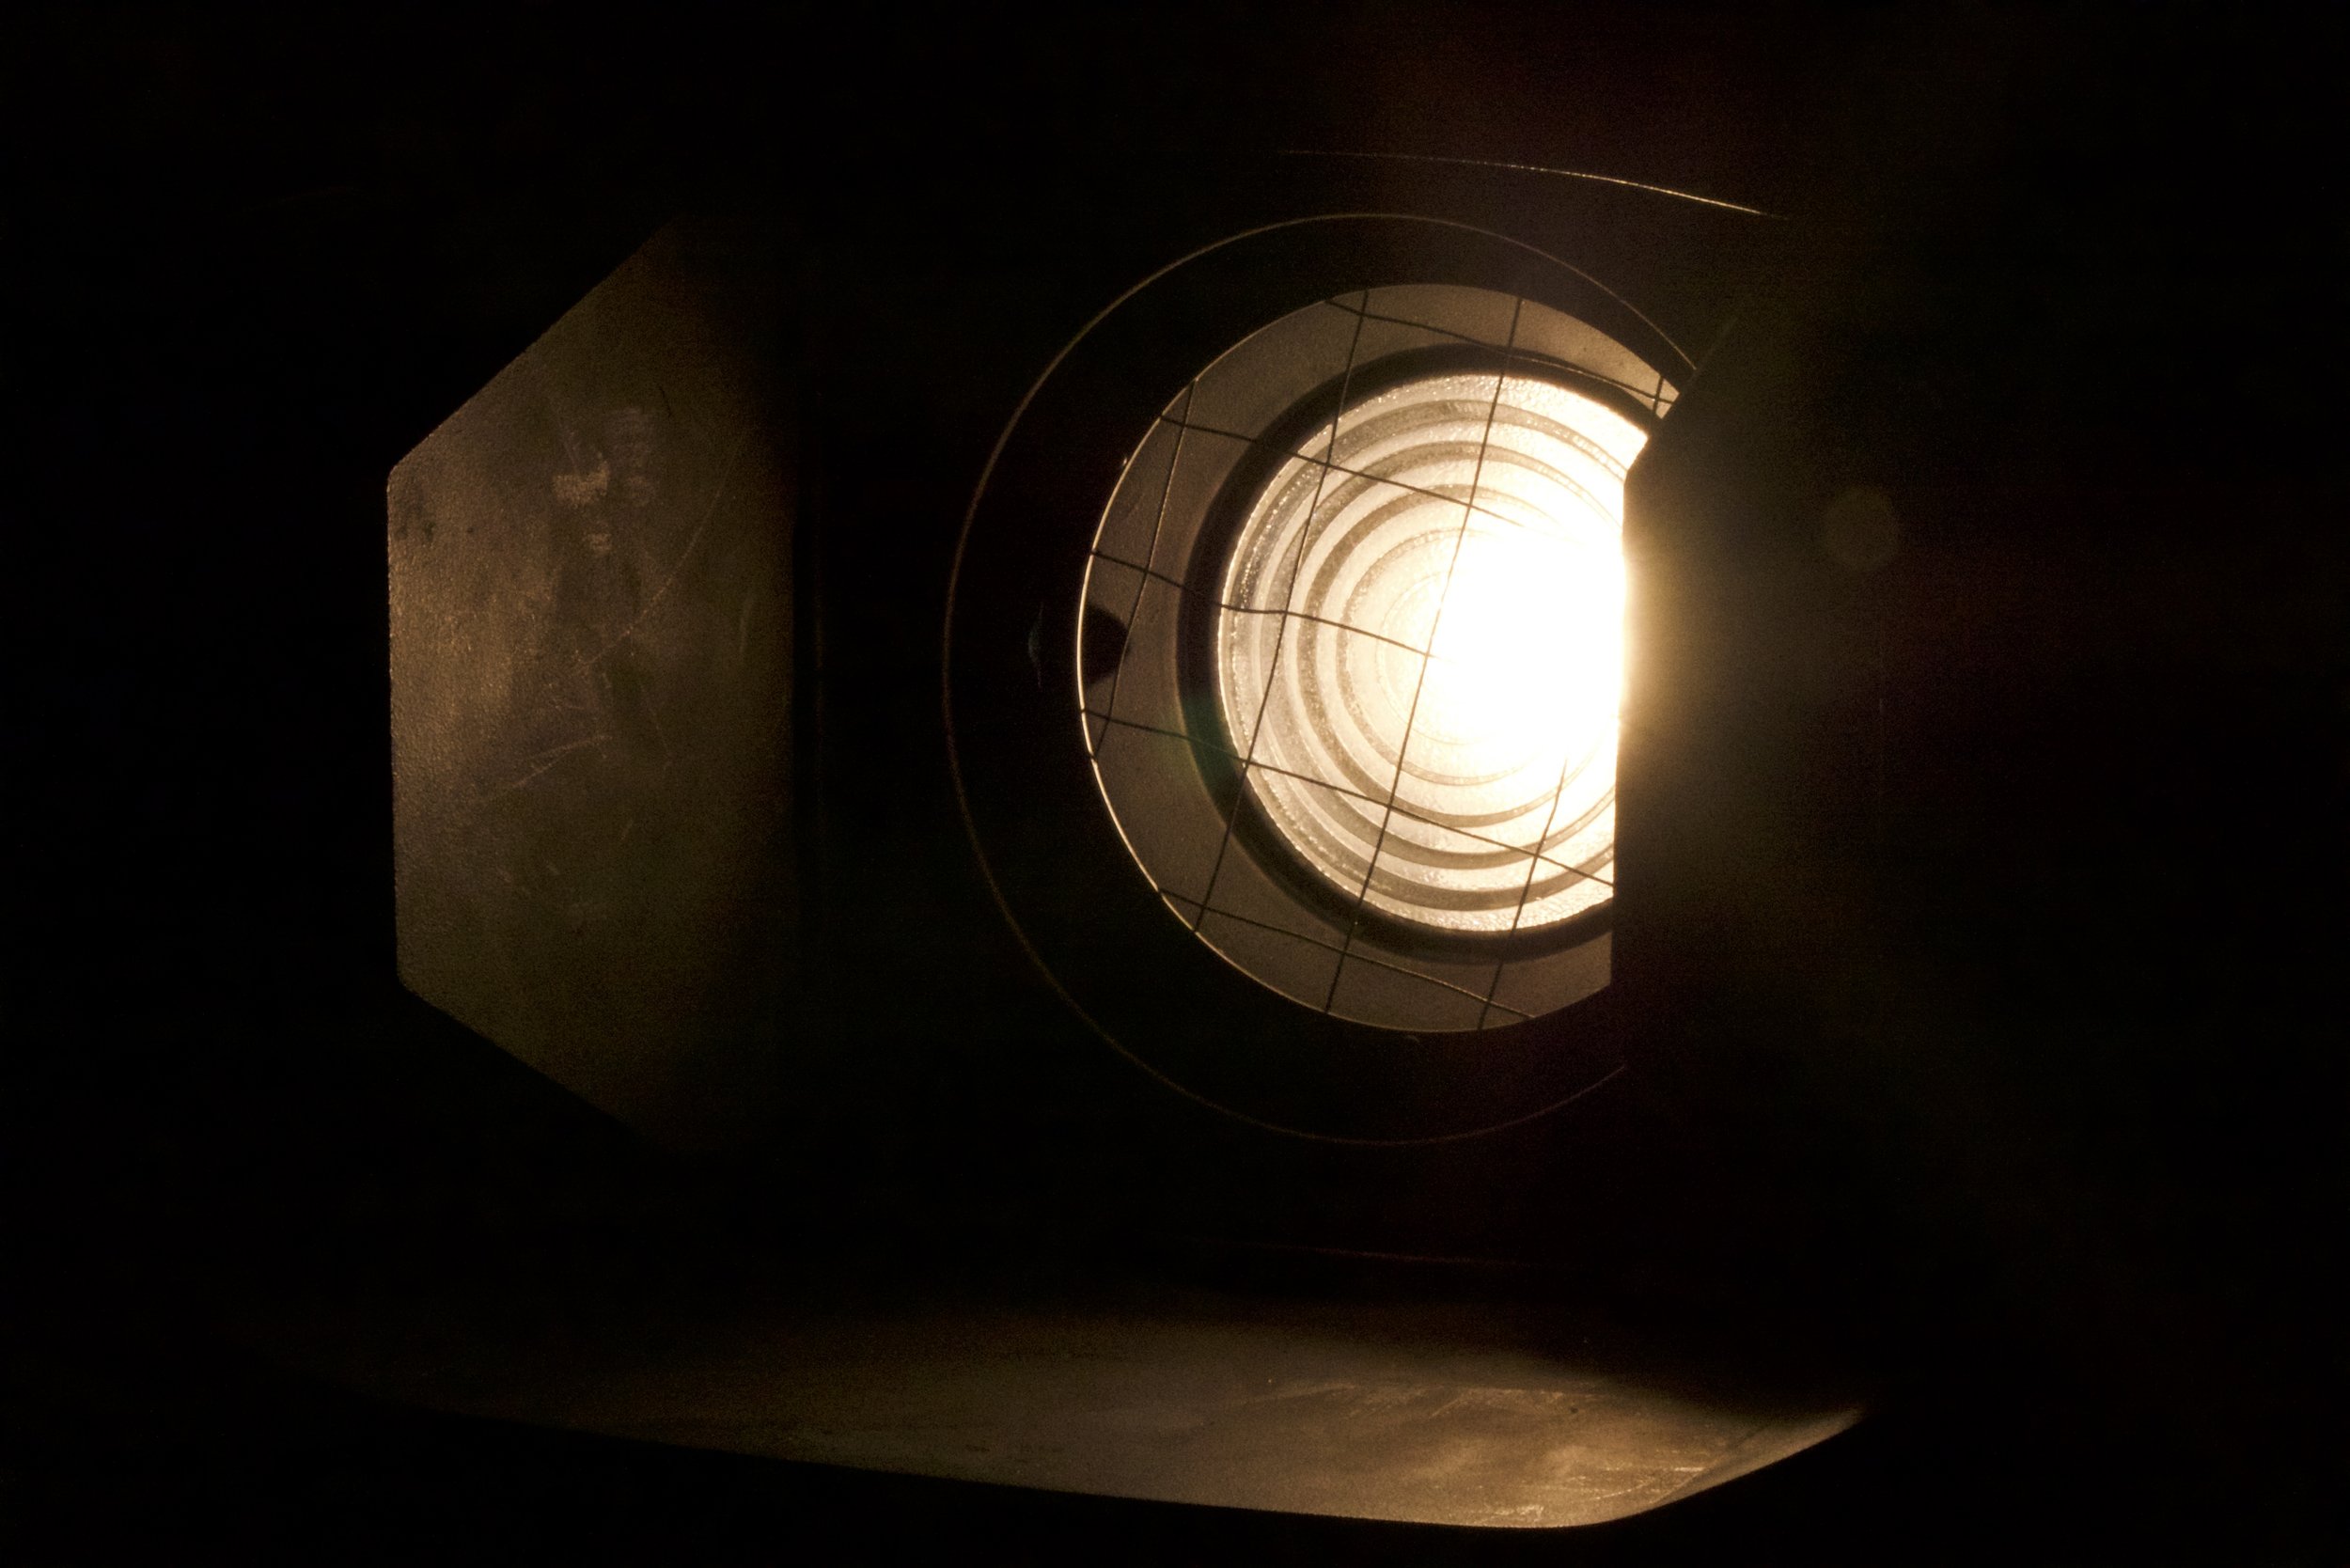
What is Lighting?
Lighting isn’t just electromagnetic radiation propelling through the air. It’s the very substance that each and every cinematographer relies on in order to realize his or her vision on the photographic canvas. It grabs the viewer’s attention and leads their eyes to what's most important, creating visual focus whilst setting the tone.
When implemented appropriately, lighting draws the audience into the scene and tells a story worth more than a thousand words.
What is Cinematography?
It All Begins Here

Cinematography is a vehicle through which one can tell an evolving story via successive imagery. The end goal of the Director of Photography is to produce a web of thematically interconnected images that visually capture the emotional heart of the script through lighting, movement and composition.
When this is achieved, the audience can feel a sense of comfort as they rest in the coherent and intentional message of the film.